Motion User Guide
- Welcome
- What’s new
-
- Intro to basic compositing
-
- Intro to transforming layers
-
- Intro to transforming layers in the canvas
- Transform layer properties in the canvas
- Transform tools
- Change layer position, scale, or rotation
- Move a layer’s anchor point
- Add a drop shadow to a layer
- Distort or shear a layer
- Crop a layer
- Modify shape or mask points
- Transform text glyphs and other object attributes
- Align layers in the canvas
- Transform layers in the HUD
- Transform 2D layers in 3D space
-
- Intro to behaviors
- Behaviors versus keyframes
-
- Intro to behavior types
-
- Intro to Parameter behaviors
- Audio behavior
- Average behavior
- Clamp behavior
- Custom behavior
- Add a Custom behavior
- Exponential behavior
- Link behavior
- Logarithmic behavior
- MIDI behavior
- Add a MIDI behavior
- Negate behavior
- Oscillate behavior
- Create a decaying oscillation
- Overshoot behavior
- Quantize behavior
- Ramp behavior
- Randomize behavior
- Rate behavior
- Reverse behavior
- Stop behavior
- Track behavior
- Wriggle behavior
-
- Intro to Simulation behaviors
- Align to Motion behavior
- Attracted To behavior
- Attractor behavior
- Drag behavior
- Drift Attracted To behavior
- Drift Attractor behavior
- Edge Collision behavior
- Gravity behavior
- Orbit Around behavior
- Random Motion behavior
- Repel behavior
- Repel From behavior
- Rotational Drag behavior
- Spring behavior
- Vortex behavior
- Wind behavior
- Additional behaviors
-
- Intro to shapes, masks, and paint strokes
- Edit fill, outline, and feathering
- Keyframe shape control points
- Convert between shapes and masks
- Using filters and masks with shapes
- Copy shape styles
- Save custom shapes and shape styles
-
- Intro to using generators
- Add a generator
-
- Intro to image generators
- Caustics generator
- Cellular generator
- Checkerboard generator
- Clouds generator
- Color Solid generator
- Concentric Polka Dots generator
- Concentric Shapes generator
- Gradient generator
- Grid generator
- Japanese Pattern generator
- Lens Flare generator
- Manga Lines generator
- Membrane generator
- Noise generator
- One Color Ray generator
- Op Art 1 generator
- Op Art 2 generator
- Op Art 3 generator
- Overlapping Circles generator
- Radial Bars generator
- Soft Gradient generator
- Spirals generator
- Spiral Drawing generator
- Use Spiral Drawing onscreen controls
- Star generator
- Stripes generator
- Sunburst generator
- Truchet Tiles generator
- Two Color Ray generator
- Save a custom generator
-
- Intro to filters
- Browse and preview filters
- Apply or remove filters
-
- Intro to filter types
-
- Intro to Color filters
- Brightness filter
- Channel Mixer filter
- Color Adjustments filter
- Color Balance filter
- Example: Color-balance two layers
- Color Curves filter
- Use the Color Curves filter
- Color Reduce filter
- Color Wheels filter
- Use the Color Wheels filter
- Colorize filter
- Contrast filter
- Custom LUT filter
- Use the Custom LUT filter
- Gamma filter
- Gradient Colorize filter
- HDR Tools filter
- Hue/Saturation filter
- Hue/Saturation Curves filter
- Use the Hue/Saturation Curves filter
- Levels filter
- Negative filter
- OpenEXR Tone Map filter
- Sepia filter
- Threshold filter
- Tint filter
-
- Intro to Distortion filters
- Black Hole filter
- Bulge filter
- Bump Map filter
- Disc Warp filter
- Droplet filter
- Earthquake filter
- Fisheye filter
- Flop filter
- Fun House filter
- Glass Block filter
- Glass Distortion
- Insect Eye filter
- Mirror filter
- Page Curl filter
- Poke filter
- Polar filter
- Refraction filter
- Ring Lens filter
- Ripple filter
- Scrape filter
- Sliced Scale filter
- Use the Sliced Scale filter
- Sphere filter
- Starburst filter
- Stripes filter
- Target filter
- Tiny Planet filter
- Twirl filter
- Underwater filter
- Wave filter
-
- Intro to Stylize filters
- Add Noise filter
- Bad Film filter
- Bad TV filter
- Circle Screen filter
- Circles filter
- Color Emboss filter
- Comic filter
- Crystallize filter
- Edges filter
- Extrude filter
- Fill filter
- Halftone filter
- Hatched Screen filter
- Highpass filter
- Indent filter
- Line Art filter
- Line Screen filter
- MinMax filter
- Noise Dissolve filter
- Pixellate filter
- Posterize filter
- Relief filter
- Slit Scan filter
- Slit Tunnel filter
- Texture Screen filter
- Vignette filter
- Wavy Screen filter
- About filters and color processing
- Publish filter controls to Final Cut Pro
- Using filters on alpha channels
- Filter performance
- Save custom filters
-
- Intro to 360-degree video
- 360-degree projects
- Create 360-degree projects
- Add 360-degree video to a project
- Create a tiny planet effect
- Reorient 360-degree media
- Creating 360-degree templates for Final Cut Pro
- 360-degree-aware filters and generators
- Export and share 360-degree projects
- Guidelines for better 360-degree projects
-
- Intro to settings and shortcuts
-
- Intro to Keyboard shortcuts
- Use function keys
- General keyboard shortcuts
- Audio list keyboard shortcuts
-
- Tools keyboard shortcuts
- Transform tool keyboard shortcuts
- Select/Transform tool keyboard shortcuts
- Crop tool keyboard shortcuts
- Edit Points tool keyboard shortcuts
- Edit shape tools keyboard shortcuts
- Pan and Zoom tools keyboard shortcuts
- Shape tools keyboard shortcuts
- Bezier tool keyboard shortcuts
- B-Spline tool keyboard shortcuts
- Paint Stroke tool keyboard shortcuts
- Text tool keyboard shortcuts
- Shape mask tools keyboard shortcuts
- Bezier Mask tool keyboard shortcuts
- B-Spline Mask tool keyboard shortcuts
- Magnetic Mask tool keyboard shortcuts
- Transport control keyboard shortcuts
- View option keyboard shortcuts
- HUD keyboard shortcuts
- Inspector keyboard shortcuts
- Keyframe Editor keyboard shortcuts
- Layers keyboard shortcuts
- Library keyboard shortcuts
- Media list keyboard shortcuts
- Timeline keyboard shortcuts
- Keyframing keyboard shortcuts
- Shape and Mask keyboard shortcuts
- 3D keyboard shortcuts
- Miscellaneous keyboard shortcuts
- Touch Bar shortcuts
- Move assets to another computer
- Work with GPUs
- Glossary
- Copyright and trademarks
Export from Motion using Compressor
The destinations available in Motion provide many options for exporting projects. If you need more options, you can create highly customized export settings using Compressor, the professional transcoding app designed to work directly with Motion. For example, you can use the Compressor frame resizing and retiming controls to make high-quality frame size and frame rate adjustments in your output files.
Important: To export using Compressor, update to the latest version of each app and make sure that the apps are compatible. Both apps must be either part of Apple Creator Studio or one-time purchases.
There are two ways you can use Motion and Compressor together:
Use the Compressor Presets destination in Motion to apply Compressor presets (either the Apple-supplied setting or custom presets you create). Exporting a project this way lets you render your project using Compressor presets without opening your project in Compressor. Each Compressor preset you select results in an additional version of your project being rendered. After you choose settings and click Save, your project is rendered in the background.
You can send your project to Compressor using the File > Send to Compressor command, to take advantage of the options available in Compressor to customize your output.
Share using the Compressor Presets destination
Using this method, you add destinations in the Share menu that are based on Compressor presets.
In Motion, create a new destination using the Compressor Presets destination.
Do one of the following:
Choose File > Share, then choose the destination you created in step 1 from the submenu.
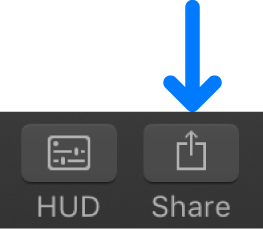
On the right side of the toolbar, click Share, then choose the destination you created in step 1.

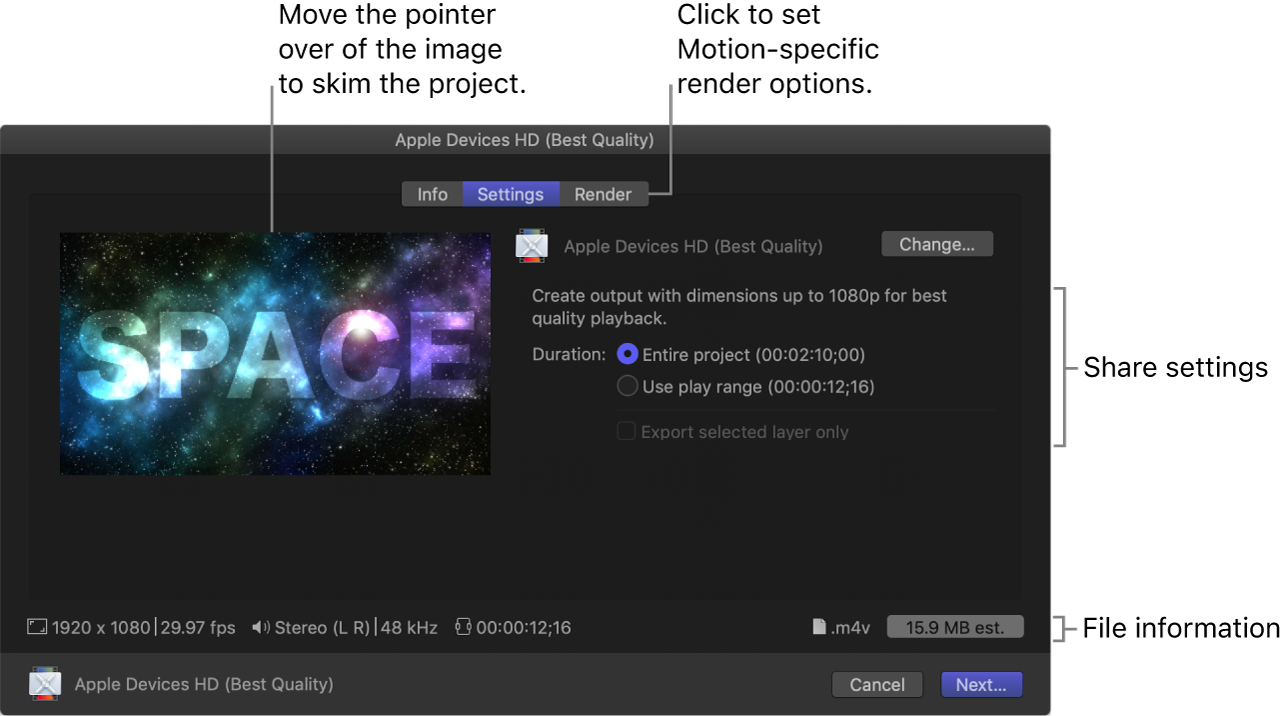
In the Info pane of the share window that appears, view or modify project attributes, such as the title and description.
In the Settings pane of the share window, choose your preferred export settings:

Change: Click to select a different Compressor preset.
Duration: Select whether to export the entire project or a portion of the project (play range).
Export selected layer only: Select to export a single layer selected in the project. If no layer is selected, or if an object that does not render is selected (such as a rig, a light, or a camera), this option is dimmed.
To specify additional Motion-specific options, click Render.
See Render settings.
Click Next.
Enter a file name, choose a save location for the output files, then click Save.
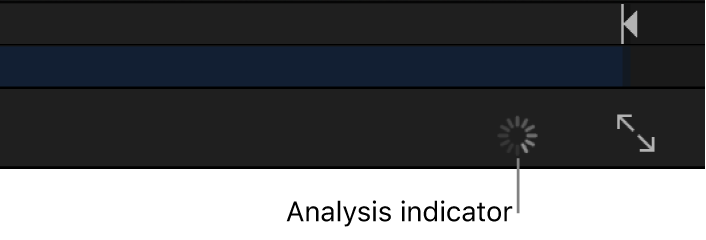
Your project begins rendering, as shown by an analysis indicator on the right side of the canvas toolbar.

Send a project to Compressor
In Motion, choose File > Send to Compressor.
Note: The Send to Compressor command is dimmed if Compressor is not installed on the same computer as Motion.
Compressor opens, adding the project to the batch area.
In Compressor, click Add, select one or more output settings, then click OK.
Click Start Batch.
See the Compressor User Guide.
Tip: To add a Motion project to Compressor from the macOS Finder, drag a Motion project file into the Compressor batch area (or onto the Compressor app icon).
Send a project with Automatic color processing to Compressor
When you send an Automatic project to Compressor, automatic color processing is retained for certain settings. You can choose a different color space in the Compressor Video Properties pane.
In Motion, choose File > Send to Compressor.
In Compressor, click Add in the batch area, select one or more output presets that support automatic color processing (such as Uncompressed 8-bit or 10-bit 422, OpenEXR Image Sequence, or an Apple ProRes option), then click OK.
In Video Properties (in the Video inspector), the “Color space” pop-up menu is set to Automatic.
Optional: To change a preset’s color space, select the preset in the batch area, then click the “Color space” pop-up menu and choose an option (such as Rec. 709 or Rec. 2020 HLG).
Note: Choosing a color space other than Automatic may result in output that appears different than in Motion. You can preview what your transcoded project will look like in Compressor’s preview area. See Preview jobs in the Compressor User Guide.
Click Start Batch.
See Change video color space in the Compressor User Guide.
Download this guide: PDF