
Use diagnostics to research device issues
You can use sysdiagnose to research general iOS and iPadOS issues before you troubleshoot or report them to your IT department or AppleCare. Sysdiagnose extracts information from iPhone and iPad and captures it in a log file. Your IT team or AppleCare can then read the file to understand software or network issues. You can use sysdiagnose log files to troubleshoot issues when you don’t have access to the iPhone or iPad device.
Set up and run sysdiagnose
Press and hold both volume buttons and the side or top button on iPhone or iPad for 1 to 1.5 seconds to start sysdiagnose.
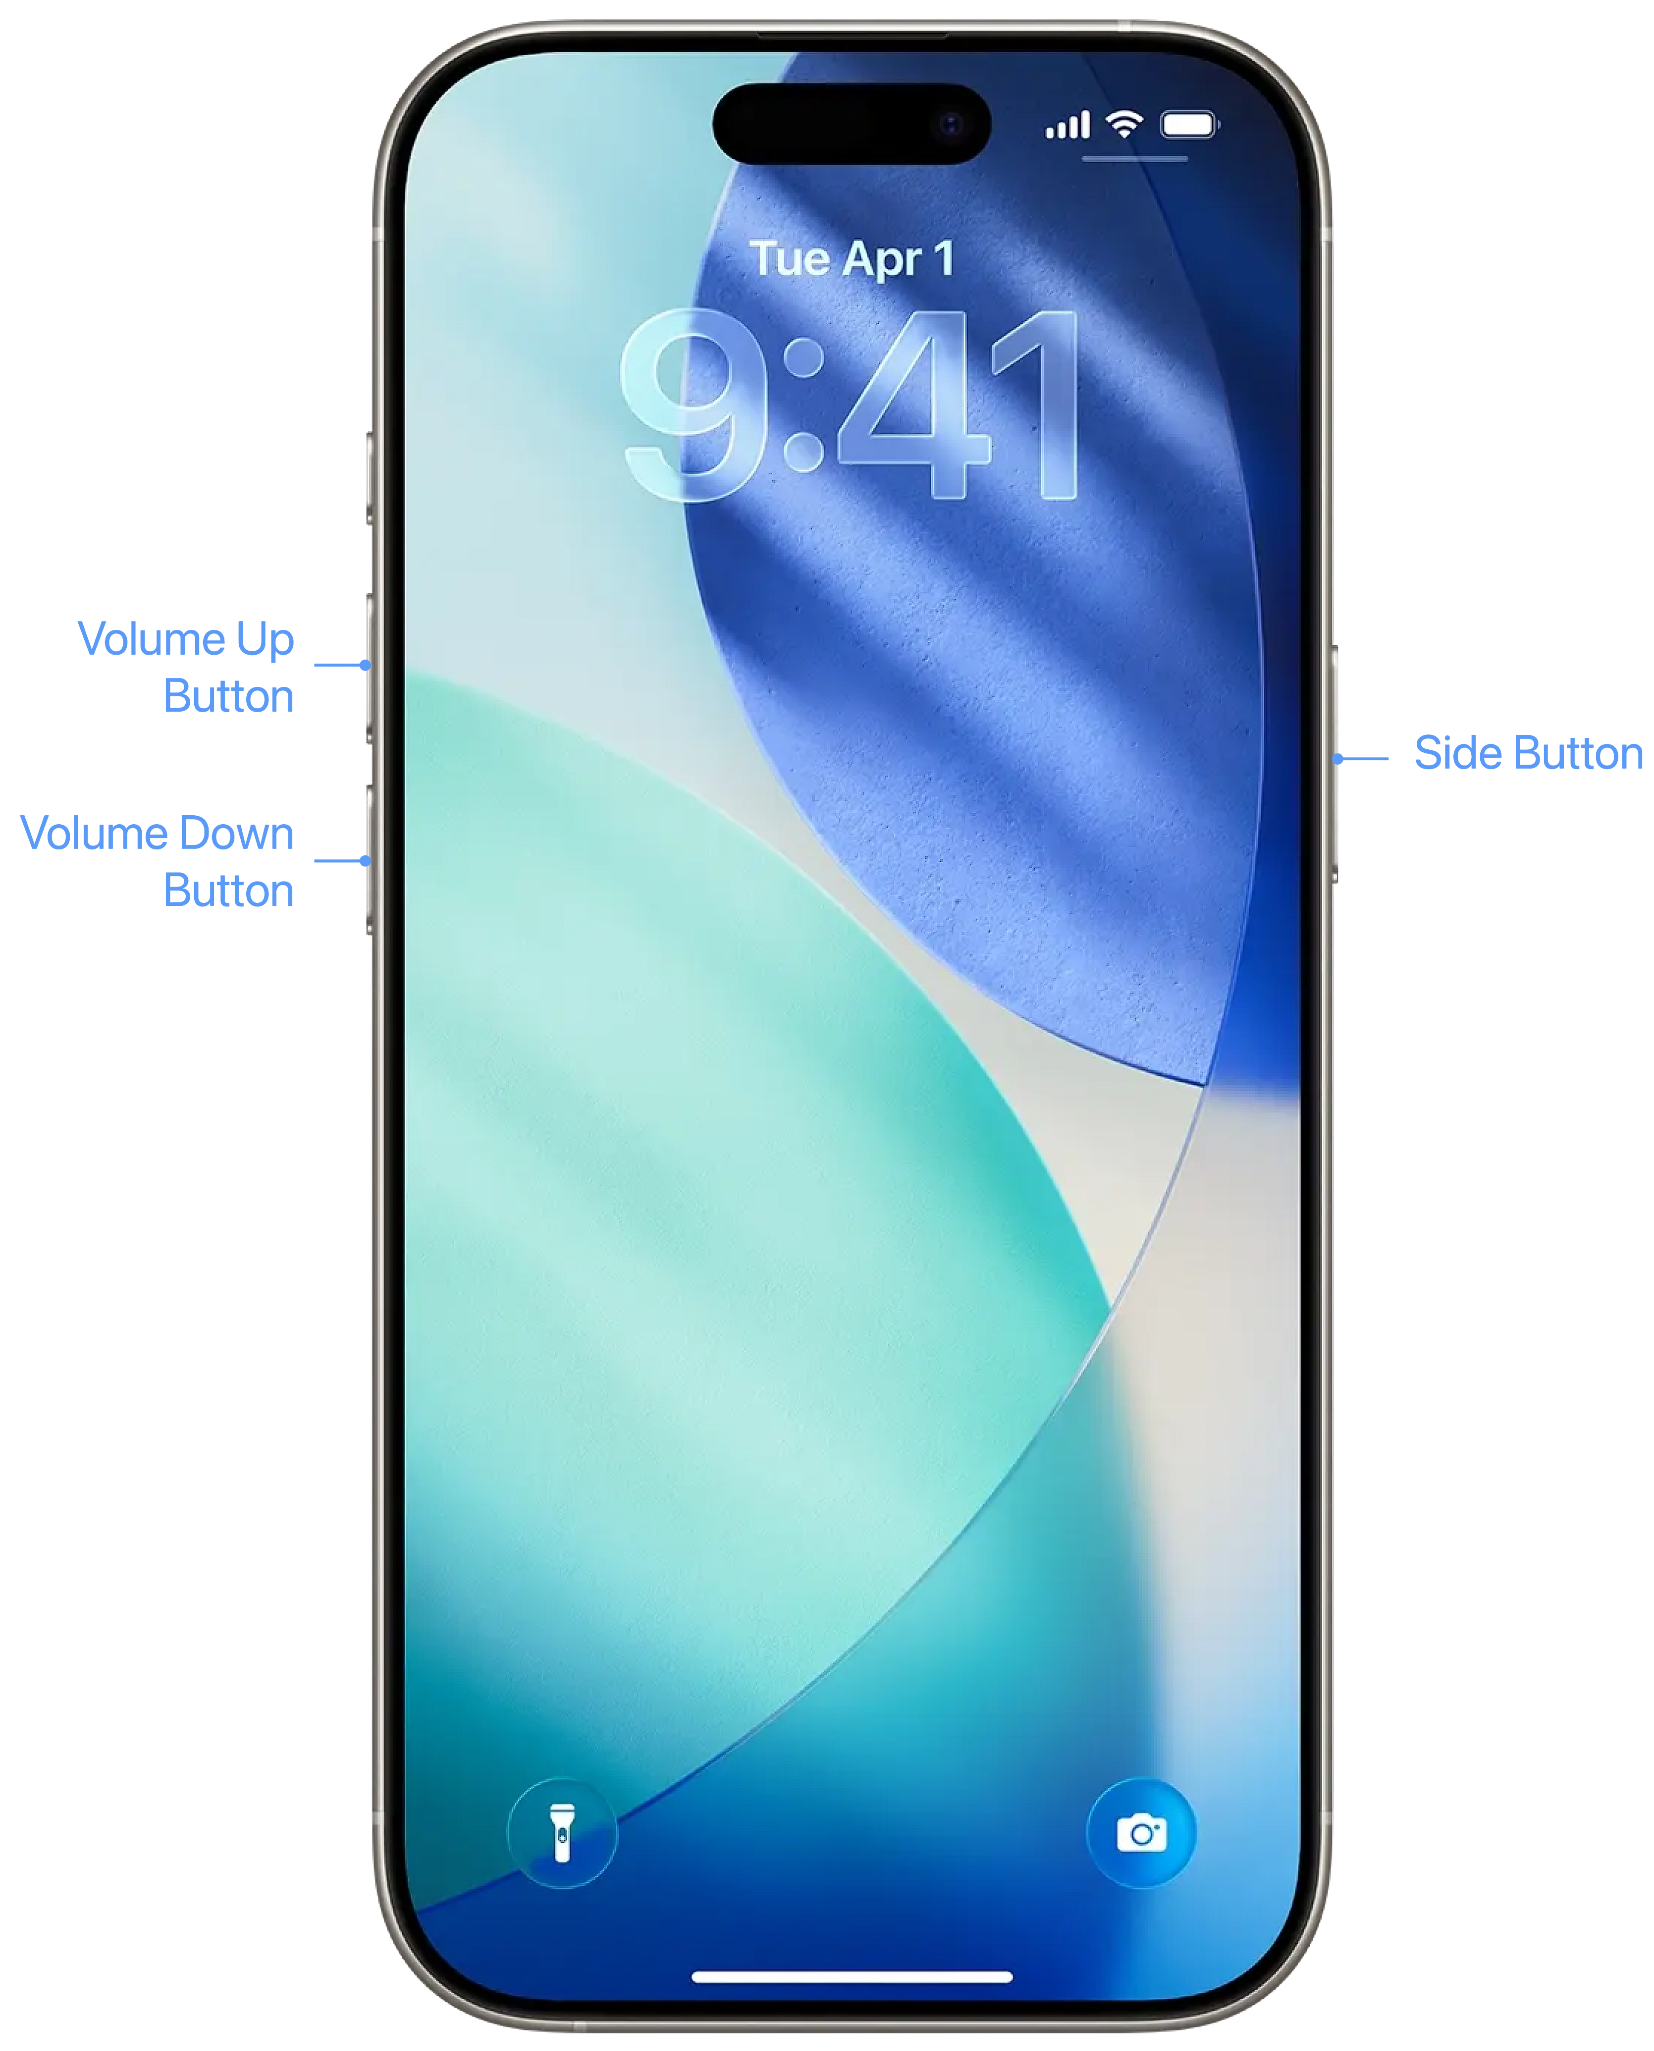
When you release the buttons, sysdiagnose starts. You’ll feel a short vibration when sysdiagnose starts. A message that says “Diagnostics are in flight, Perform the following” may appear with Send Feedback and Ignore options.
Important: Before running sysdiagnose, try to repeat the issue on the device, then run sysdiagnose. Even if the issue doesn’t consistently occur, document the date and time that the sysdiagnose was started, and use this information to find your sysdiagnose log file.
Set up and run sysdiagnose using AssistiveTouch
Alternatively, if any buttons on iPhone or iPad aren’t functioning, you can use AssistiveTouch in the Accessibility settings to run sysdiagnose.
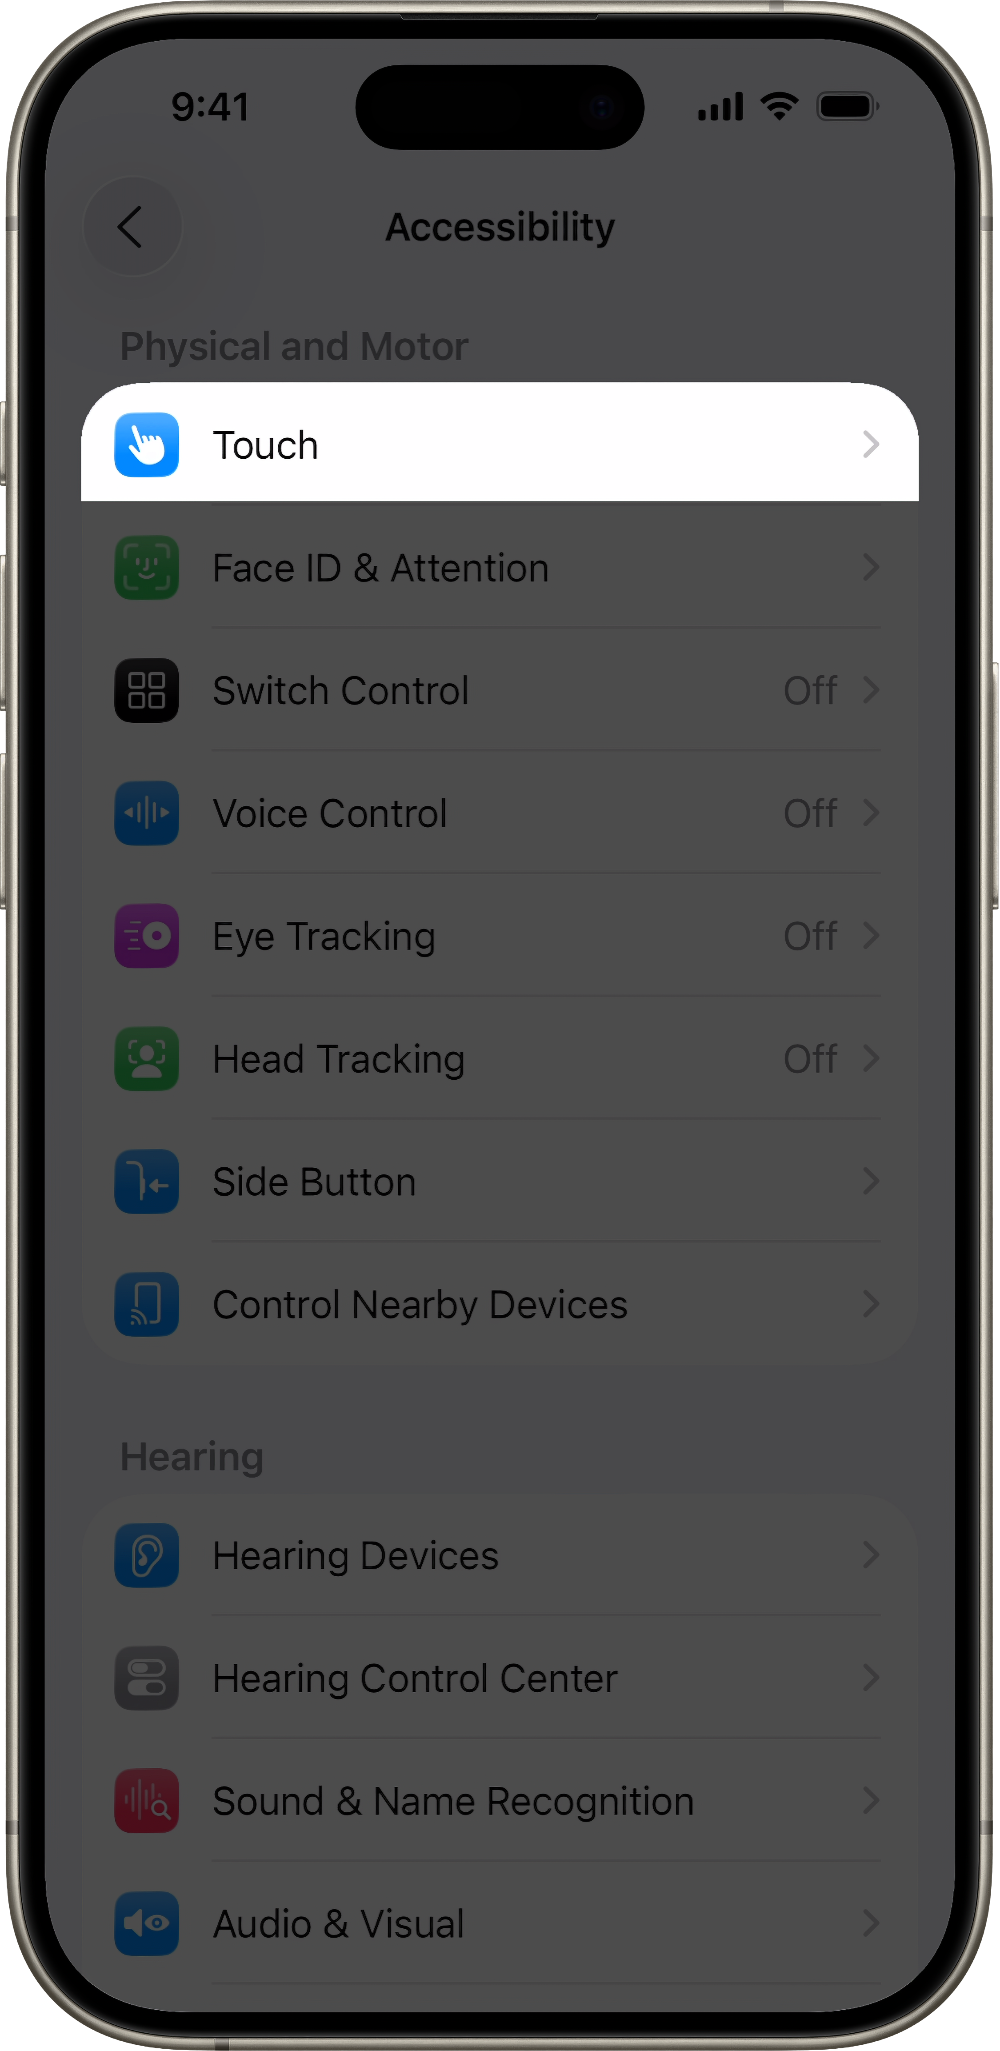
In Settings, tap Accessibility > Touch.
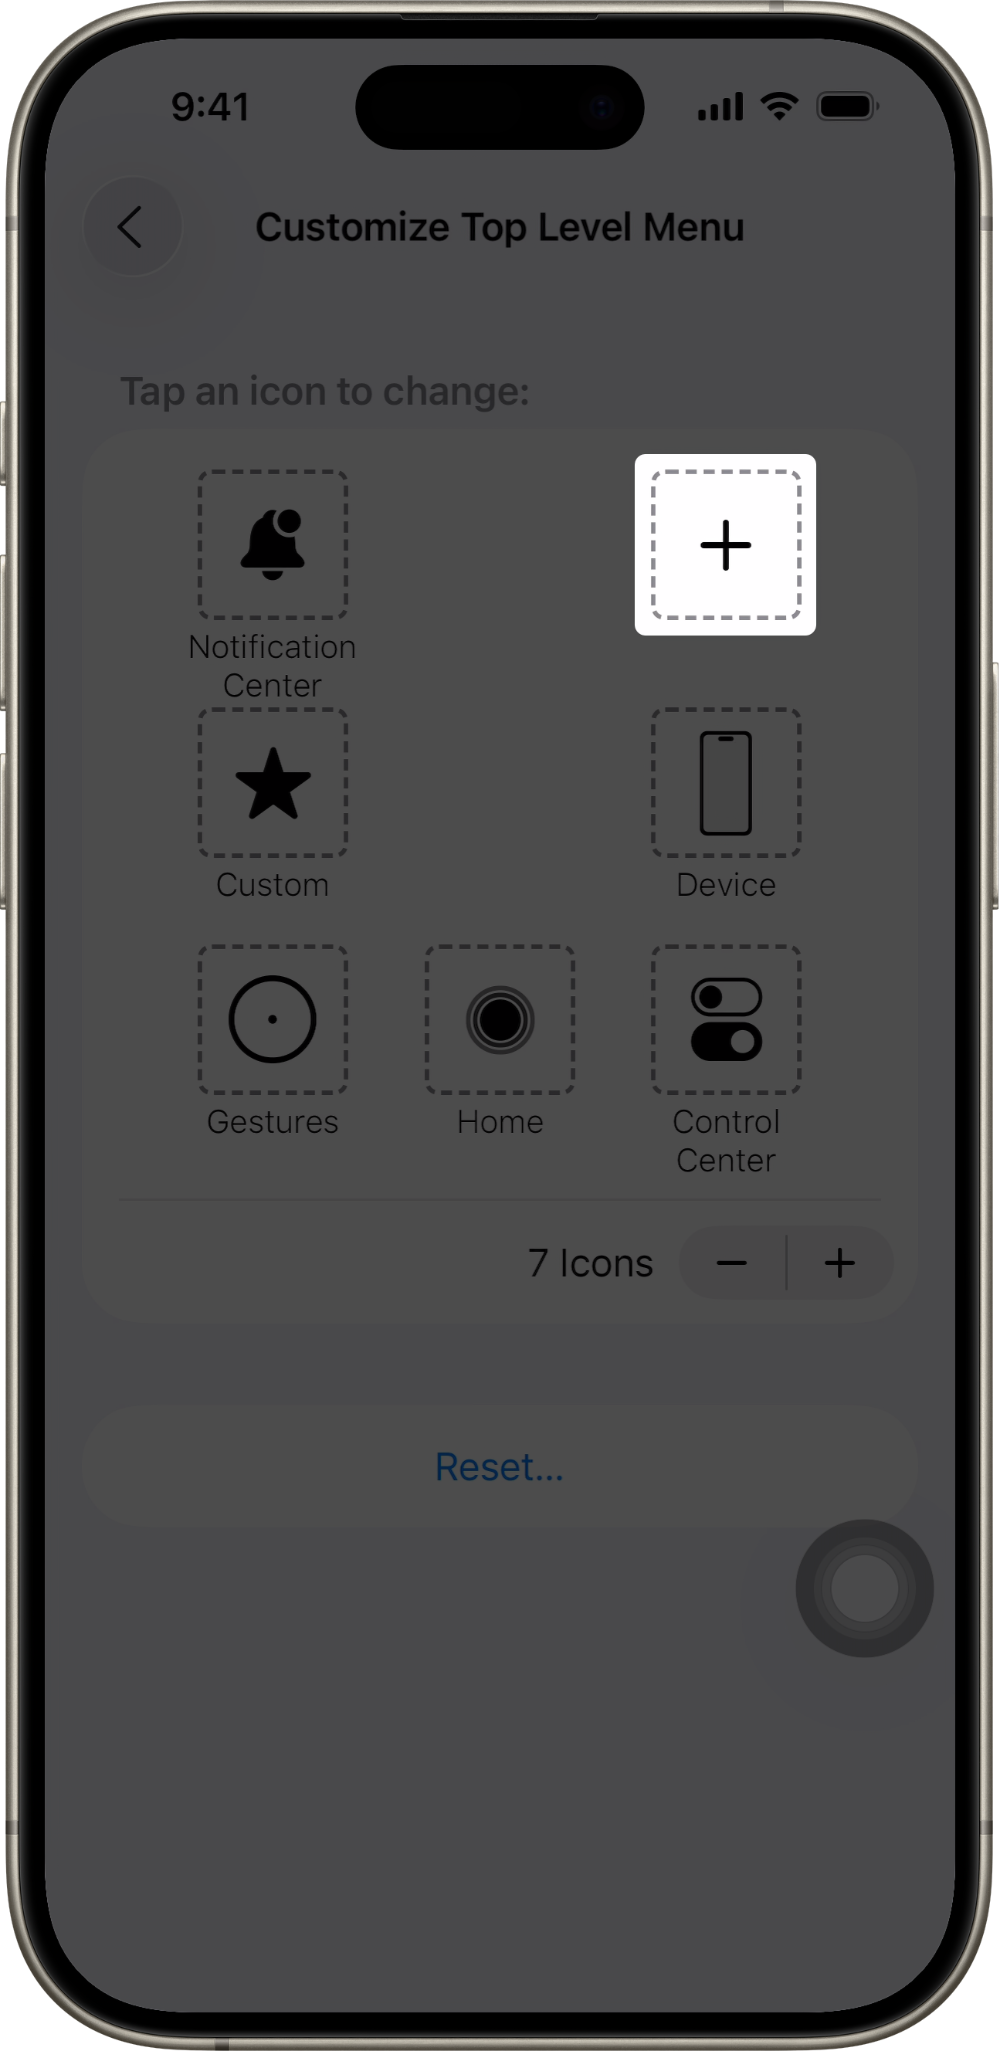
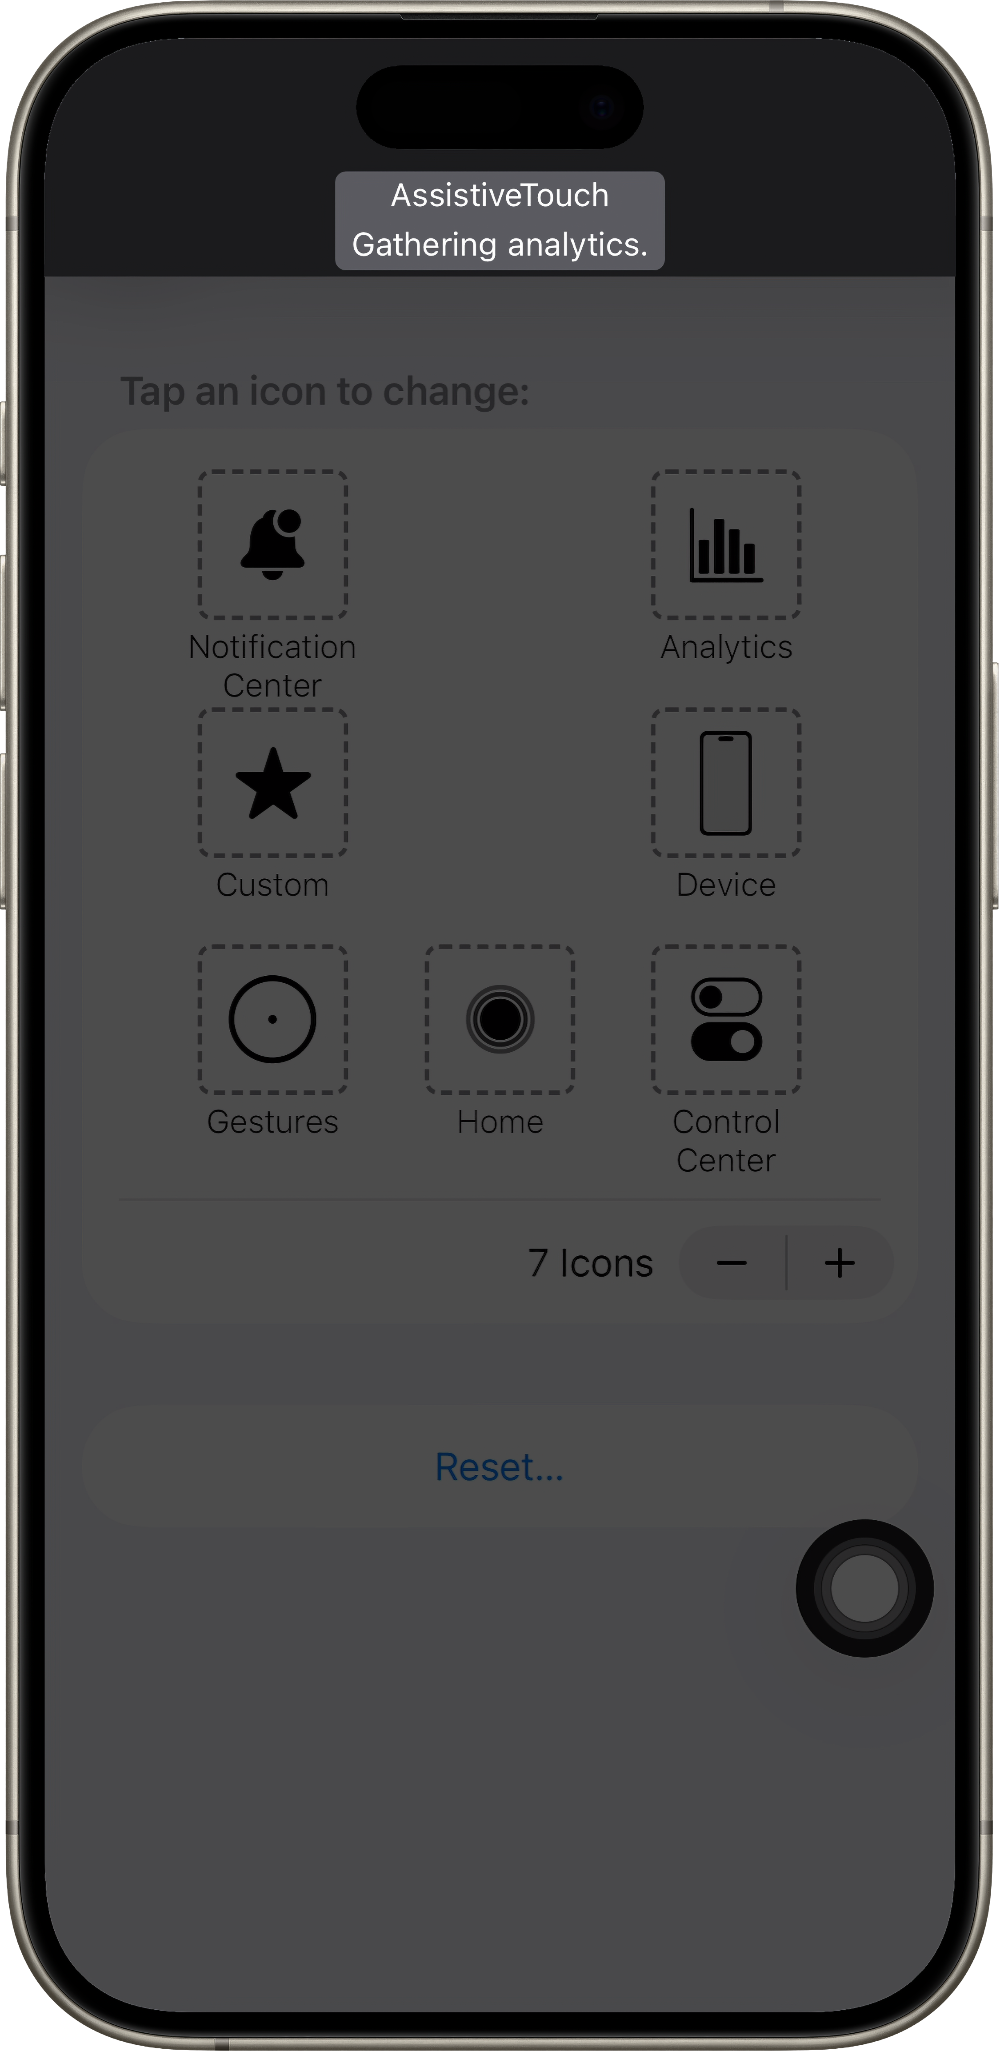
Tap to turn on AssistiveTouch, then tap Customize Top Level Menu.
On the Customize Top Level Menu screen, tap the + button to add a new function.

Tap the + icon in the function placeholder to add a new function.
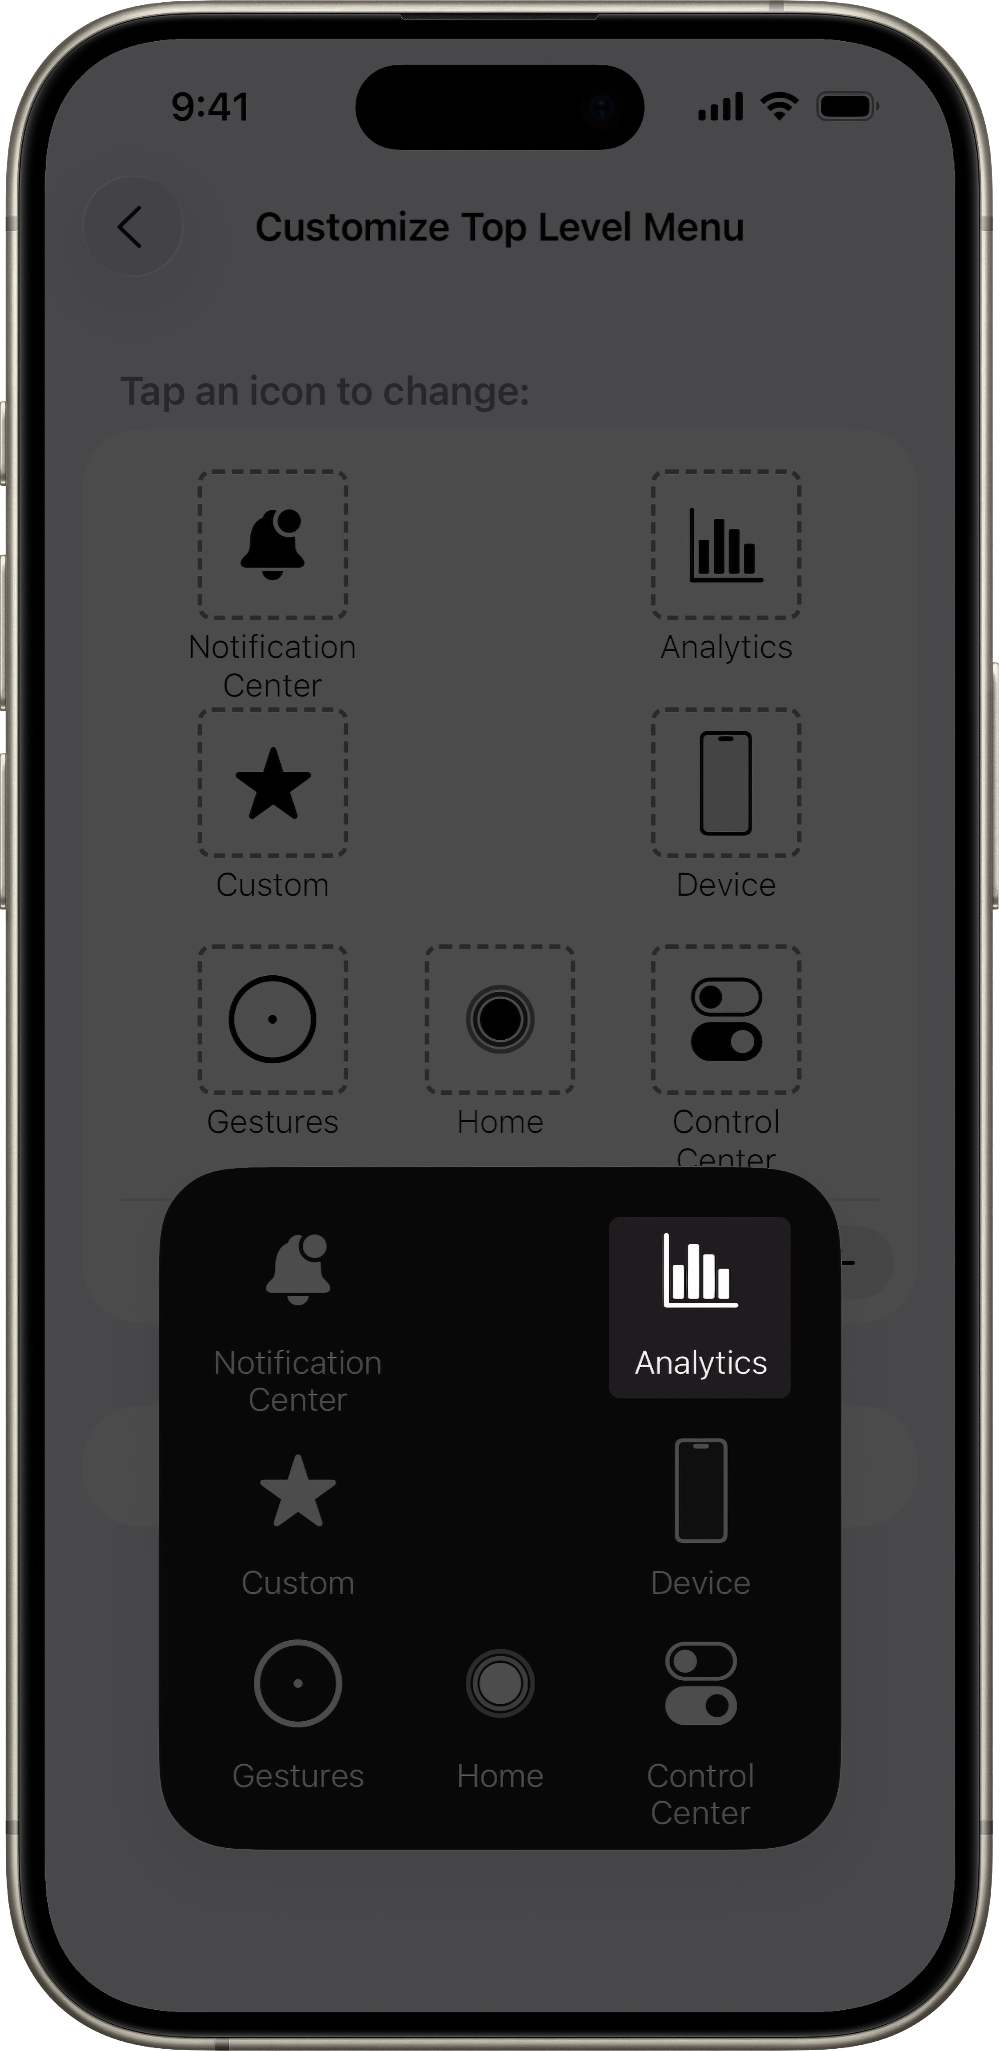
Tap to select Analytics from the list, then tap the checkmark.
Analytics is now added to AssistiveTouch, and you can tap the Back button to leave that menu. Reproduce the failure or behavior of the iPhone or iPad you’re trying to troubleshoot.
Tap the AssistiveTouch tool, then select Analytics from the Top Level Menu.
Confirm that the message “AssistiveTouch Gathering analytics” appears.
iOS and iPadOS capture sysdiagnose log files and stores them in Analytics Data in Settings.
Important: Before running sysdiagnose, try to repeat the issue on the device, then run sysdiagnose. Even if the issue doesn’t consistently occur, document the date and time that the sysdiagnose was started, and use this information to find your sysdiagnose log file.
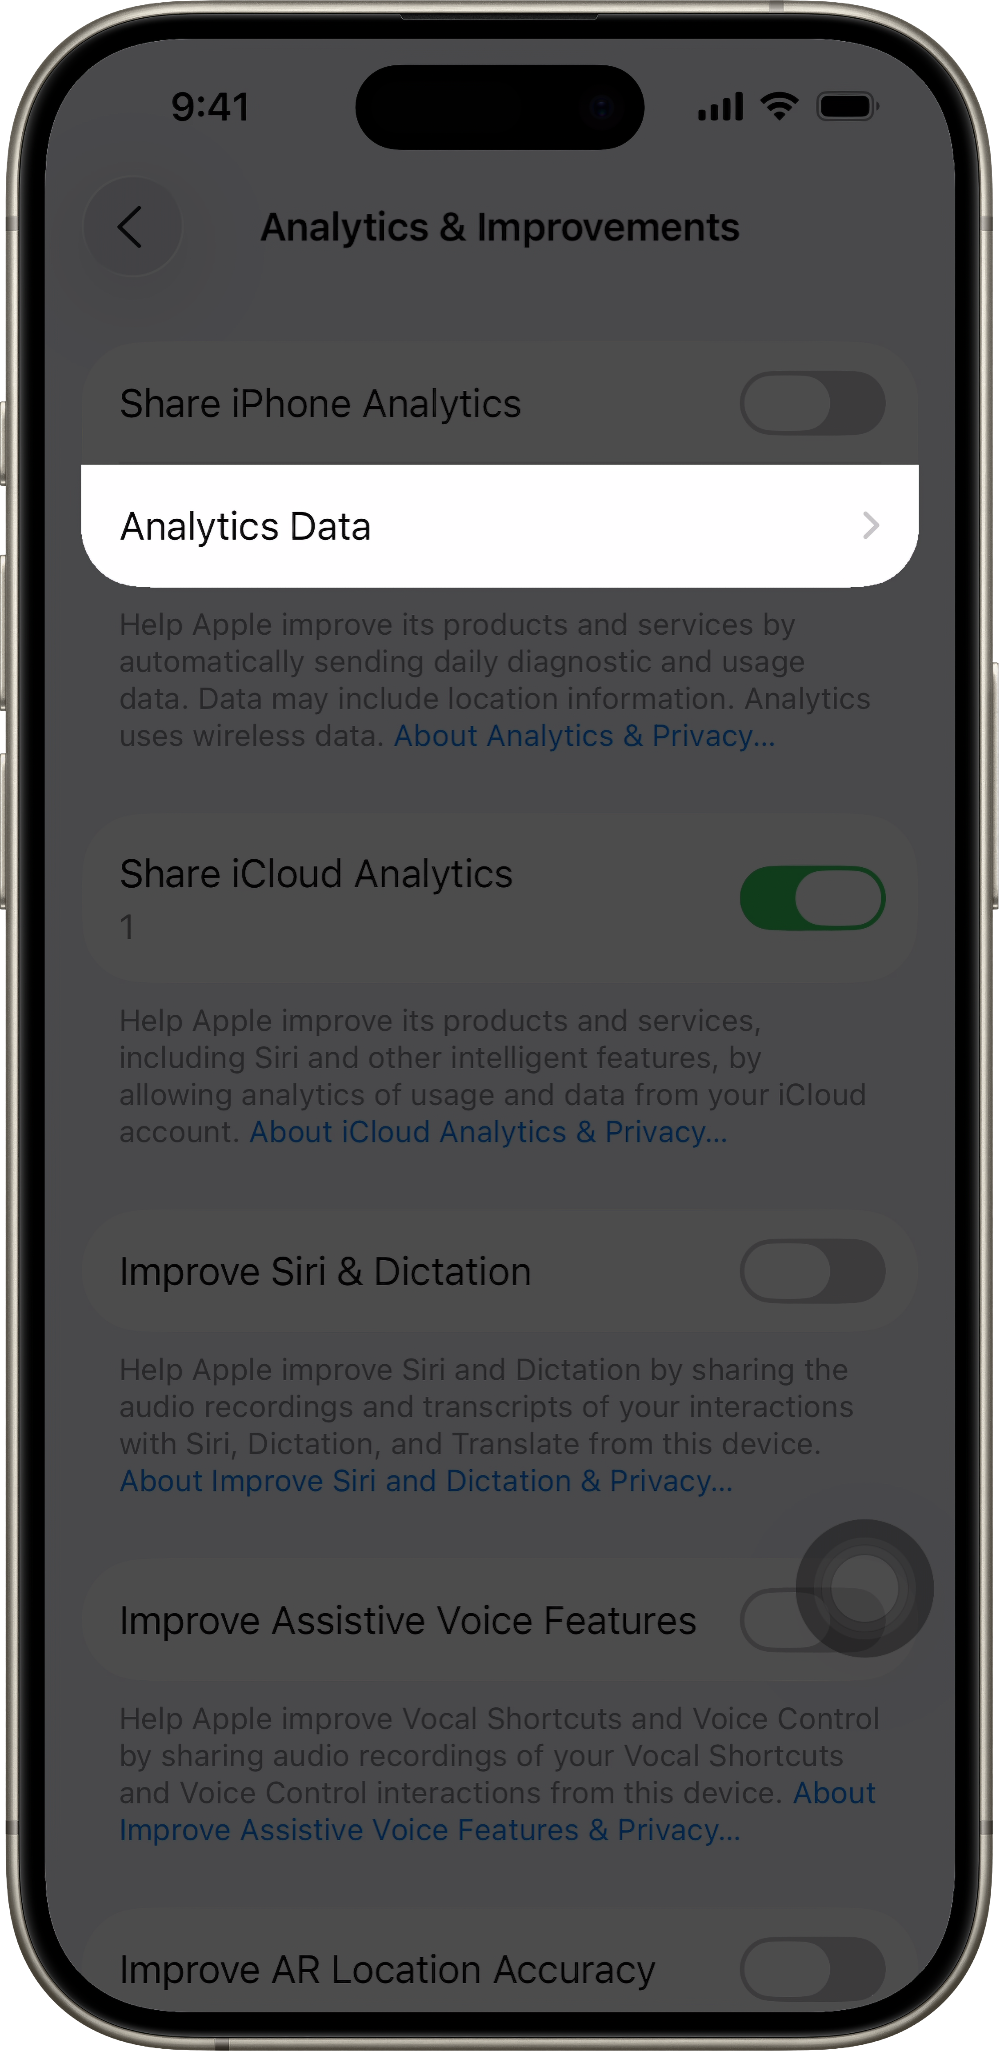
In Settings, tap Privacy & Security > Analytics & Improvements > Analytics Data.
Multiple analytics log files appear.
Tap the search bar and type “sys” to begin your search.
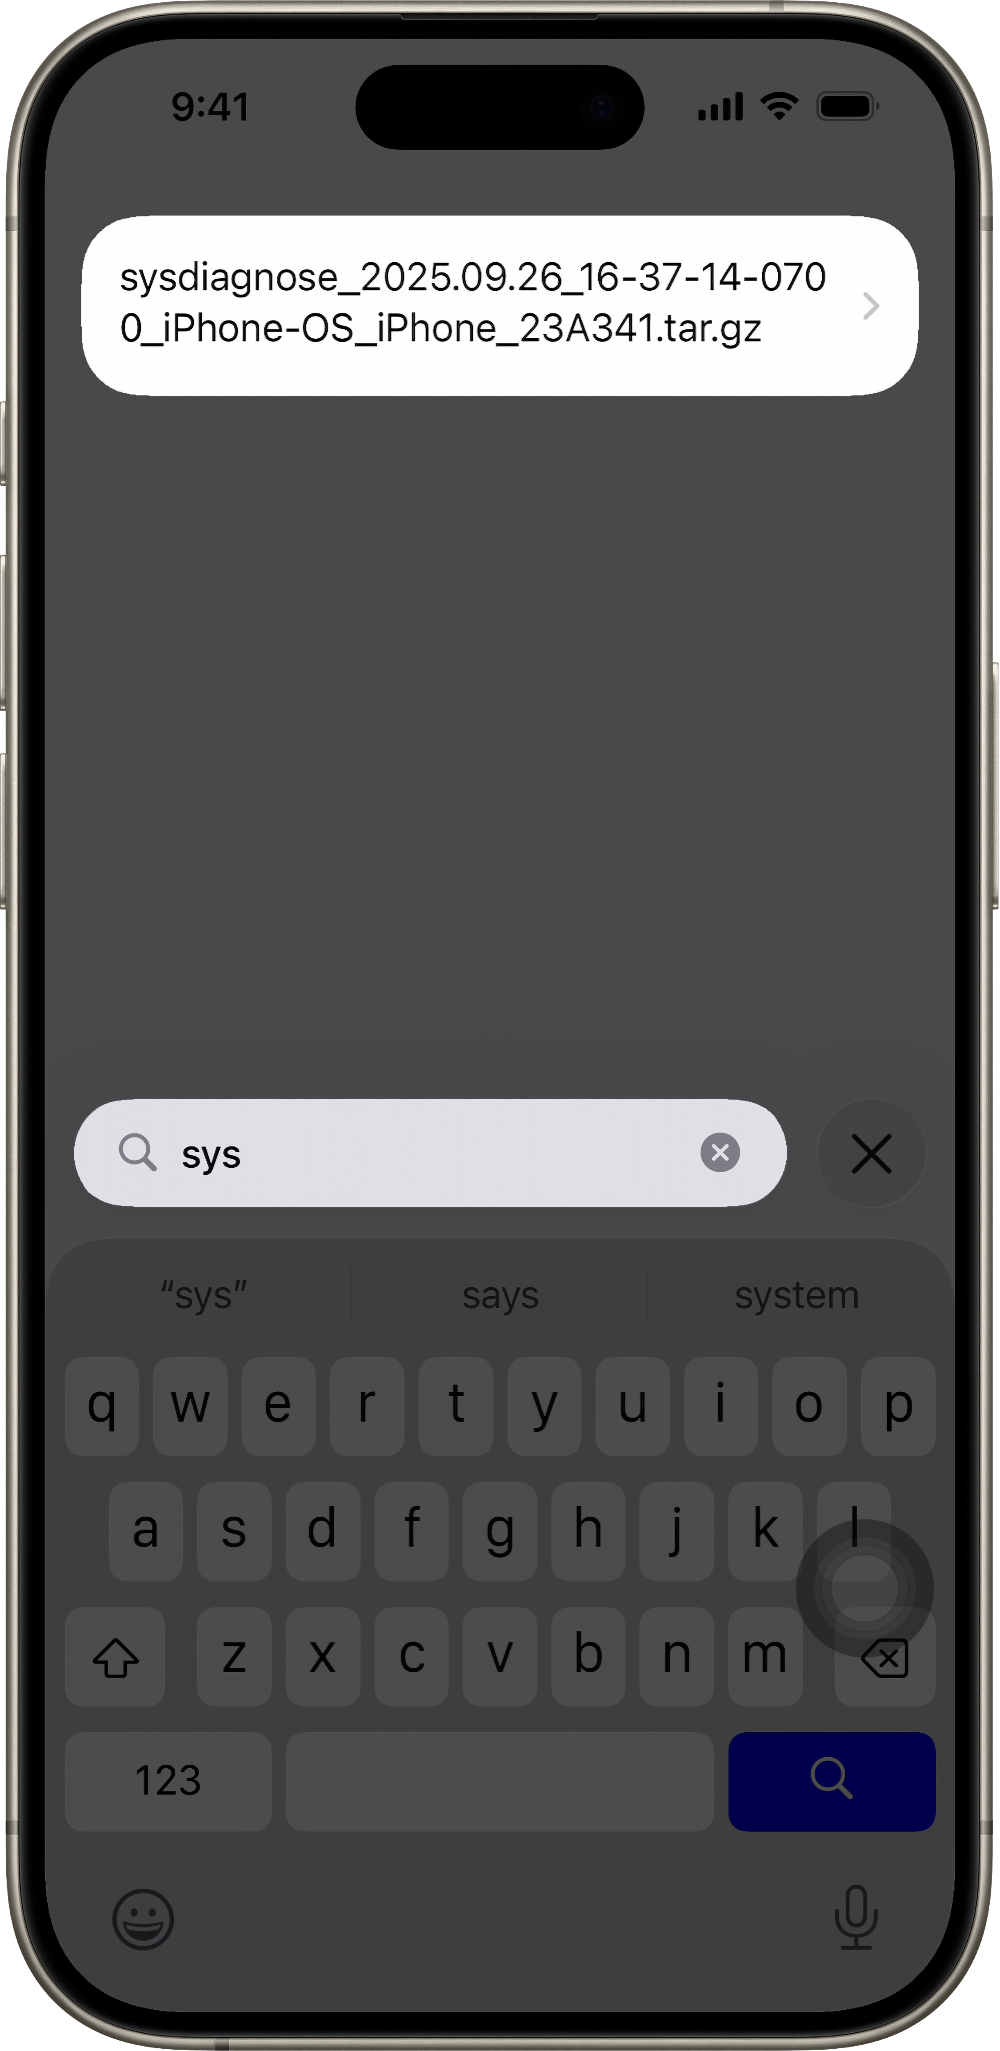
Use the date and time you documented to find the sysdiagnose log file.
Locate and transfer sysdiagnose files on devices
After you run sysdiagnose on iPhone or iPad, you can transfer the log file to Mac so that you can send it to AppleCare or your organization’s IT team for analysis. You can use AirDrop to transfer the file or connect iPhone or iPad to Mac and transfer the file using the Finder.
Go to Settings > Privacy > Analytics & Improvements > Analytics Data on iPhone or iPad.
Locate the sysdiagnose file and use AirDrop to send it to Mac. Scroll down to the sysdiagnose file with the corresponding date, tap the file, and tap the box with an arrow in it at the top right.
Choose the Mac to send it to from the list of devices that appear in the AirDrop area. After the transfer is complete (this may take several minutes), the file is located in the /Users/[user short name]/Downloads folder and looks similar to “sysdiagnose_YYYY.MM.DD_HH-MM-SS-XX…”
Transfer the log file to Mac using the Finder
While iPhone is connected to Mac, click the device below Locations in the Finder sidebar, and click Sync.
Next, you’ll find the sysdiagnose log file in the hidden Library folder on the Mac, Macintosh HD/Users/[user short name]/Library/. macOS hides the /Users/username/Library/folder by default.
In the Finder, press and hold the Option key while you click the Go menu. The Library folder appears in the menu.
Click the Library folder, then go to Logs > CrashReporter > MobileDevice > [device name] > DiagnosticLogs > sysdiagnose. The sysdiagnose log file appears.