iPad Användarhandbok
- Välkommen
- Nyheter i iOS 12
-
- Väcka och låsa upp
- Lära dig grundläggande gester
- Lära dig gester för modeller med Face ID
- Utforska hemskärmen och appar
- Ändra inställningarna
- Ta en skärmavbild
- Justera volymen
- Ändra eller stänga av ljudet
- Söka efter innehåll
- Använda och anpassa Kontrollcenter
- Visa och ordna vyn Idag
- Nå funktioner från låsskärmen
- Resa med iPad
- Ställa in skärmtid, kvoter och begränsningar
- Synkronisera iPad med hjälp av iTunes
- Ladda och övervaka batteriet
- Lär dig vad statussymbolerna betyder
-
- Hitta mina vänner
- Hitta min iPhone
- Mätverktyg
-
- Visa bilder och videor
- Redigera bilder och videor
- Ordna bilder i album
- Söka i Bilder
- Dela bilder och videor
- Visa minnen
- Hitta personer i Bilder
- Bläddra i bilder efter plats
- Använda iCloud-bilder
- Dela bilder med Delade album på iCloud
- Använda Min bildström
- Importera bilder och videor
- Skriva ut bilder
- Aktier
- Tips
-
- Tillbehör som följer med iPad
- Ansluta Bluetooth-enheter
- Strömma ljud och video till andra enheter
- Ansluta till en TV, projektor eller bildskärm
- Styra ljud på flera enheter
- Apple Pencil
- Använda Smart Keyboard och Smart Keyboard Folio
- Använda Magic Keyboard
- AirPrint
- Handoff
- Använda universella urklipp
- Ringa och besvara Wi-Fi-samtal
- Instant Hotspot
- Internetdelning
- Överföra filer med iTunes
-
-
- Kom igång med hjälpmedelsfunktioner
- Hjälpmedelsgenvägar
-
-
- Aktivera och öva på VoiceOver
- Ändra inställningar för VoiceOver
- Lära dig VoiceOver-gester
- Styra iPad med VoiceOver-gester
- Styra VoiceOver med rotorn
- Använda tangentbordet på skärmen
- Skriva med fingret
- Styra VoiceOver med Magic Keyboard
- Skriva punktskrift på skärmen med hjälp av VoiceOver
- Använda en punktskriftsdisplay
- Använda VoiceOver i appar
- Läsa upp markering, läs upp skärm, tal vid skrift
- Zooma
- Förstorare
- Skärminställningar
- Face ID och uppmärksamhet
-
- Guidad åtkomst
-
- Viktig säkerhetsinformation
- Viktig information om hantering
- Zooma in en app för att fylla skärmen
- Få information om iPad
- Visa eller ändra mobilinställningar
- Läs mer om programvara och service för iPad
- FCC-överensstämmelse
- ISED Canada-överensstämmelse
- Klass 1-laserinformation
- Apple och miljön
- Information om kassering och återvinning
- Överensstämmelse med ENERGY STAR
- Copyright
Mäta storlekar med iPad
På modeller som har stöd för det kan du använda appen Mätverktyg ![]() och iPad-kameran till att mäta objekt och ytor omkring dig. iPad upptäcker automatiskt måtten för rektangulära objekt. Du kan också ställa in start- och slutpunkter manuellt för ett mått.
och iPad-kameran till att mäta objekt och ytor omkring dig. iPad upptäcker automatiskt måtten för rektangulära objekt. Du kan också ställa in start- och slutpunkter manuellt för ett mått.
För bästa resultat bör du använda Mätverktyg på väl framträdande objekt som befinner sig 0,5 till 3 meter från iPad.
Obs! Måtten är ungefärliga.
Börja mäta
Öppna Mätverktyg
 och använd sedan iPad-kameran till att långsamt skanna objekt i närheten.
Placera iPad så att objektet som du vill mäta visas på skärmen.
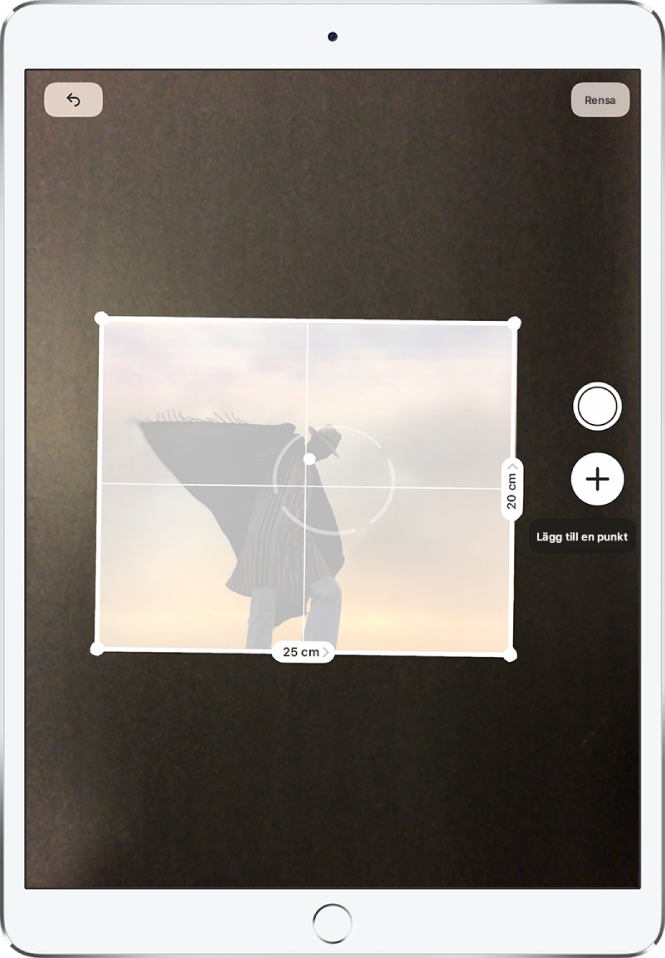
Ta ett automatiskt rektangulärt mått
När iPad känner av det rektangulära objektets kanter kommer en gul ruta att rama in objektet. Tryck på den gula rutan för att se måtten.
Om du vill ta en bild av måtten trycker du på
 .
.
Ta ett manuellt mått
Rikta in skärmens centrum mot startpunkten och tryck sedan på
 .
.Panorera iPad långsamt till slutpunkten och tryck sedan på
för att se den uppmätta längden.Om du vill ta en bild av måtten trycker du på
.Ta ett annat mått eller tryck på Rensa för att börja om.