Final Cut Pro User Guide for Mac
- Welcome
- What’s new
-
- Intro to importing media
- If it’s your first import
- Organize files during import
-
- Import from Image Playground
- Import from iMovie for macOS
- Import from iMovie for iOS or iPadOS
- Import from Final Cut Pro for iPad
- Import from Final Cut Camera
- Import from Photos
- Import from Music
- Import from Apple TV
- Import from Motion
- Import from GarageBand and Logic Pro
- Import using workflow extensions
- Record into Final Cut Pro
- Memory cards and cables
- Supported media formats
-
- Intro to effects
-
- Intro to transitions
- How transitions are created
- Add transitions and fades
- Quickly add a transition with a keyboard shortcut
- Set the default duration for transitions
- Delete transitions
- Adjust transitions in the timeline
- Adjust transitions in the inspector and viewer
- Merge jump cuts with the Flow transition
- Adjust transitions with multiple images
- Modify transitions in Motion
- Add adjustment clips
-
- Add storylines
- Use the precision editor
- Conform frame sizes and rates
- Use XML to transfer projects
-
- Intro to sharing projects
- Share to Apple devices
- Share on the web
- Send a video frame to Pixelmator Pro
- Share in email
- Share stereo or spatial video
- Batch sharing
- Share using Compressor
- Create share destinations
- Change metadata for shared items
- View the status of shared items
- Speed up exports with simultaneous processing
- Glossary
- Copyright and trademarks
Ways to view masks in Final Cut Pro for Mac
You can display the precise area of a mask in the viewer as a black-and-white alpha channel image or as a color image, showing the actual color contents of the mask. Changing the viewing mode helps you see which areas of the image are being affected (by a color correction, for example).
Add a clip to your Final Cut Pro project, then select the clip in the timeline.
Do one of the following:
Add an effect to the clip, then add a mask to the effect.
Note: Effects you can mask in this way include color corrections.
Add a color mask or a shape mask to the clip.
Position the playhead in the timeline so that the clip appears in the viewer.
If the Color inspector isn’t already shown, do one of the following:
Choose Window > Go To > Color Inspector (or press Command-6).
Click the Enhancements pop-up menu below the viewer and choose Show Color Inspector.
In the inspector, click the View Masks button to show the mask in the viewer.
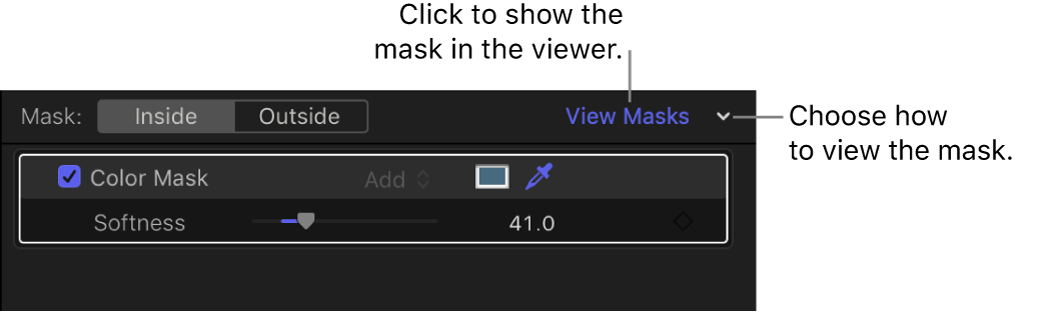
Do one of the following:
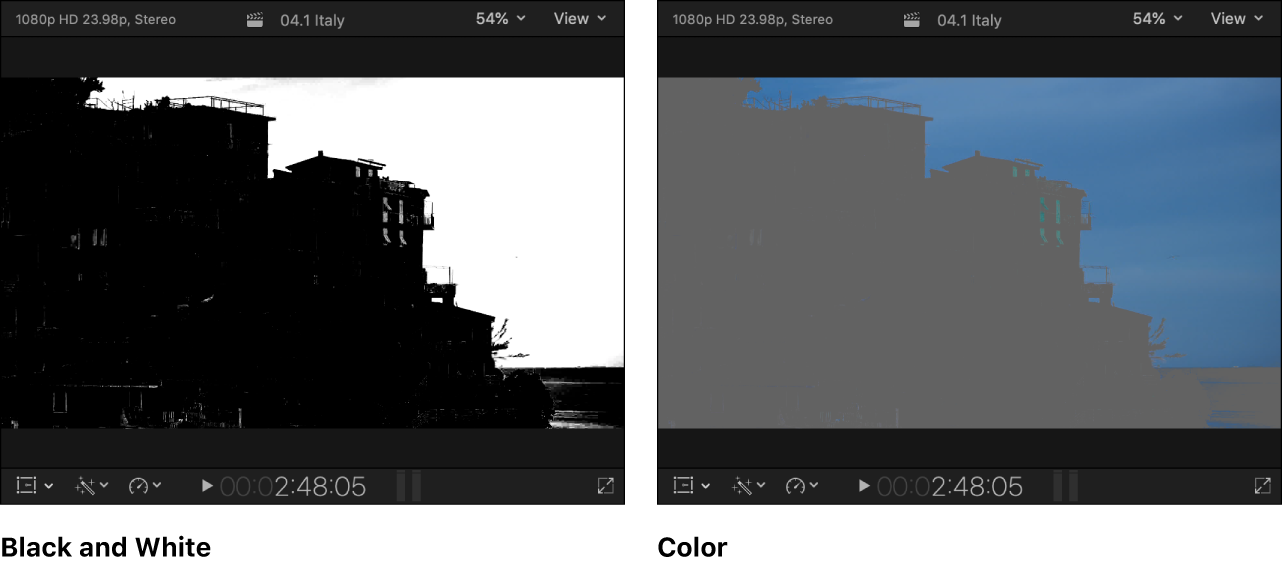
View the alpha channel in black and white: Click the View Masks pop-up menu and choose Black and White.
The mask’s alpha channel appears in the viewer. White indicates fully opaque mask areas, black indicates areas outside the mask, and levels of gray indicate transparent mask areas.
View the visible areas of the masked image in color: Click the View Masks pop-up menu and choose Color.
The colors inside the mask appear in the viewer. Gray indicates areas outside the mask.
To turn the current mask view on or off and switch between displaying the mask and the adjusted image in the viewer, click View Masks.


Download this guide: PDF