Final Cut Pro User Guide for Mac
- Welcome
- What’s new
-
- Intro to importing media
- If it’s your first import
- Organize files during import
-
- Import from Image Playground
- Import from iMovie for macOS
- Import from iMovie for iOS or iPadOS
- Import from Final Cut Pro for iPad
- Import from Final Cut Camera
- Import from Photos
- Import from Music
- Import from Apple TV
- Import from Motion
- Import from GarageBand and Logic Pro
- Import using workflow extensions
- Record into Final Cut Pro
- Memory cards and cables
- Supported media formats
-
- Intro to effects
-
- Intro to transitions
- How transitions are created
- Add transitions and fades
- Quickly add a transition with a keyboard shortcut
- Set the default duration for transitions
- Delete transitions
- Adjust transitions in the timeline
- Adjust transitions in the inspector and viewer
- Merge jump cuts with the Flow transition
- Adjust transitions with multiple images
- Modify transitions in Motion
- Add adjustment clips
-
- Add storylines
- Use the precision editor
- Conform frame sizes and rates
- Use XML to transfer projects
-
- Intro to sharing projects
- Share to Apple devices
- Share on the web
- Send a video frame to Pixelmator Pro
- Share in email
- Share stereo or spatial video
- Batch sharing
- Share using Compressor
- Create share destinations
- Change metadata for shared items
- View the status of shared items
- Speed up exports with simultaneous processing
- Glossary
- Copyright and trademarks
Rate clips in Final Cut Pro for Mac
If your clips contain sections that you don’t like or might never want to use in a project—because they’re blurry, for example—you can mark them as rejected. You can easily rate the clips you like and don’t like as you review them. When you’re ready to edit your project, you can focus on your best footage by choosing to display only those clips you marked as favorite. You can also delete your rejected clips’ source media files to free up storage space.

Rate clips
In the browser in Final Cut Pro, select a range, a clip, or multiple clips you want to rate.
Do one of the following:
If you like the selection: Press the F key (or choose Mark > Favorite).
In the browser, a green line appears at the top of frames you’ve marked as favorite.

If you don’t like the selection: Press the Delete key (or choose Mark > Reject).
A red line appears at the top of frames you’ve marked as rejected.

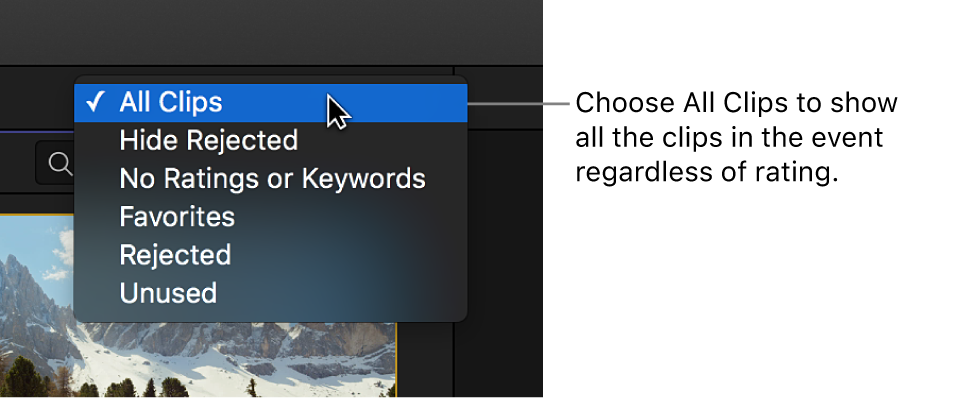
Note: If you chose Hide Rejected from the Filter pop-up menu at the top of the browser, clips marked as rejected disappear from view. See Find clips and projects.
Remove ratings from clips
In Final Cut Pro, make sure the clips you want to work with appear in the browser.
You might need to choose a new option, such as All Clips, from the Filter pop-up menu at the top of the browser so that all the clips you need to access are visible. See Find clips and projects.
In the browser, select the clips whose rating you want to remove, and press the U key (or choose Mark > Unrate).
The green or red line at the top of the clips disappears.
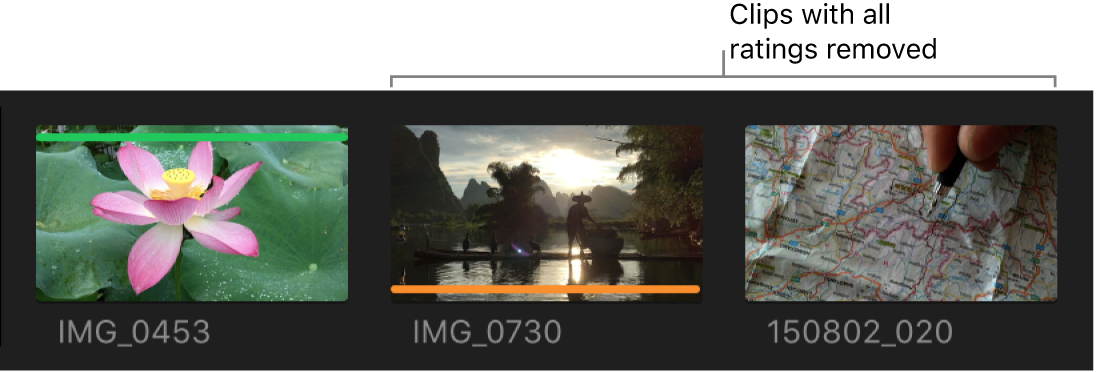
Note: An orange line along the bottom of an event clip indicates that the clip is being used in the current project (the project that is open in the timeline). To turn this view on or off, choose View > Browser > Used Media Ranges. For more information about these markings, see Lines marking event clips.


Download this guide: PDF