Final Cut Pro User Guide for Mac
- Welcome
- What’s new
-
- Intro to importing media
- If it’s your first import
- Organize files during import
-
- Import from Image Playground
- Import from iMovie for macOS
- Import from iMovie for iOS or iPadOS
- Import from Final Cut Pro for iPad
- Import from Final Cut Camera
- Import from Photos
- Import from Music
- Import from Apple TV
- Import from Motion
- Import from GarageBand and Logic Pro
- Import using workflow extensions
- Record into Final Cut Pro
- Memory cards and cables
- Supported media formats
-
- Intro to effects
-
- Intro to transitions
- How transitions are created
- Add transitions and fades
- Quickly add a transition with a keyboard shortcut
- Set the default duration for transitions
- Delete transitions
- Adjust transitions in the timeline
- Adjust transitions in the inspector and viewer
- Merge jump cuts with the Flow transition
- Adjust transitions with multiple images
- Modify transitions in Motion
- Add adjustment clips
-
- Add storylines
- Use the precision editor
- Conform frame sizes and rates
- Use XML to transfer projects
-
- Intro to sharing projects
- Share to Apple devices
- Share on the web
- Send a video frame to Pixelmator Pro
- Share in email
- Share stereo or spatial video
- Batch sharing
- Share using Compressor
- Create share destinations
- Change metadata for shared items
- View the status of shared items
- Speed up exports with simultaneous processing
- Glossary
- Copyright and trademarks
Create complex masks in Final Cut Pro for Mac
You can use the powerful Draw Mask effect to create a complex custom mask using control points and spline drawing methods. You can also convert a Shape Mask to a Draw Mask, to take advantage of its sophisticated controls.
Create a complex mask with the Draw Mask effect
The instructions below explain how to create a mask using a Bezier spline, the default shape type. If you prefer to draw your mask with linear or B-Spline shapes, you can adjust this setting in the Video inspector before you get started. See Add mask control points.
Add the clip you want to mask to the Final Cut Pro timeline.
Note: If you want to composite the clip over a background clip, you must use connected clips. See Connect clips.
Select the clip in the timeline, then position the playhead at a point within the clip that shows the area you want to make transparent.
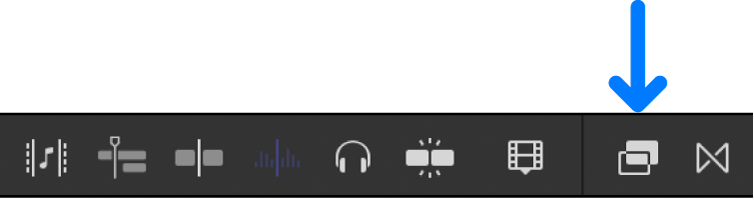
To open the Effects browser, click the Effects button in the top-right corner of the timeline (or press Command-5).
In the Effects browser, select the Draw Mask effect.
Tip: To quickly find the Draw Mask effect, type “draw mask” in the Effects browser search field.
To apply the mask effect to the clip selected in the timeline, do one of the following:
Drag the effect to the timeline clip or the viewer.
Double-click the effect thumbnail in the Effects browser.
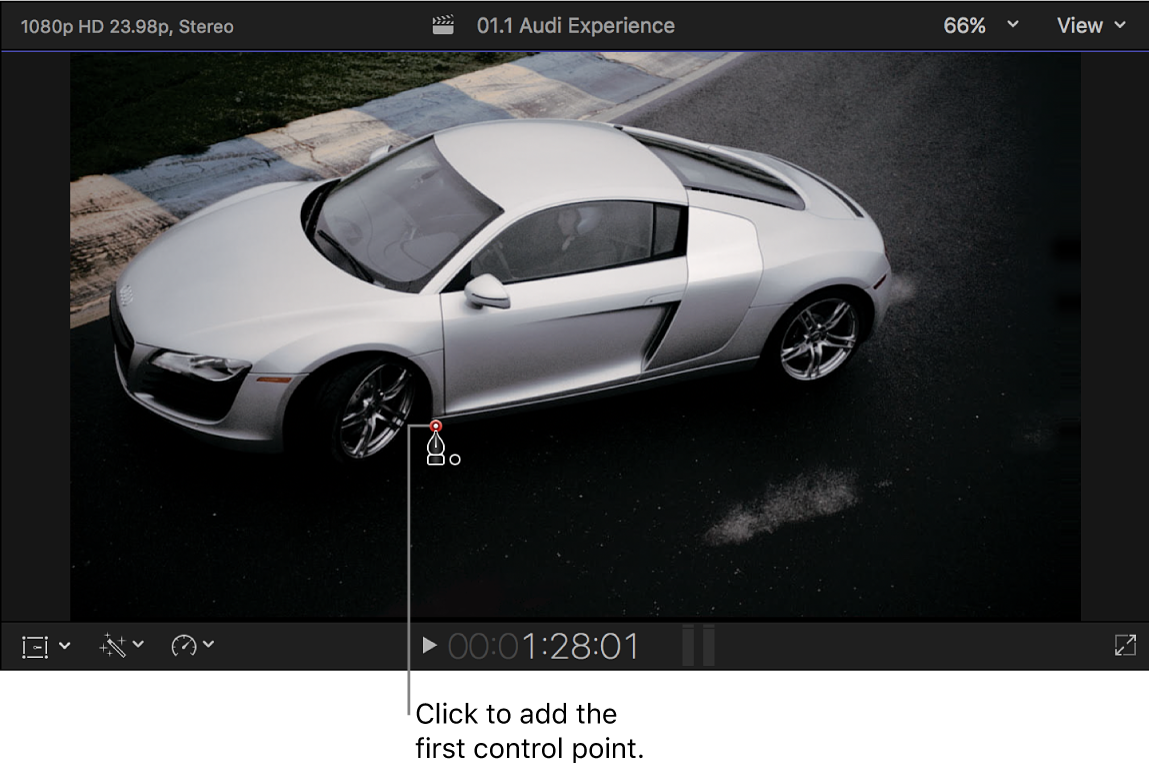
In the viewer, click to add a control point.
A red dot with a white center (indicating a selected control point) appears where you clicked.
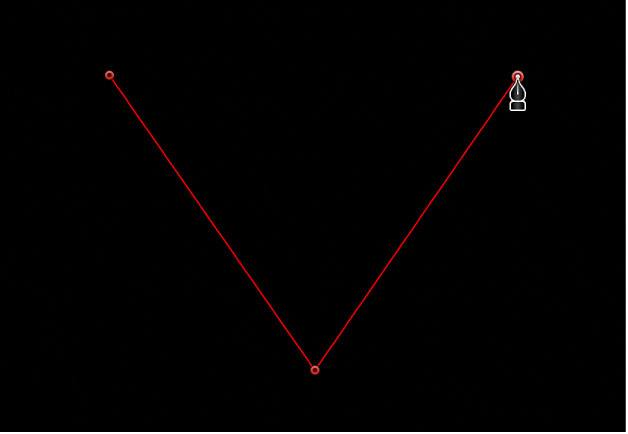
To add points to further define the shape, do one of the following:
Click to make a linear corner point.
Drag to make a curved Bezier point, adjusting it to the shape you want.
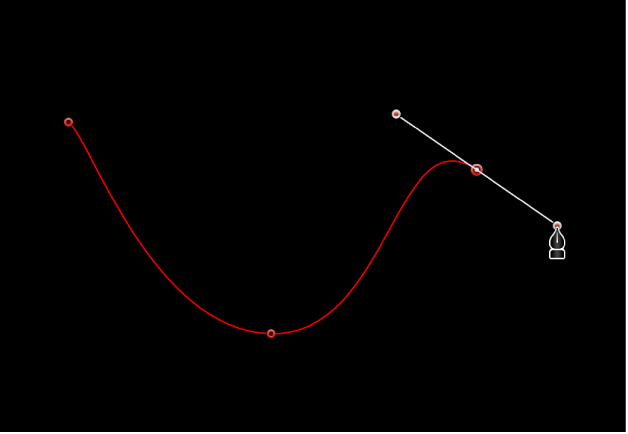
Press Shift while making a curved point to constrain its tangents to 45-degree angles. Press Command-Plus Sign (+) to zoom in for a closer look, and Command-Minus Sign (–) to zoom out.
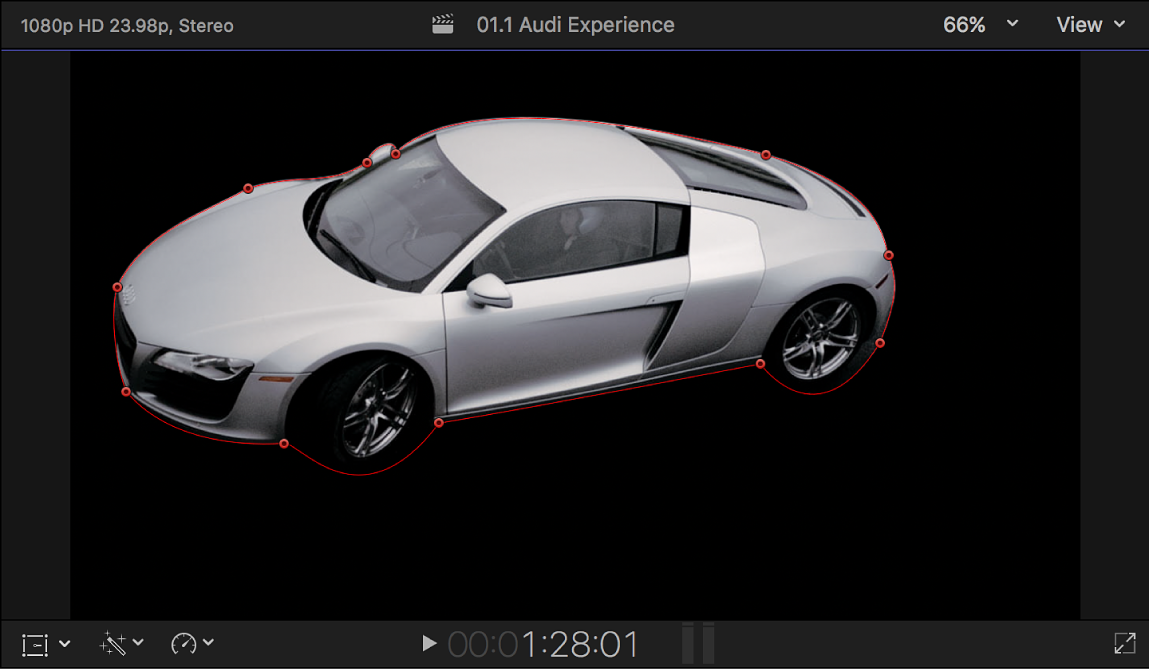
Continue adding more control points in the viewer to create your detailed mask shape.
Red lines appear in the viewer, connecting the control points.
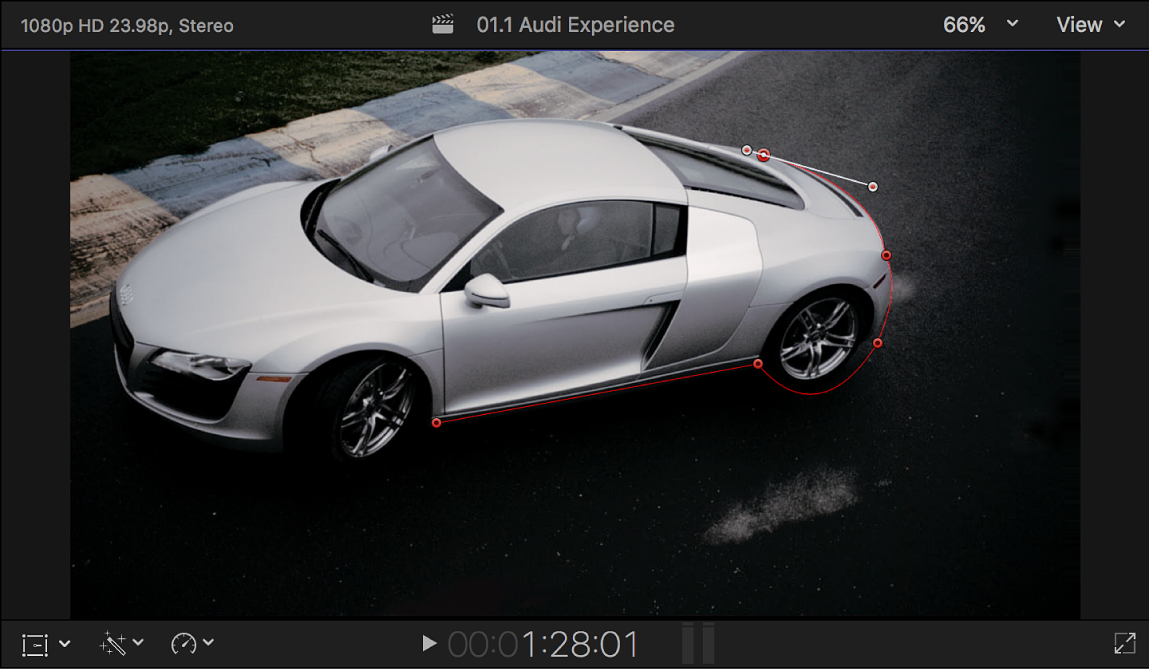
To complete the initial mask shape, click the original control point.
The area outside the mask shape is filled with solid black, representing the transparent area. If you added a background clip using connected clips, the background image shows through this transparent area.
To adjust the mask, do any of the following:
Visually manipulate the mask in the viewer: Drag the onscreen controls in the viewer.
Show or hide onscreen controls and control points in the viewer: Click the Draw Mask Onscreen Controls button
 in the Draw Mask section of the Video inspector.
Make precise numeric adjustments, including keyframing: Modify the mask settings in the Draw Mask section of the Video inspector.

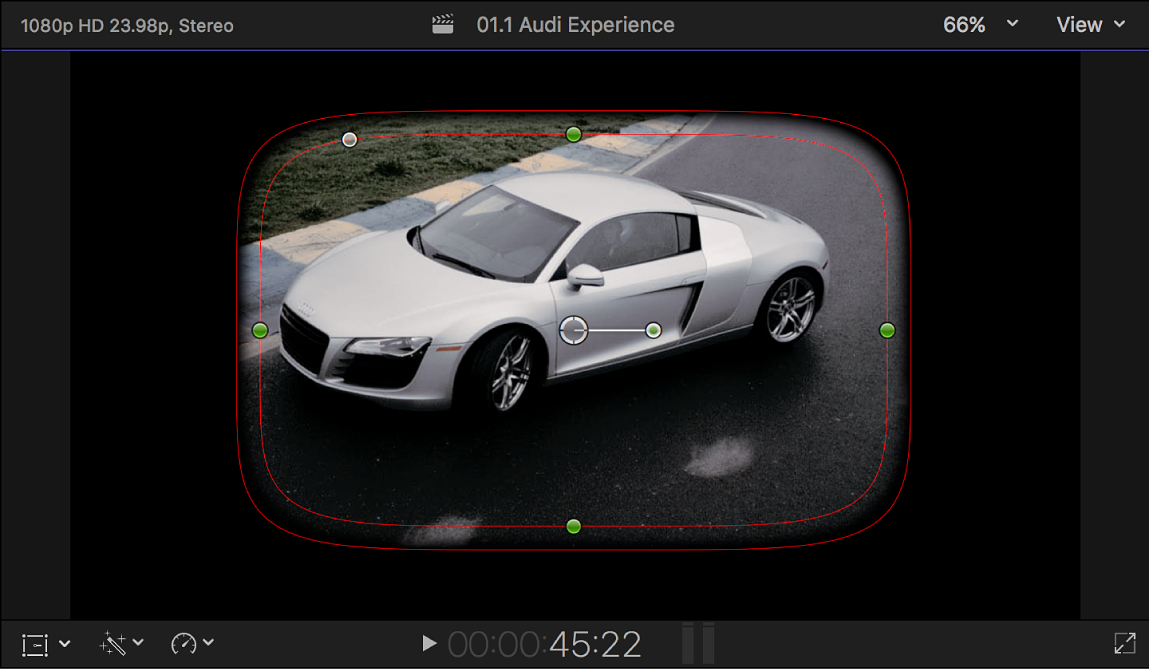
Create a complex mask by converting a Shape Mask
You can refine the contours of a Shape Mask by converting it to a Draw Mask with editable control points that allow you to adjust shape and curvature.
Add a Shape Mask effect to a clip in the Final Cut Pro timeline.
The Shape Mask onscreen controls appear in the viewer.
Do one of the following:
Click Convert to Points at the bottom of the Shape Mask section of the Video inspector.
Control-click the Shape Mask onscreen controls in the viewer and choose Convert to Points.
Red control points appear in the viewer, in place of the Shape Mask onscreen controls. In the Video inspector, the Shape Mask section changes to a Draw Mask section.
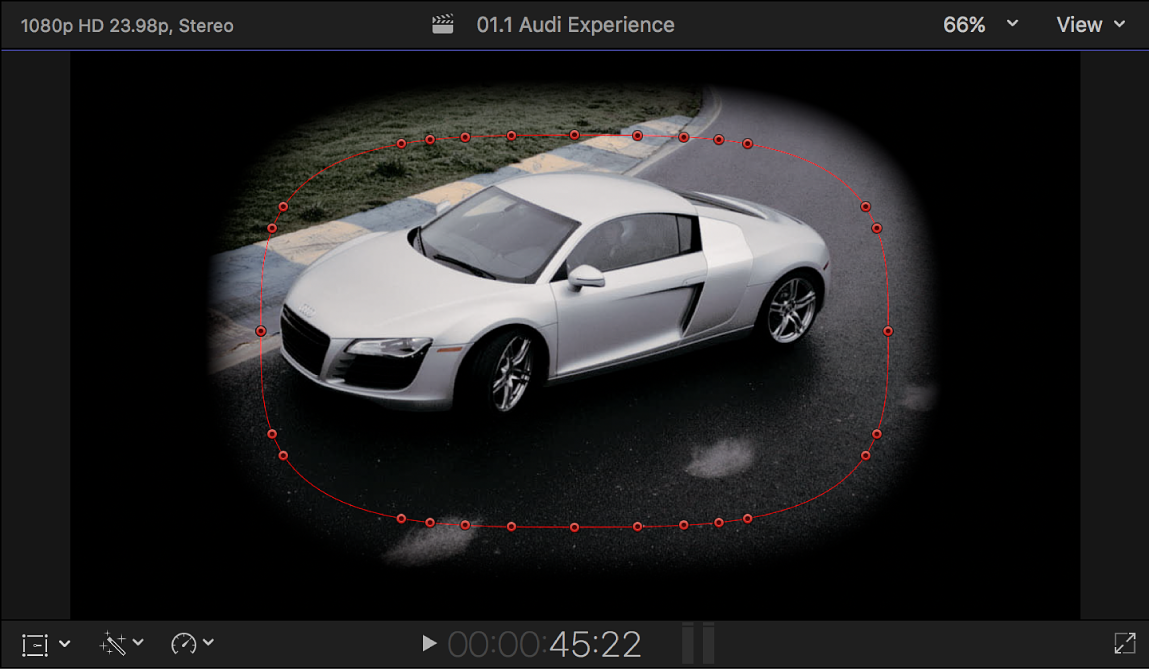
Note: If you animated the Radius or Curvature parameter in the original Shape Mask, a dialog appears asking you to confirm the conversion. The animation is discarded after the shape is converted.
To adjust the mask, do any of the following:
Visually manipulate the mask in the viewer: Drag the control points in the viewer.
Show or hide onscreen controls and control points in the viewer: Click the Draw Mask Onscreen Controls button
in the Draw Mask section of the Video inspector.Make precise numeric adjustments, including keyframing: Modify the mask settings in the Draw Mask section of the Video inspector.
Note: After the control points become available, you can’t convert the mask back to a simple shape mask.
Download this guide: PDF