Final Cut Pro User Guide for Mac
- Welcome
- What’s new
-
- Intro to effects
-
- Intro to transitions
- How transitions are created
- Add transitions and fades
- Quickly add a transition with a keyboard shortcut
- Set the default duration for transitions
- Delete transitions
- Adjust transitions in the timeline
- Adjust transitions in the inspector and viewer
- Merge jump cuts with the Flow transition
- Adjust transitions with multiple images
- Modify transitions in Motion
-
- Add storylines
- Use the precision editor
- Conform frame sizes and rates
- Use XML to transfer projects
- Glossary
- Copyright

Adjust transitions in the timeline in Final Cut Pro for Mac
You can adjust a transition’s duration and move it in the timeline. You can also trim either of the clips under the transition.
Note: If you extend a clip to its maximum length in either direction, the clip edge turns red. You may need to trim (shorten) the clip to create the media handle necessary to create a transition. See How transitions are created in Final Cut Pro for Mac.
Change the transition duration
Select a transition in the Final Cut Pro timeline.
Do one of the following:
Choose Modify > Change Duration (or press Control-D), type the duration (it appears below the viewer), then press Return.
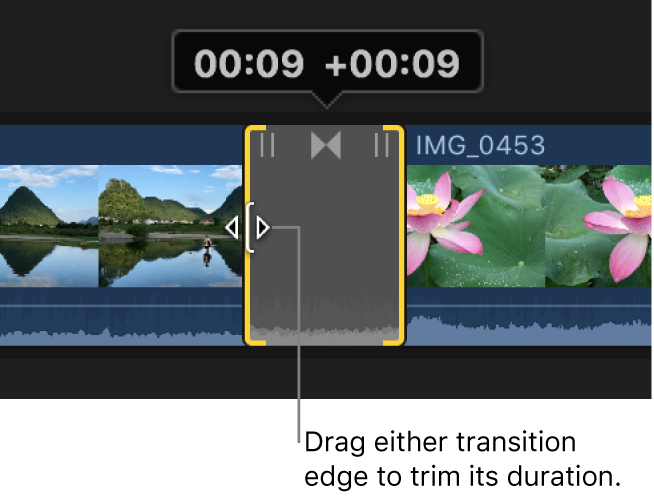
Drag one end of the transition away from the transition’s center to lengthen it, or toward the center to shorten it.

The transition maintains its center point and both ends are trimmed equally, with the number showing how many frames have been added to or subtracted from the transition duration.
Move a transition
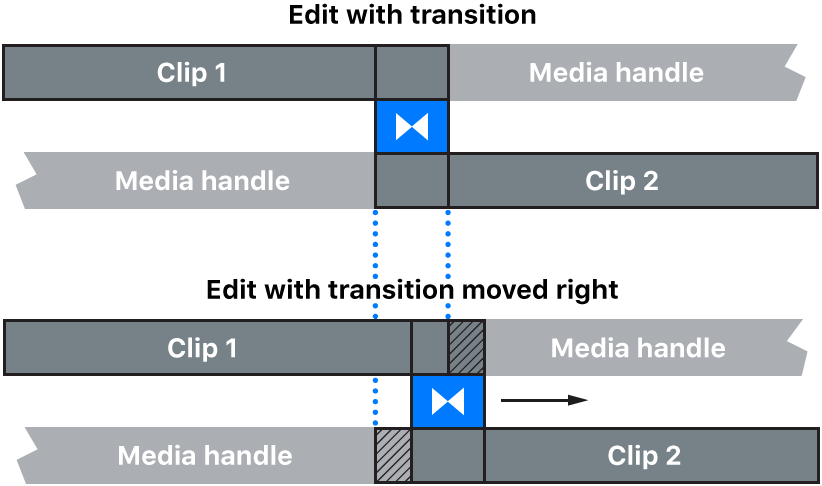
Moving a transition actually rolls the edit under the transition, adding content to one underlying clip while removing content from the other clip. The overall duration of the project is not affected. You can move a transition only if the clip that is being extended has sufficient media handles.

Select a transition in the Final Cut Pro timeline.
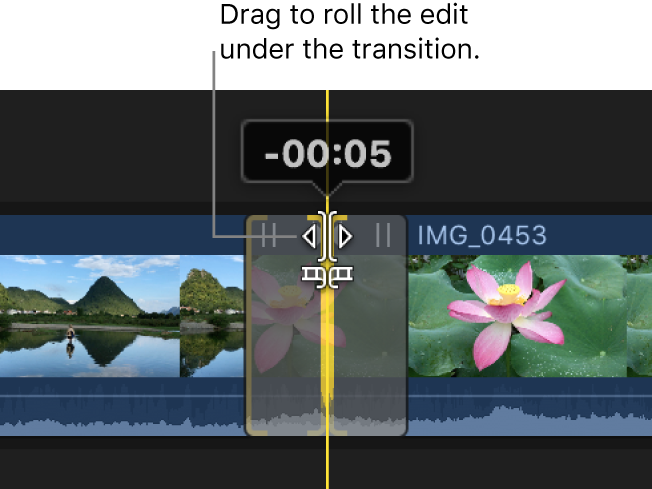
Drag the transition trim icon in the upper-center area of the transition.

The edit under the transition is rolled, with one clip being extended and the other shortened. A number appears above the trim icon showing the number of frames to the left (negative numbers) or to the right (positive numbers) you have rolled the transition.
You can also use the precision editor to roll the transition.
Trim a clip under a transition
The transition includes icons that make it easy to trim the left or right clip without affecting the transition.
Select a transition in the Final Cut Pro timeline.
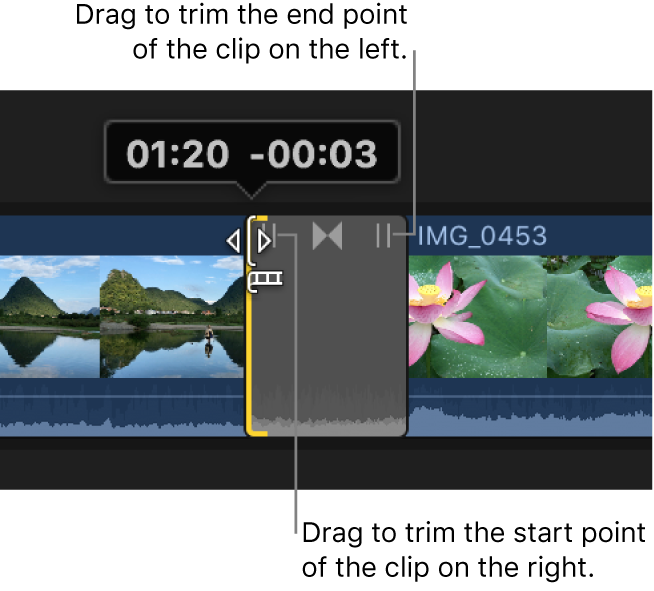
Drag one of the trim icons in the upper-left or upper-right area of the transition.
Note: You may need to zoom in on the timeline to make the trim icons appear.

Dragging the trim icon in the upper left adjusts the right clip’s start point, and dragging the trim icon in the upper right adjusts the left clip’s end point. A number appears showing how many frames you have added to (negative numbers) or subtracted from (positive numbers) the clip’s duration. Trimming the clip doesn’t affect the transition’s duration, but it does affect the project’s duration.
You can also use the precision editor to trim the clips under the transition.
Download this guide: Apple Books | PDF