Final Cut Pro User Guide for Mac
- Welcome
- What’s new
-
- Intro to effects
-
- Intro to transitions
- How transitions are created
- Add transitions and fades
- Quickly add a transition with a keyboard shortcut
- Set the default duration for transitions
- Delete transitions
- Adjust transitions in the timeline
- Adjust transitions in the inspector and viewer
- Merge jump cuts with the Flow transition
- Adjust transitions with multiple images
- Modify transitions in Motion
-
- Add storylines
- Use the precision editor
- Conform frame sizes and rates
- Use XML to transfer projects
- Glossary
- Copyright

Share on the web in Final Cut Pro for Mac
In Final Cut Pro 10.5.1 or later, you can use the YouTube & Facebook share option to save a project or clip as a file that is ready for posting on video-sharing websites.
In Final Cut Pro, do one of the following:
Select one or more projects or clips in the browser.
Note: You can’t mix projects and clips in a batch share. Your selection must contain only projects or only clips. See Batch sharing in Final Cut Pro for Mac.
Select ranges in one or more clips in the browser.
See Set multiple ranges in the browser in Final Cut Pro for Mac.
Select a range in a project in the timeline.
Note: To share just a portion of a project, you must make a range selection. A clip selection is not sufficient. You can use the I and O keys to set the range start and end points.
If you’re sharing a project that is set to use proxy media for playback, open it in the timeline, then click the View pop-up menu in the top-right corner of the viewer and choose Optimized/Original.
This ensures the highest quality in the exported file. When you choose this setting, Final Cut Pro uses optimized media to create the shared file. If optimized media doesn’t exist, the original media is used. For more information about optimized and proxy media, see Control playback quality in Final Cut Pro for Mac.
Do one of the following:
Choose File > Share > YouTube & Facebook.
Click the Share button in the toolbar, then click YouTube & Facebook.

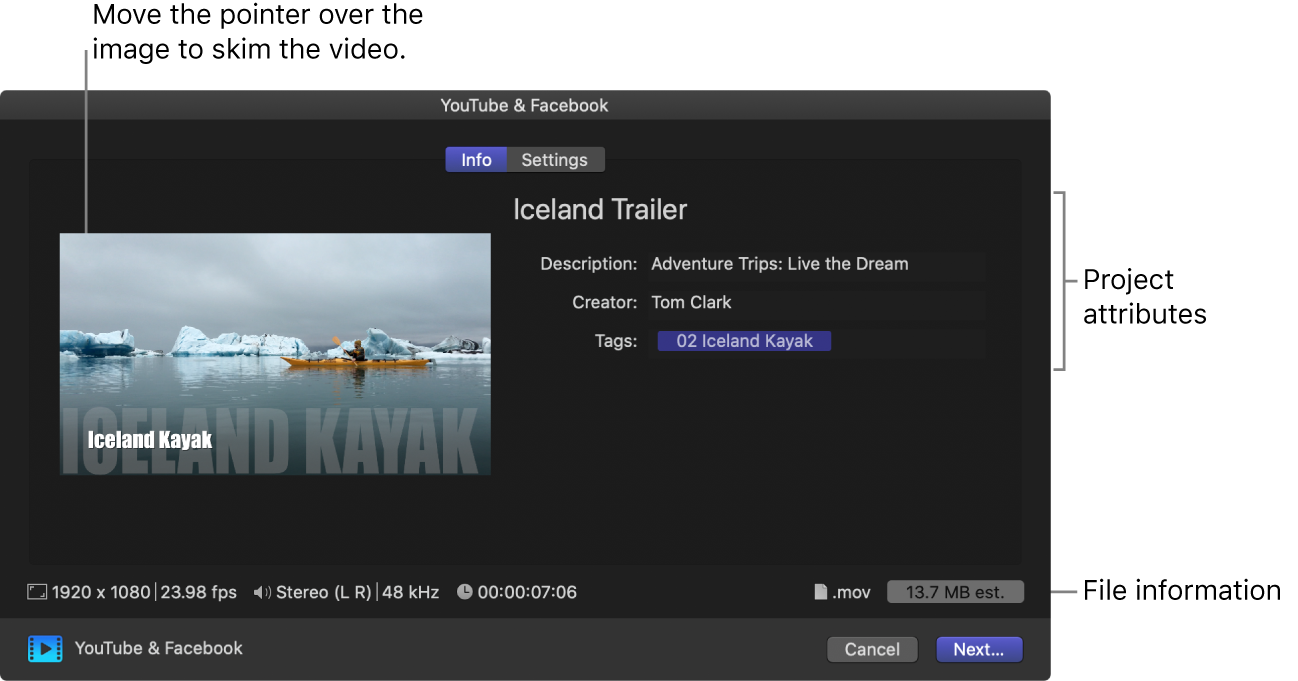
In the Share window that appears, do any of the following:

Move the pointer over the image to skim the video.
If you’re batch sharing (exporting multiple items), the image is replaced by a list of the items you’re exporting.
In the Info pane, view and modify project or clip attributes, such as the title and description.
See Change metadata for shared items in Final Cut Pro for Mac. All of the attributes associated with the project or clip are included in the output file.
Important: By default, the title field lists the project or clip name. Changing the title does not change the project or clip name, which is the name used for the exported file.
At the bottom of the window, view information about the file that will be exported, including frame size and frame rate, audio channels and sample rate, duration, output file type, and file size.
Click Settings to confirm the settings and make any necessary adjustments.
In the Settings pane, enter the requested information:
Resolution: Choose a frame size.
Compression: Choose “Multi-pass (Better)” to maximize the quality. Choose “Single-pass (Faster)” to speed up the encoding.
Export captions: If you added captions to your project, you can choose a language version to include with the video, either as embedded captions or as a separate sidecar file. See Intro to captions in Final Cut Pro for Mac.
Burn in captions: If you added captions to your project, you can choose a language version to burn in to the output media file.
Note: Burned-in captions are permanently visible in the output file and are not the same as embedded captions.
Click Next.
Enter a name for the output media file, navigate to a location on your Mac or storage device where you want to save the file, and click Save.
Your project is transcoded to a format suitable for YouTube and Facebook: a MOV file with H.264 video and AAC audio.
Upload the file to YouTube or Facebook using the corresponding website or app. (You must first set up an account with the video-sharing service you plan to use.)
You can monitor the progress of the transcode in the Background Tasks window, and you can continue to work in Final Cut Pro while the file is transcoded.
When transcoding is complete, a notification appears. You can view and locate shared projects in the Share inspector. See View the status of shared items in Final Cut Pro for Mac.
Download this guide: Apple Books | PDF