Final Cut Pro User Guide for Mac
- Welcome
- What’s new
-
- Intro to effects
-
- Intro to transitions
- How transitions are created
- Add transitions and fades
- Quickly add a transition with a keyboard shortcut
- Set the default duration for transitions
- Delete transitions
- Adjust transitions in the timeline
- Adjust transitions in the inspector and viewer
- Merge jump cuts with the Flow transition
- Adjust transitions with multiple images
- Modify transitions in Motion
-
- Add storylines
- Use the precision editor
- Conform frame sizes and rates
- Use XML to transfer projects
- Glossary
- Copyright

Export image sequences in Final Cut Pro for Mac
You can export your project’s visuals as an image sequence—a set of sequentially numbered still-image files that are compatible with many professional finishing, compositing, and grading apps.
In Final Cut Pro, do one of the following:
Select one or more projects or clips in the browser.
Note: You can’t mix projects and clips in a batch share. Your selection must contain only projects or only clips. See Batch sharing in Final Cut Pro for Mac.
Select ranges in one or more clips in the browser.
See Set multiple ranges in the browser in Final Cut Pro for Mac.
Select a range in a project in the timeline.
Note: To share just a portion of a project, you must make a range selection. A clip selection is not sufficient. You can use the I and O keys to set the range start and end points.
If you’re sharing a project that is set to use proxy media for playback, open it in the timeline, then click the View pop-up menu in the top-right corner of the viewer and choose Optimized/Original.
This ensures the highest quality in the exported file. When you choose this setting, Final Cut Pro uses optimized media to create the shared file. If optimized media doesn’t exist, the original media is used. For more information about optimized and proxy media, see Control playback quality in Final Cut Pro for Mac.
Do one of the following:
Choose File > Share > Export Image Sequence.
Click the Share button in the toolbar, then click Export Image Sequence.

Important: The Export Image Sequence destination doesn’t appear by default. To add it to your set of destinations and to the Share menu, choose File > Share > Add Destination, then double-click the Image Sequence destination. See Create share destinations in Final Cut Pro for Mac and Intro to Destinations settings in Final Cut Pro for Mac.
In the Share window that appears, do any of the following:

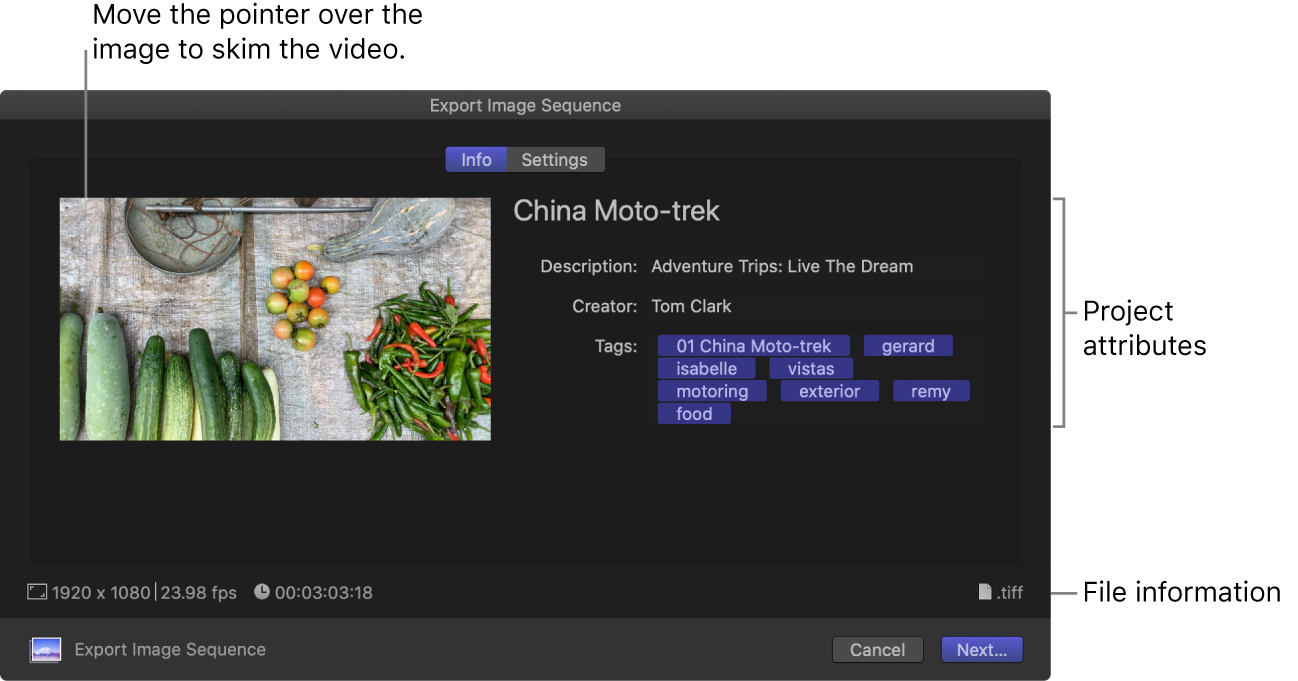
Move the pointer over the image to skim the video.
If you’re batch sharing (exporting multiple items), the image is replaced by a list of the items you’re exporting.
In the Info pane, view and modify project or clip attributes, such as the title and description.
See Change metadata for shared items in Final Cut Pro for Mac.
Important: By default, the title field lists the project or clip name. Changing the title does not change the project or clip name, which is the name used for the exported file.
At the bottom of the window, view information about the files that will be exported, including frame size, frame rate, and output file type.
Click Settings to confirm the export settings or make any necessary adjustments:
Export: Choose an output file type for the image sequence you’re exporting.
Scale image to preserve aspect ratio: Leave this checkbox selected unless your project uses a non-square pixel format (such as 1440 x 1080) and you want to use the exported image sequence in another video project with the same non-square pixel properties.
Burn in captions: If you added captions to your project, you can choose a caption language to burn in to the output media file.
Note: Burned-in captions are permanently visible in the output file and are not the same as embedded captions.
Click Next.
If you selected a single range, enter a name for the image sequence you’re sharing.
Choose a location for the exported files, then click Save.
The image sequence files are saved in a folder with the name you entered.
You can monitor the progress of the transcode in the Background Tasks window, and you can continue to work in Final Cut Pro while the file is transcoded.
When transcoding is complete, a notification appears. You can view and locate shared projects in the Share inspector. See View the status of shared items in Final Cut Pro for Mac.
Download this guide: Apple Books | PDF