Final Cut Pro User Guide
- Welcome
- What’s new
-
- Intro to effects
-
- Intro to transitions
- How transitions are created
- Add transitions and fades
- Quickly add a transition with a keyboard shortcut
- Set the default duration for transitions
- Delete transitions
- Adjust transitions in the timeline
- Adjust transitions in the inspector and viewer
- Merge jump cuts with the Flow transition
- Adjust transitions with multiple images
- Modify transitions in Motion
-
- Add storylines
- Use the precision editor
- Conform frame sizes and rates
- Use XML to transfer projects
- Glossary
- Copyright

Combine multiple effect masks in Final Cut Pro for Mac
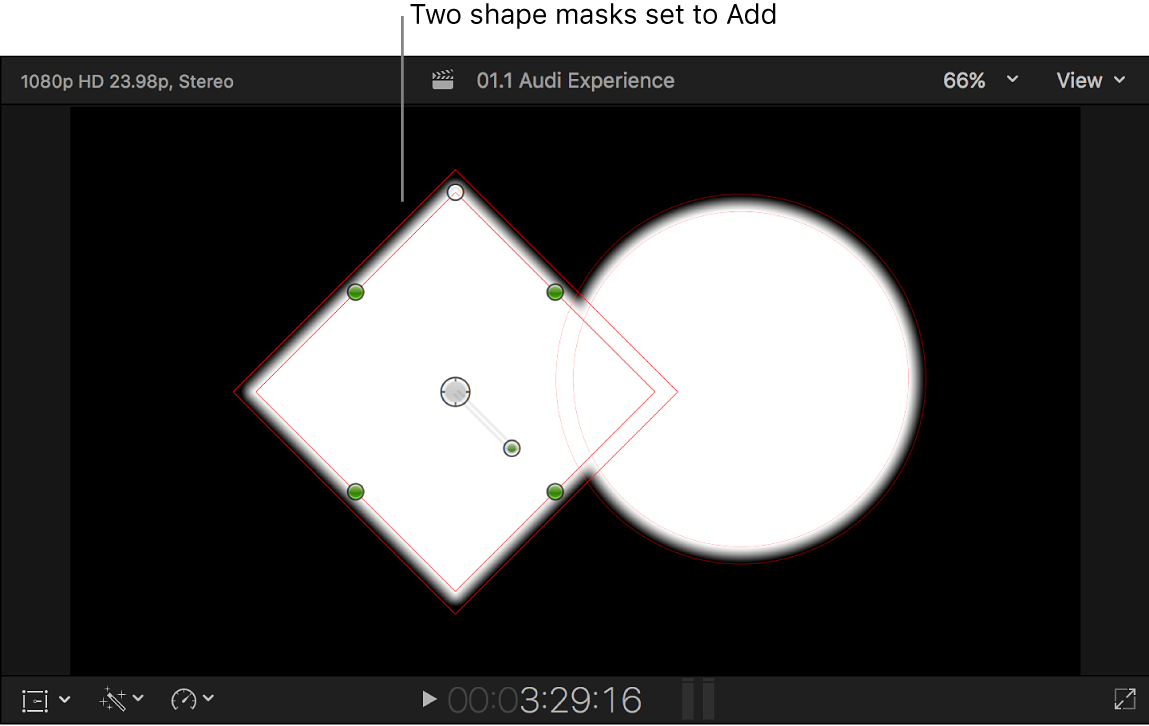
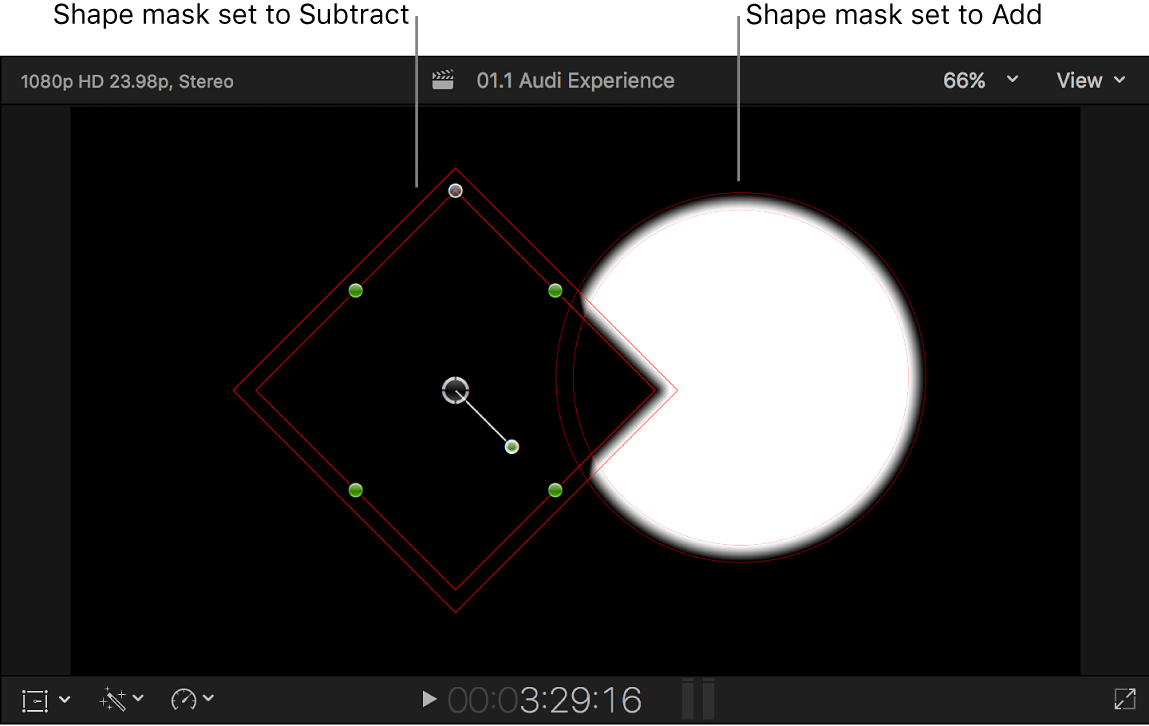
When defining the area of a clip effect, including a color correction, you may find that it’s impossible to create the mask shape you need using only one mask. For example, when masking a shape with a hole in it, you need at least two masks—one set to Add to mask the overall object, and a second set to Subtract to cut out the hole.
You can set masks to interact in different ways using mask blend modes. For example, you can add mask shapes together to create a combined mask, subtract a mask shape from other masks, and intersect masks.
Note: You can add an unlimited number of effects to a clip, but mask blend modes interact within a single effect—not across multiple effects.
Add, subtract, and intersect masks
Position the playhead in the timeline so that your clip appears in the viewer.
Add a video effect to the clip from the Effects browser.
You can add almost any kind of video clip effect, including the Color Correction effect. However, effects in the Keying and Masks categories in the Effects browser do not have the built-in effect masking tools described here.
If the Video inspector isn’t already open, do one of the following:
Choose Window > Show in Workspace > Inspector (or press Command-4).
Click the Inspector button on the right side of the toolbar.

Click the Video button at the top of the inspector.

In the Effects section of the Video inspector, add a shape mask or a color mask to the effect.
To add an additional mask to the effect, move the pointer over the effect name in the Video inspector and click the Apply Effect Masks button
 that appears to the right of the effect name.
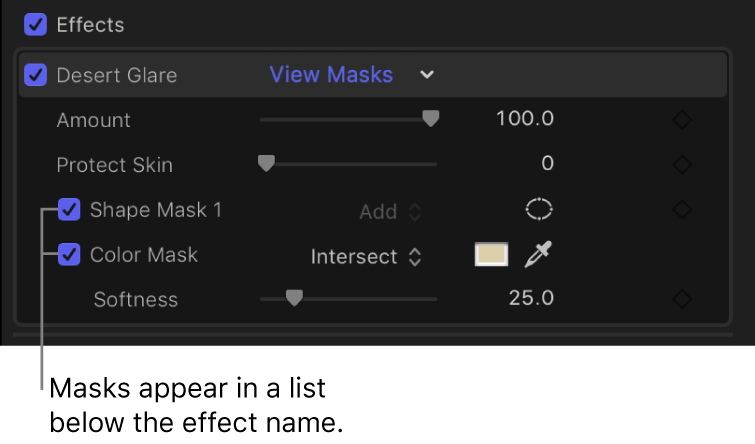
The new mask appears below the effect name in the Video inspector, with the blend mode to the right. By default, new shape masks appear at the top of the list in Add mode, and new color masks appear at the bottom of the list in Intersect mode.
Note: You can rearrange the order of the masks within a given effect. See Reorder masks, below.
To change how a mask interacts with other masks applied to the effect, click the pop-up menu next to the mask name and choose a blend mode:
Add: Applies the effect to the area inside the mask shape selection. If two or more masks are set to Add, the masks are merged.

Subtract: Removes the effect from the area inside the mask shape, including areas that overlap with other masks.

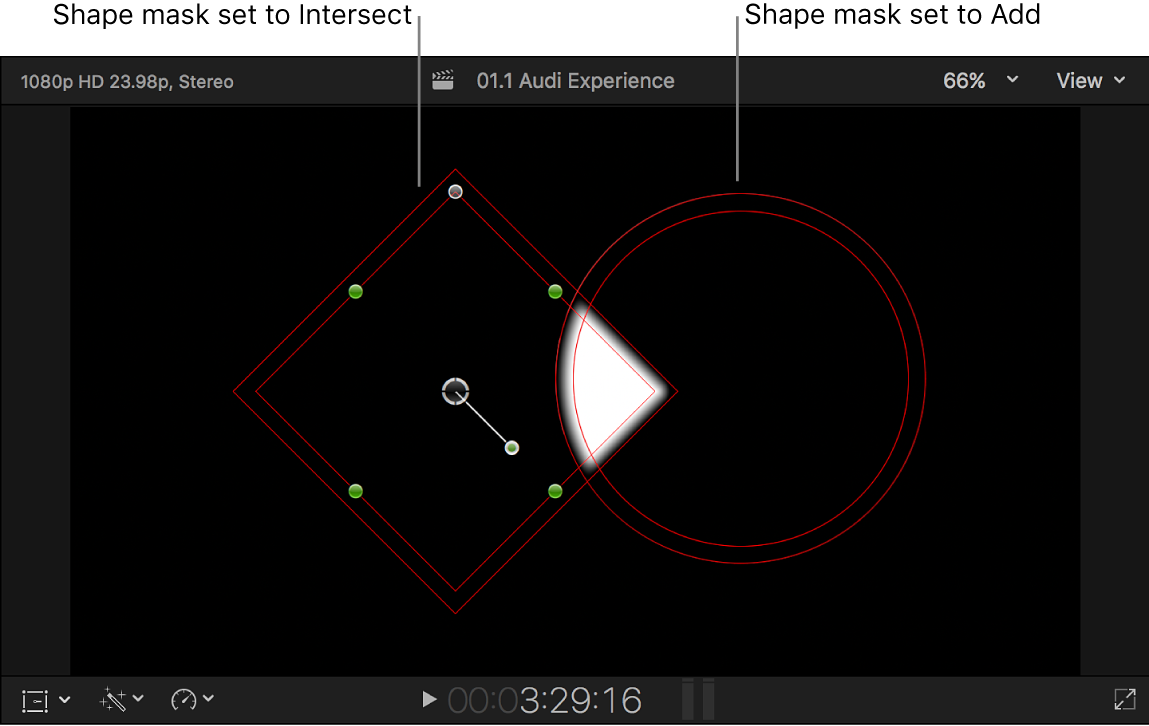
Intersect: Applies the effect to any area inside the mask shape that overlaps with other masks set to either Add or Intersect.

Note: At any time, you can invert all masks for a given effect. See Invert effect masks in Final Cut Pro for Mac.
Reorder masks
The order in which you apply shape and color masks can affect the final output. The Add, Subtract, and Intersect modes operate sequentially, starting at the top of the mask list in the Video inspector. By default, new shape masks appear at the top of the list in Add mode, and new color masks appear at the bottom of the list in Intersect mode. You can reorder masks to achieve the effect you want.
To apply two or more masks to an effect in Final Cut Pro, follow steps 1 through 6 in Add, subtract, and intersect masks, above.
The masks are listed below the effect name in the Video inspector.

To change the mask order, drag masks up or down in the list.

For an example of how you might use shape masks set to the Intersect blend mode to isolate one area of a color mask, see Add shape masks to a color mask in Final Cut Pro for Mac.
Download this guide: Apple Books | PDF