Create unmanaged nearby classes in Classroom
After your IT administrator has successfully configured the school’s Wi-Fi network to support Classroom, you can begin creating classes.
Note: To use nearby unmanaged classes with Classroom in your organization, make sure “Use unmanaged nearby classes in Classroom” is turned on. To use classes synced with Apple School Manager, “Use unmanaged nearby classes in Classroom” should remain off. See Turn on user access to specific privacy and security features in the Apple School Manager User Guide.
Enter your information and create your first class
Open the Classroom app
 on your Mac or iPad, then do one of the following:
If this is your first time using Classroom, select Continue, enter the name you want your students to see (for example, “Moria Dawson”), select the image icon to take or choose a photo, then select Done.
If you’ve created your teacher name already, proceed to step 2.
Select Create Class, then enter the name for your class and an optional description. Select an icon and background color for that class, then select Create.
Invite students to join your class
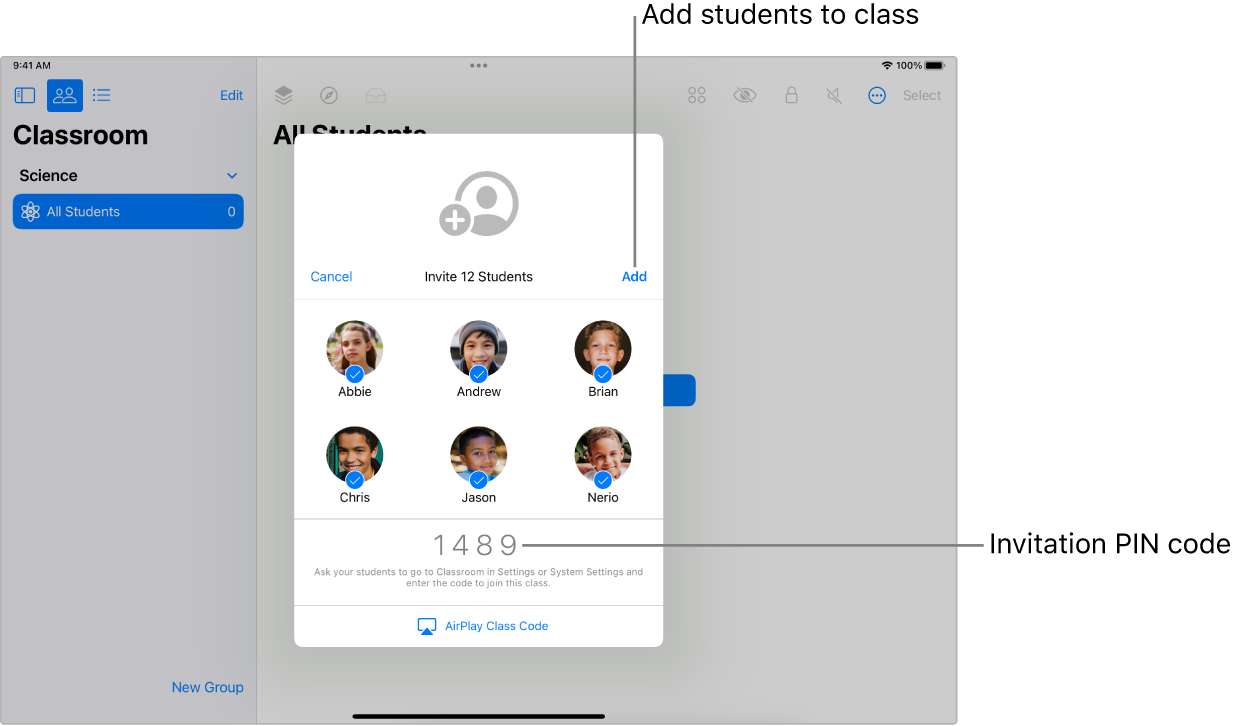
Your unmanaged nearby advertised class is ready for enrollment, and a student can browse for that class by choosing Settings > Classroom on their iPad. Students add the class by entering a four-digit invitation code that you provided. A student can join more than one class—by the same or different teachers—making it easy for students to move from room to room with their iPad.

If you’re not already in the class, select the class, select
 , then select Invite
  .
.Note: It may take up to 10 seconds for the class to appear for nearby students.
Ask your students to add the class:
On an iPad: Select Settings > Classroom, and tap Add Class name.
On a Mac with macOS 13 or later: Select System Settings > Classroom, and select Add Class name.
On a Mac with macOS 12 or earlier: Select System Preferences > Classroom, and select Add Class name.
If your students have a Me Card in the Contacts app, they can use or change their name and photo.
When you’re ready for students to join, display the class invitation code on the Apple TV for all students to see.
After a student adds the class, that student appears in the window. A checkbox appears next to the students’ names, indicating they’re going to be part of this class.
Review the list of students and deselect the ones you don’t want in the class, then select Add.
You can add more students at any time.
After you have students in your class, you can now manage the class experience. See the following: