Edit photos and videos on iPad
Use the tools in the Photos app ![]() to edit photos and videos on your iPad. When you use iCloud Photos, any edits you make are saved across all your devices.
to edit photos and videos on your iPad. When you use iCloud Photos, any edits you make are saved across all your devices.
See Use iCloud Photos on iPad.
Adjust light and color
Tap a photo or video thumbnail to view it in full screen.

Tap Edit, then choose an editing effect such as Exposure, Brilliance, or Highlights from the options on the right.
Drag the slider to adjust the effect.
The level of adjustment you make for each effect is displayed by the outline around the button, so you can see at a glance which effects have been increased or decreased.
Tap the effect button to see the shot before and after the effect was applied (or tap the photo to toggle between the edited version and the original).
Tap Done to save your edits, or if you don’t like your changes, tap Cancel, then tap Discard Changes.
Tip: Tap ![]() to automatically edit your photos and videos with effects.
to automatically edit your photos and videos with effects.
Apply filter effects
Tap a photo or video thumbnail to view it in full screen.
Tap Edit, then tap
 on the left side of the screen.
Choose a filter on the right side of the screen, then drag the slider to adjust the effect.
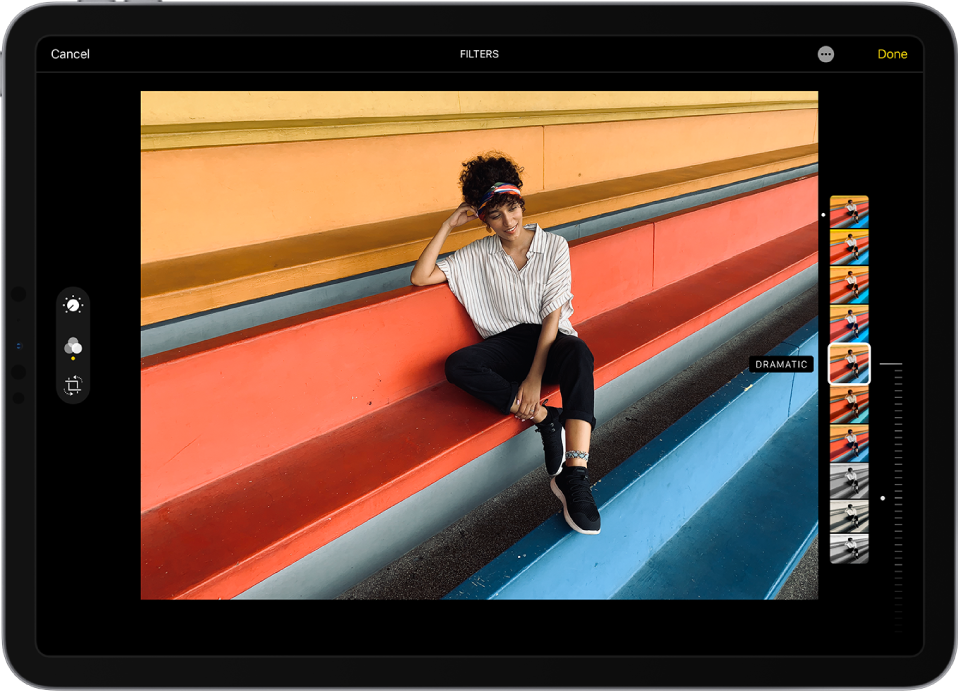
To compare the edited photo to the original, tap the photo.
Tap Done to save your edits, or if you don’t like your changes, tap Cancel, then tap Discard Changes.
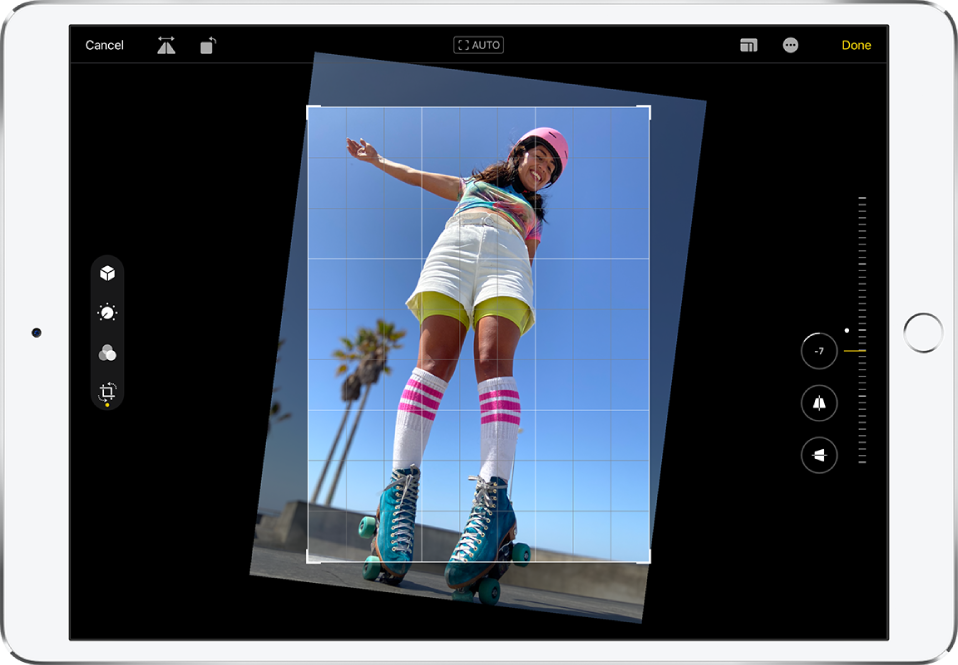
Crop, rotate, or flip a photo or video
Tap a photo or video thumbnail to view it in full screen.
Tap Edit, tap
 on the left side of the screen, then do any of the following:
Crop manually: Drag the rectangle corners to enclose the area you want to keep in the photo, or you can pinch the photo open or closed.
Crop to a standard preset ratio: Tap
 , then choose an option at the bottom of the screen.
Rotate: Tap
 to rotate the photo 90 degrees.
Flip: Tap
 to flip the image horizontally.
Tap Done to save your edits, or if you don’t like your changes, tap Cancel, then tap Discard Changes.
Straighten and adjust perspective
Tap a photo or video thumbnail to view it in full screen.
Tap Edit, tap
on the left side of the screen, then select an effect button on the right side of the screen.Drag the slider to adjust the effect.
The level of adjustment you make for each effect is displayed by the outline around the button, so you can see at a glance which effects have been increased or decreased. Tap the button to toggle between the edited effect and the original.
Tap Done to save your edits, or if you don’t like your changes, tap Cancel, then tap Discard Changes.
Revert an edited photo
After you edit a photo and save your changes, you can revert to the original image.
Open the edited image, tap Edit, then tap Revert.
Tap Revert to Original.
Mark up a photo
Tap a photo to view it in full screen.
Tap Edit, then tap
 .
.Tap Markup
 .
.Annotate the photo using the different drawing tools and colors. Tap
 to add shapes, text, or even your signature.
Tap Done to save your edits, or if you don’t like your changes, tap Cancel.
Trim a video
Open the video, then tap Edit.
Drag either end of the frame viewer to adjust the length, then tap Done.
Tap Save Video to save only the trimmed video, or Save Video as New Clip to save both versions of the video.
To undo the trim after you save, tap Edit, then tap Revert.
Note: A video saved as a new clip can’t be reverted to the original.
Set the slow-motion section of a video shot in Slo-mo
Open a video shot in Slo-mo, then tap Edit.
Drag the white vertical bars beneath the frame viewer to set where the video is played in slow motion.
Tap Done to save your edits, or if you don’t like your changes, tap Cancel.
Use other photography apps to edit your photos
Photo app extensions can provide special editing options. See the Apple Support article How to edit with third-party apps and extensions in Photos.