Final Cut Pro User Guide
- Welcome
- What’s new
-
- Intro to effects
-
- Intro to transitions
- How transitions are created
- Add transitions and fades
- Quickly add a transition with a keyboard shortcut
- Set the default duration for transitions
- Delete transitions
- Adjust transitions in the timeline
- Adjust transitions in the inspector and viewer
- Merge jump cuts with the Flow transition
- Adjust transitions with multiple images
- Modify transitions in Motion
-
- Add storylines
- Use the precision editor
- Conform frame sizes and rates
- Use XML to transfer projects
- Glossary
- Copyright

Organize the timeline with audio lanes in Final Cut Pro for Mac
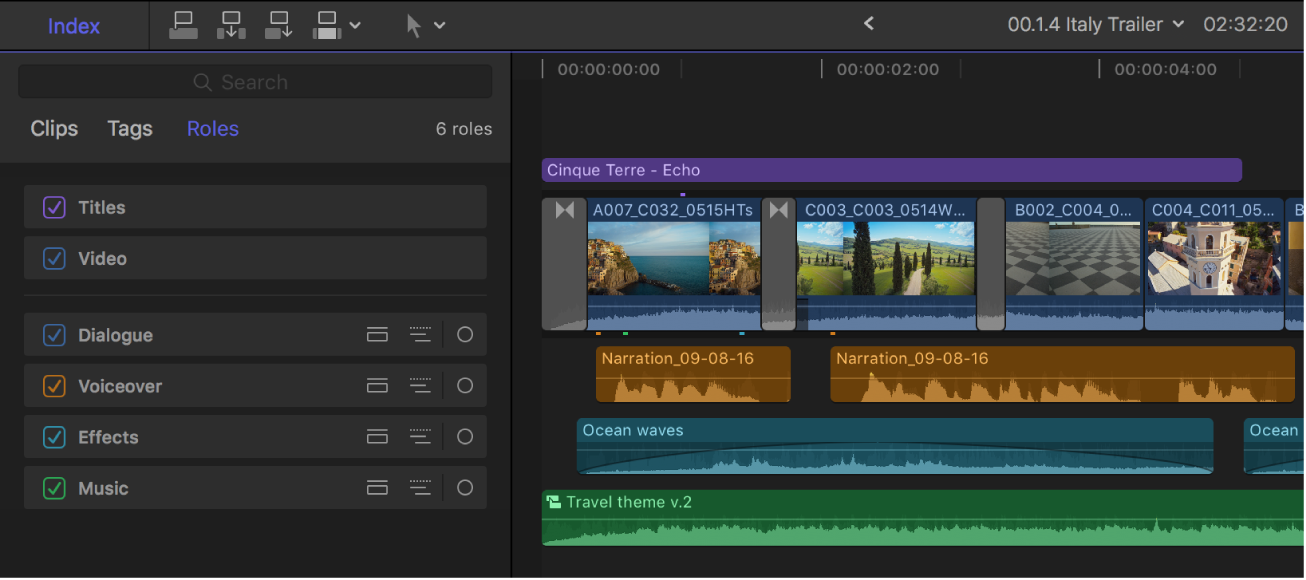
With a few clicks, you can arrange audio clips into audio lanes in the timeline, based on their role assignments. Audio lanes appear as separate, visually distinct layers in the timeline. This view organizes audio clips visually and provides reference points that make editing easier and more efficient.
Organizing the timeline in this way does not affect the content of your project or how it plays back in the viewer—it simply adjusts the timeline appearance for your editing convenience.

Note: When you display audio roles in separate lanes in the timeline, any clips that contain both audio and video are expanded to show audio and video separately.
In Final Cut Pro, open the Roles pane of the timeline index by doing one of the following:
Click the Index button in the top-left corner of the timeline (or press Shift-Command-2), then click Roles at the top of the timeline index.
Choose View > Timeline Index > Roles.
Do one of the following:
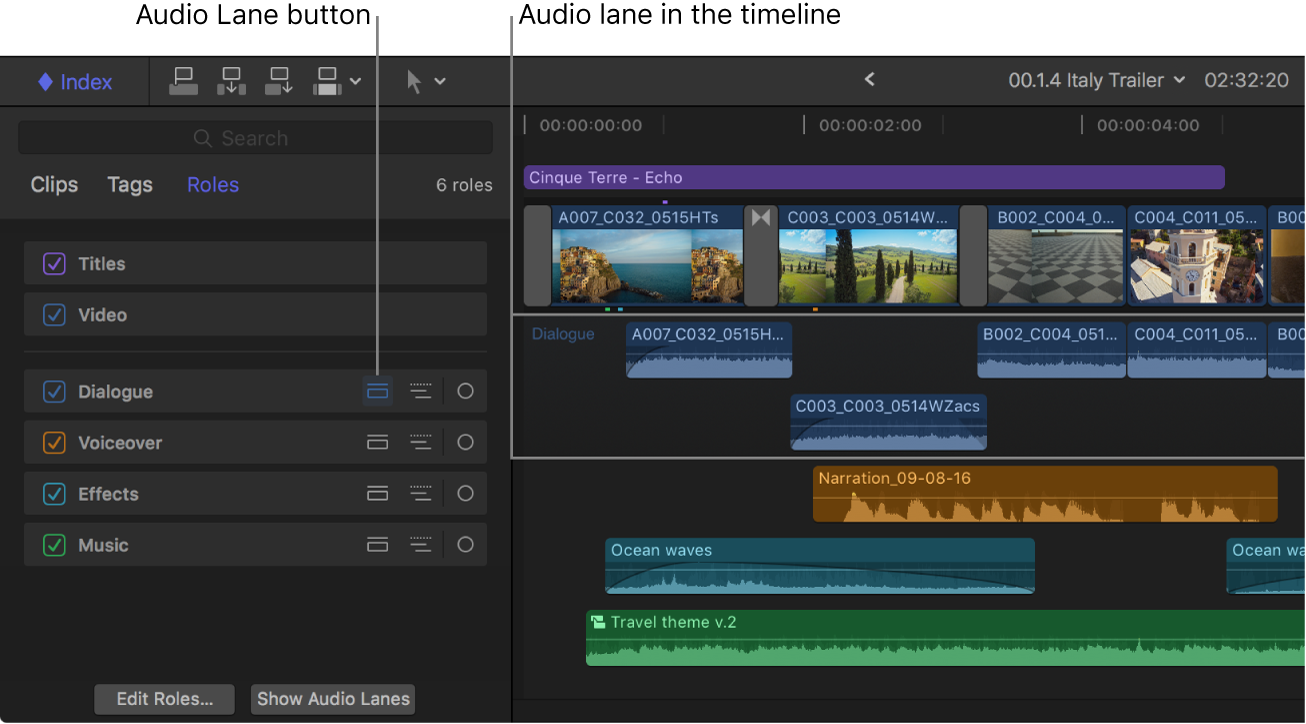
Show an audio role in a separate lane: In the Roles pane, click the Audio Lane button
 to the right of a role.
Audio clips with that role assigned appear in a separate lane in the timeline. A text label appears at the left side of the lane in the timeline, identifying the role.

Repeat this step for each role that you want to show in a separate lane.
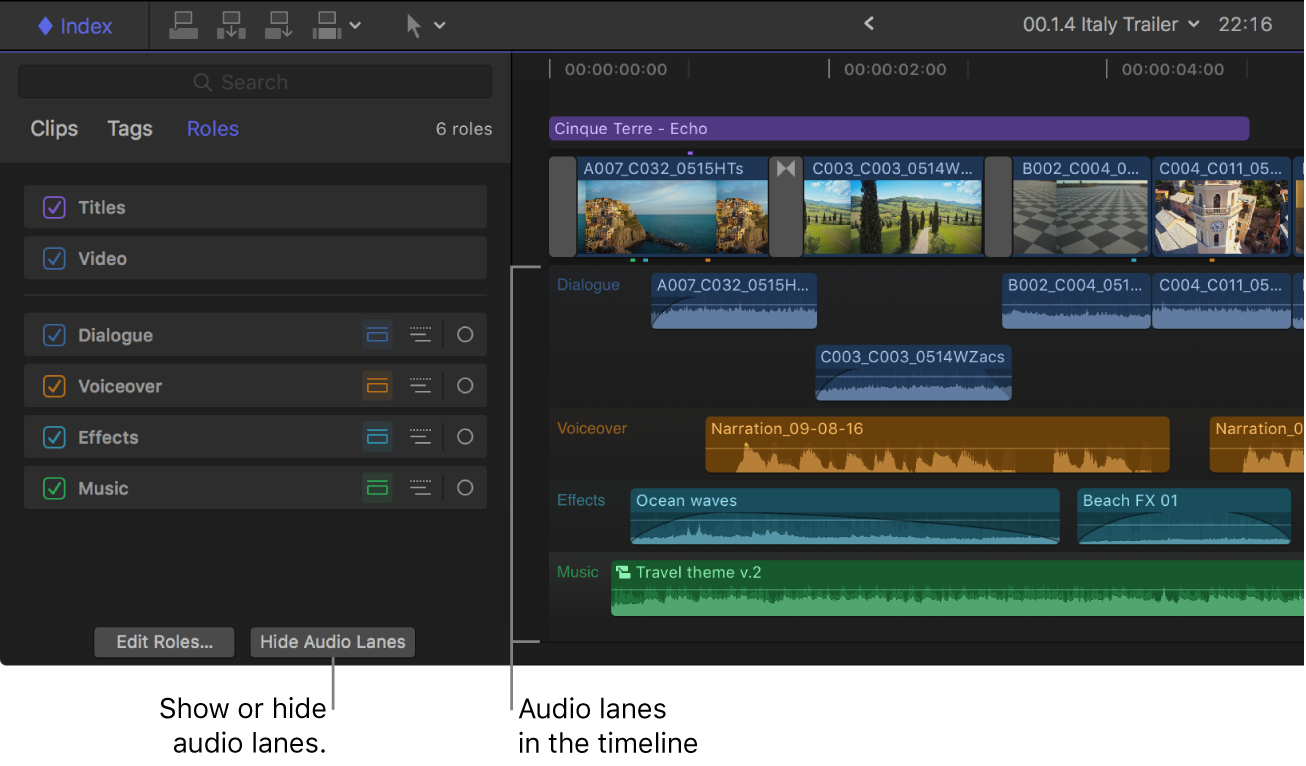
Show all audio roles in separate lanes: Click Show Audio Lanes at the bottom of the timeline index.
Separate lanes appear in the timeline for each role, with audio clips in the lanes of their assigned roles. A text label appears at the left side of each audio lane, identifying the role.

The lanes in the timeline appear in the order you define in the timeline index. See Reorder audio roles in Final Cut Pro for Mac.
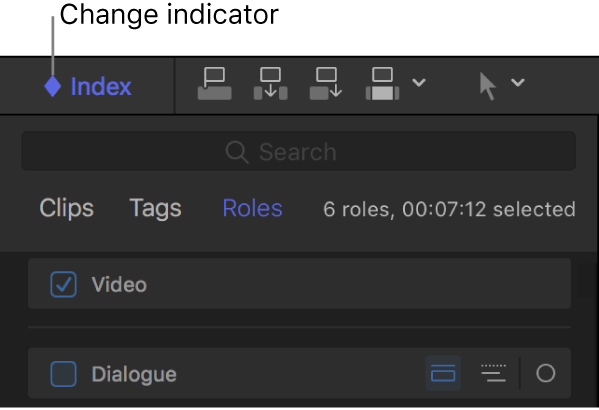
To help you keep track of the current timeline organization, a diamond-shaped change indicator appears in the Index button in the top-left corner of the timeline whenever you change any roles settings from their default states. These roles changes include showing roles and subroles in separate audio lanes, focusing the timeline on a specific role, and turning off roles or subroles.

Note: You can also customize the display of clips in the timeline by changing the clip appearance and height, and you can choose whether to view clips by name or role. See Adjust timeline clip appearance in Final Cut Pro for Mac.
Download this guide: Apple Books | PDF