Final Cut Pro User Guide for Mac
- Welcome
- What’s new
-
- Intro to importing media
- If it’s your first import
- Organize files during import
-
- Import from Image Playground
- Import from iMovie for macOS
- Import from iMovie for iOS or iPadOS
- Import from Final Cut Pro for iPad
- Import from Final Cut Camera
- Import from Photos
- Import from Music
- Import from Apple TV
- Import from Motion
- Import from GarageBand and Logic Pro
- Import using workflow extensions
- Record into Final Cut Pro
- Memory cards and cables
- Supported media formats
-
- Intro to effects
-
- Intro to transitions
- How transitions are created
- Add transitions and fades
- Quickly add a transition with a keyboard shortcut
- Set the default duration for transitions
- Delete transitions
- Adjust transitions in the timeline
- Adjust transitions in the inspector and viewer
- Merge jump cuts with the Flow transition
- Adjust transitions with multiple images
- Modify transitions in Motion
- Add adjustment clips
-
- Add storylines
- Use the precision editor
- Conform frame sizes and rates
- Use XML to transfer projects
-
- Intro to sharing projects
- Share to Apple devices
- Share on the web
- Send a video frame to Pixelmator Pro
- Share in email
- Share stereo or spatial video
- Batch sharing
- Share using Compressor
- Create share destinations
- Change metadata for shared items
- View the status of shared items
- Speed up exports with simultaneous processing
- Glossary
- Copyright and trademarks
Create multilingual closed captions in Final Cut Pro for Mac
The easiest way to create closed captions for a project in multiple languages is to duplicate a finished set of closed captions and then translate the closed captions in the duplicate set. This way, you can place the closed captions and set their timing once, and then reuse that initial work as many times as necessary.

In Final Cut Pro, complete the closed captions for the entire project in the first language subrole.
Select all the closed captions that you created.
Tip: To select all the closed captions in a language subrole, select any closed caption, then press Command-A. To select everything in the timeline, press Command-A again.
Do one of the following:
Choose Edit > Closed Captions > Duplicate Captions to New Language, then choose a language from the submenu.
Control-click the selected closed captions, choose Duplicate Captions to New Language, then choose a language from the submenu.
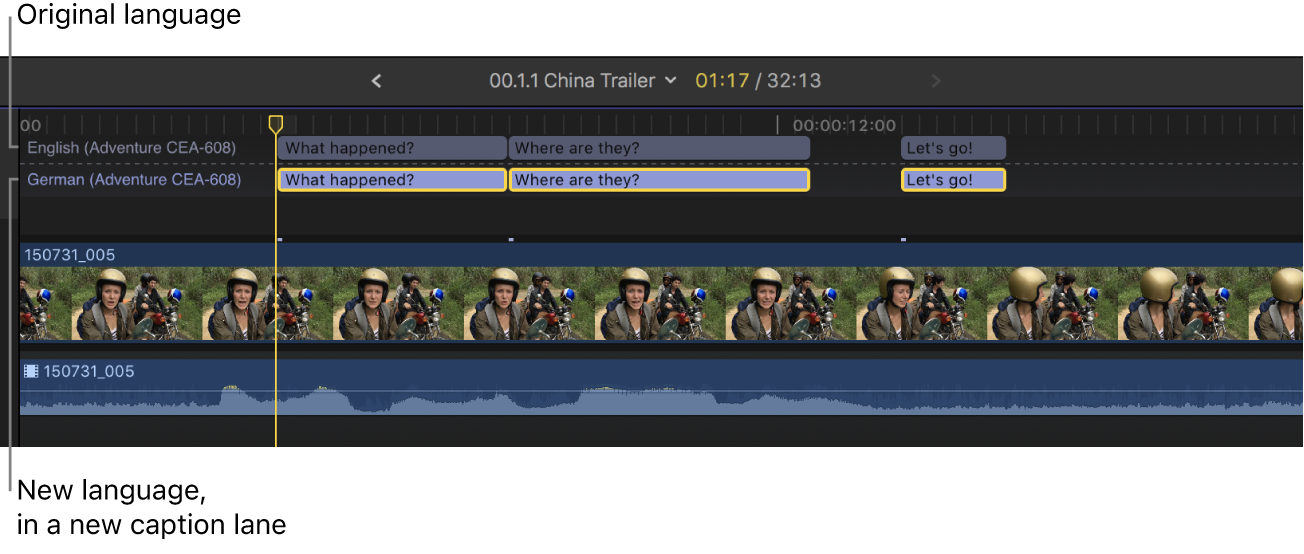
The new language appears as a new closed caption lane in the timeline.
Note: Choosing a language does not affect what kind of characters can be typed into the closed captions. Additional steps may be required for some languages. See Write in another language on Mac in the Mac User Guide.
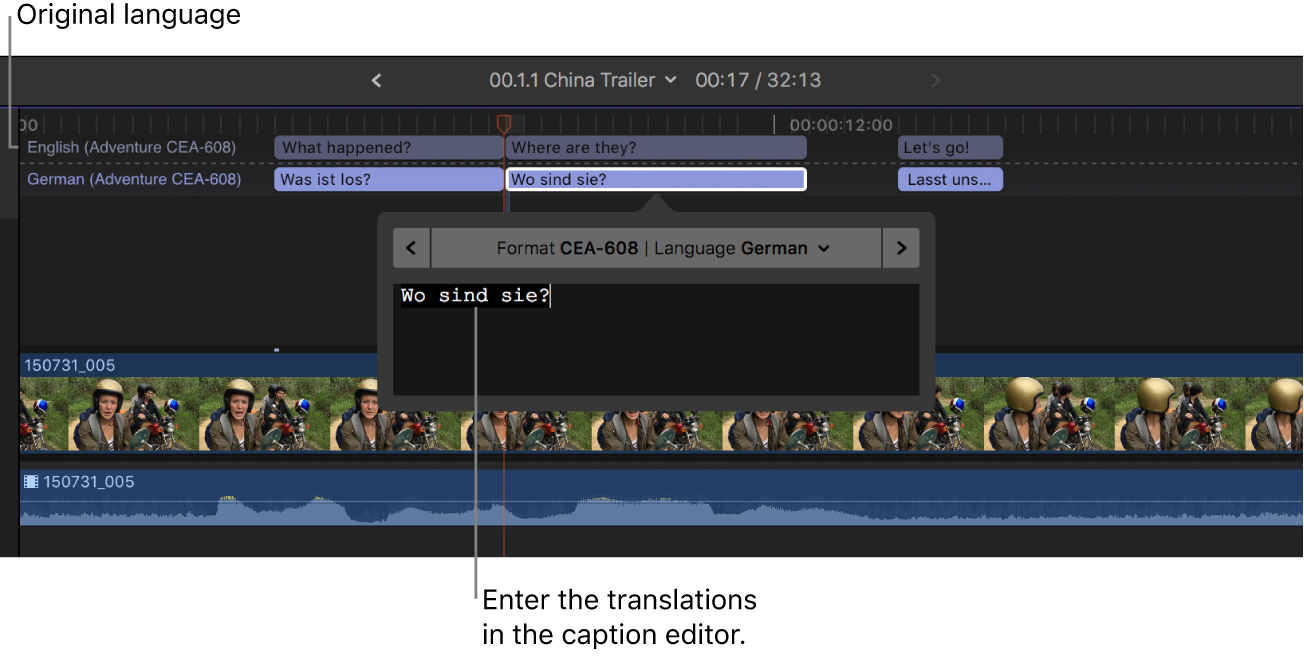
To translate the duplicate closed captions, double-click a closed caption (or select it and press Control-Option-C), then type the translation in the closed caption editor.
Do any of the following:
Navigate between closed captions: Click the arrows on either side of the closed caption editor (or press Command-Right Arrow or Command-Left Arrow).
Note: When the closed caption editor is open, many single-key keyboard shortcuts (such as J, K, L, I, O, and Space bar) are interpreted as text characters rather than as shortcuts. To use these shortcuts in the closed caption editor, add the Control key. For example, to play in reverse when the closed caption editor is open, press Control-J.
Adjust a closed caption’s duration: Trim it by dragging its start point or end point. See Arrange and trim closed caption clips in the timeline.
You can also use powerful trimming techniques with closed caption clips. See Cut clips in two and Extend or shorten clips.
Adjust a closed caption’s sync with the clip it’s connected to: Drag the closed caption left or right in the timeline. (When you drag a closed caption clip, it overwrites adjacent captions.)


Download this guide: PDF