Motion User Guide
- Welcome
-
- Intro to basic compositing
-
- Intro to transforming layers
-
- Intro to transforming layers in the canvas
- Transform layer properties in the canvas
- Transform tools
- Change layer position, scale, or rotation
- Move a layer’s anchor point
- Add a drop shadow to a layer
- Distort or shear a layer
- Crop a layer
- Modify shape or mask points
- Transform text glyphs and other object attributes
- Align layers in the canvas
- Transform layers in the HUD
- Transform 2D layers in 3D space
-
- Intro to behaviors
- Behaviors versus keyframes
-
- Intro to behavior types
-
- Intro to Parameter behaviors
- Audio behavior
- Average behavior
- Clamp behavior
- Custom behavior
- Add a Custom behavior
- Exponential behavior
- Link behavior
- Logarithmic behavior
- MIDI behavior
- Add a MIDI behavior
- Negate behavior
- Oscillate behavior
- Create a decaying oscillation
- Overshoot behavior
- Quantize behavior
- Ramp behavior
- Randomize behavior
- Rate behavior
- Reverse behavior
- Stop behavior
- Track behavior
- Wriggle behavior
-
- Intro to Simulation behaviors
- Align to Motion behavior
- Attracted To behavior
- Attractor behavior
- Drag behavior
- Drift Attracted To behavior
- Drift Attractor behavior
- Edge Collision behavior
- Gravity behavior
- Orbit Around behavior
- Random Motion behavior
- Repel behavior
- Repel From behavior
- Rotational Drag behavior
- Spring behavior
- Vortex behavior
- Wind behavior
- Additional behaviors
-
- Intro to using generators
- Add a generator
-
- Intro to image generators
- Caustics generator
- Cellular generator
- Checkerboard generator
- Clouds generator
- Color Solid generator
- Concentric Polka Dots generator
- Concentric Shapes generator
- Gradient generator
- Grid generator
- Japanese Pattern generator
- Lens Flare generator
- Manga Lines generator
- Membrane generator
- Noise generator
- One Color Ray generator
- Op Art 1 generator
- Op Art 2 generator
- Op Art 3 generator
- Overlapping Circles generator
- Radial Bars generator
- Soft Gradient generator
- Spirals generator
- Spiral Drawing generator
- Use Spiral Drawing onscreen controls
- Star generator
- Stripes generator
- Sunburst generator
- Truchet Tiles generator
- Two Color Ray generator
- Save a modified generator
-
- Intro to filters
- Browse and preview filters
- Apply or remove filters
-
- Intro to filter types
-
- Intro to Color filters
- Brightness filter
- Channel Mixer filter
- Color Balance filter
- Example: Color-balance two layers
- Color Curves filter
- Use the Color Curves filter
- Color Reduce filter
- Color Wheels filter
- Use the Color Wheels filter
- Colorize filter
- Contrast filter
- Custom LUT filter
- Use the Custom LUT filter
- Gamma filter
- Gradient Colorize filter
- HDR Tools filter
- Hue/Saturation filter
- Hue/Saturation Curves filter
- Use the Hue/Saturation Curves filter
- Levels filter
- Negative filter
- OpenEXR Tone Map filter
- Sepia filter
- Threshold filter
- Tint filter
-
- Intro to Distortion filters
- Black Hole filter
- Bulge filter
- Bump Map filter
- Disc Warp filter
- Droplet filter
- Earthquake filter
- Fisheye filter
- Flop filter
- Fun House filter
- Glass Block filter
- Glass Distortion
- Insect Eye filter
- Mirror filter
- Page Curl filter
- Poke filter
- Polar filter
- Refraction filter
- Ring Lens filter
- Ripple filter
- Scrape filter
- Sphere filter
- Starburst filter
- Stripes filter
- Target filter
- Tiny Planet filter
- Twirl filter
- Underwater filter
- Wave filter
-
- Intro to Stylize filters
- Add Noise filter
- Bad Film filter
- Bad TV filter
- Circle Screen filter
- Circles filter
- Color Emboss filter
- Comic filter
- Crystallize filter
- Edges filter
- Extrude filter
- Fill filter
- Halftone filter
- Hatched Screen filter
- Highpass filter
- Indent filter
- Line Art filter
- Line Screen filter
- MinMax filter
- Noise Dissolve filter
- Pixellate filter
- Posterize filter
- Relief filter
- Slit Scan filter
- Slit Tunnel filter
- Texture Screen filter
- Vignette filter
- Wavy Screen filter
- Publish filter parameters to Final Cut Pro
- Using filters on alpha channels
- Filter performance
- Save custom filters
-
- Intro to 3D objects
- Add a 3D object
- Move and rotate a 3D object
- Reposition a 3D object’s anchor point
- Exchange a 3D object file
- 3D object intersection and layer order
- Using cameras and lights with 3D objects
- Save custom 3D objects
- Guidelines for working with 3D objects
- Working with imported 3D objects
-
- Intro to 360-degree video
- 360-degree projects
- Create 360-degree projects
- Add 360-degree video to a project
- Create a tiny planet effect
- Reorient 360-degree media
- Creating 360-degree templates for Final Cut Pro
- 360-degree-aware filters and generators
- Export and share 360-degree projects
- Guidelines for better 360-degree projects
-
-
- Intro to preferences and shortcuts
-
- Intro to Keyboard shortcuts
- Use function keys
- General keyboard shortcuts
- Audio list keyboard shortcuts
-
- Tools keyboard shortcuts
- Transform tool keyboard shortcuts
- Select/Transform tool keyboard shortcuts
- Crop tool keyboard shortcuts
- Edit Points tool keyboard shortcuts
- Edit shape tools keyboard shortcuts
- Pan and Zoom tools keyboard shortcuts
- Shape tools keyboard shortcuts
- Bezier tool keyboard shortcuts
- B-Spline tool keyboard shortcuts
- Paint Stroke tool keyboard shortcuts
- Text tool keyboard shortcuts
- Shape mask tools keyboard shortcuts
- Bezier Mask tool keyboard shortcuts
- B-Spline Mask tool keyboard shortcuts
- Transport control keyboard shortcuts
- View option keyboard shortcuts
- HUD keyboard shortcuts
- Inspector keyboard shortcuts
- Keyframe Editor keyboard shortcuts
- Layers keyboard shortcuts
- Library keyboard shortcuts
- Media list keyboard shortcuts
- Timeline keyboard shortcuts
- Keyframing keyboard shortcuts
- Shape and Mask keyboard shortcuts
- 3D keyboard shortcuts
- Miscellaneous keyboard shortcuts
- Touch Bar shortcuts
- Move assets to another computer
- Work with GPUs
- Glossary
- Copyright

Modify 3D text depth and weight in Motion
One of the most obvious differences between 2D text and 3D text is that 3D text has depth.
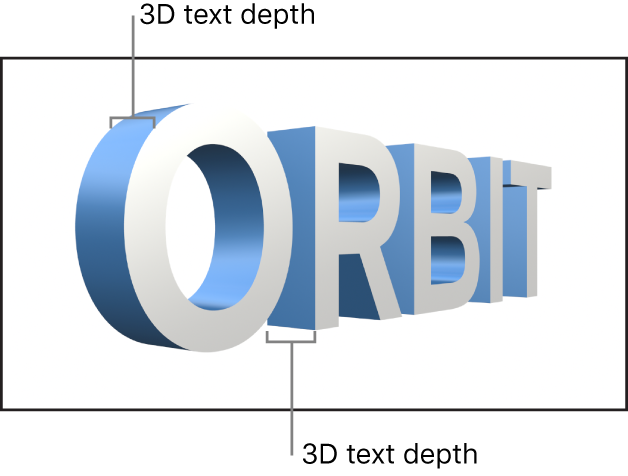
You can adjust text depth, as well as a number of other 3D text attributes (such as text weight, edge style, and corner style) in the Appearance pane of the Text Inspector.
Adjust 3D text depth
In the Layers list, Timeline, or canvas in Motion, select a 3D text object.
Do one of the following:
In the 3D Text section of the Text Inspector’s Appearance pane, drag the Depth slider left or right.
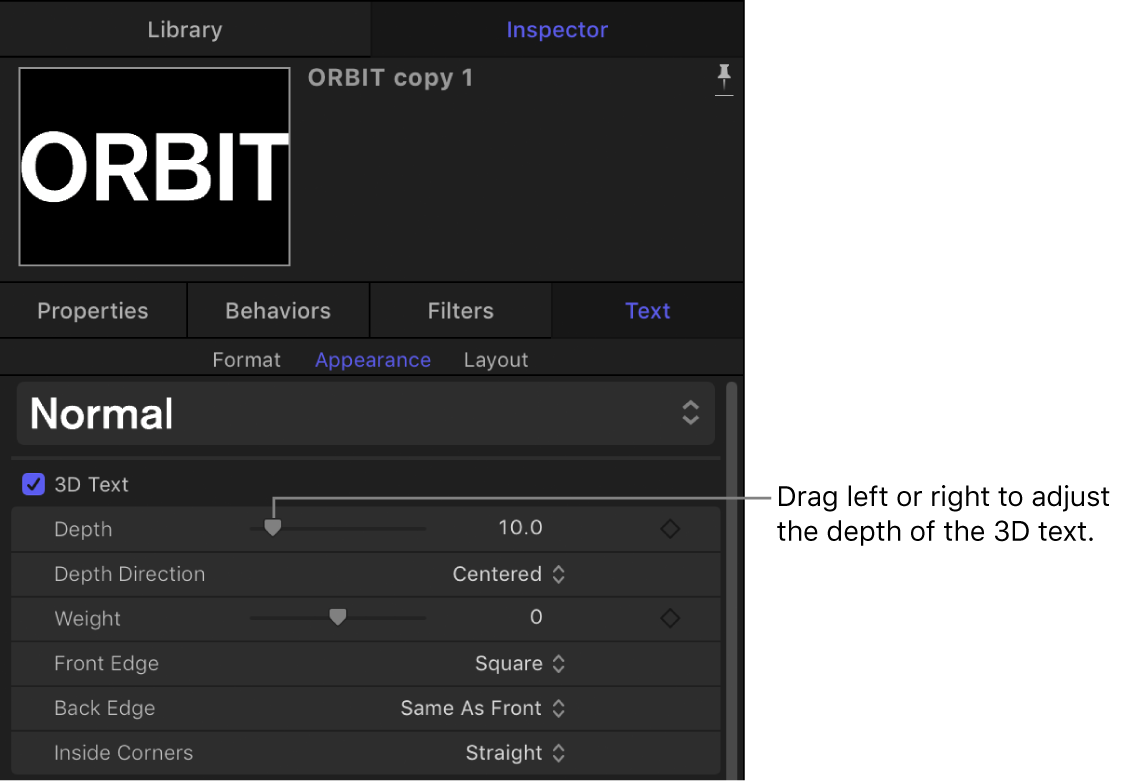
In the HUD (press D if it’s not visible), drag the Depth slider left or right.
Change the direction of 3D text depth
You can set 3D text depth to extrude in different directions: forwards, backwards, or centered on the original text plane.
In the Layers list, Timeline, or canvas in Motion, select a 3D text object.
In the 3D Text section of the Text Inspector’s Appearance pane, click the Depth Direction pop-up menu, then choose any of the following:
Backward: The text object is extruded backwards from the plane where the text was initially added.
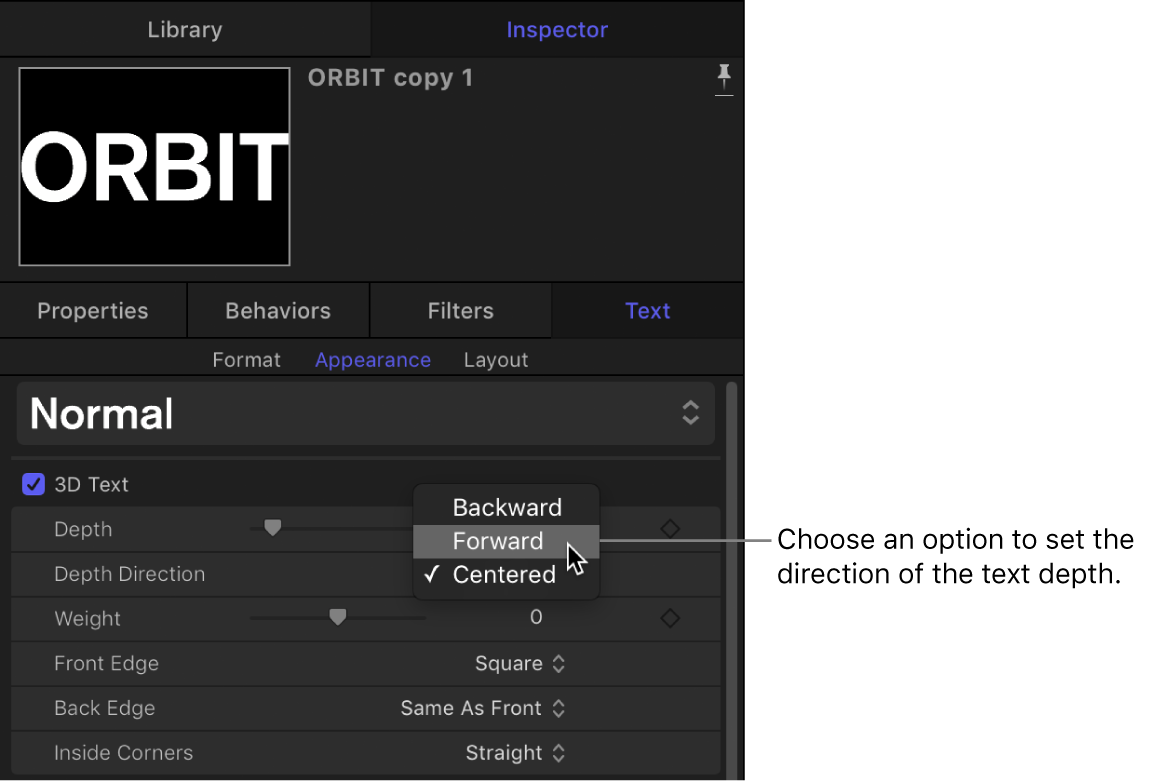
Forward: The text object is extruded forwards from the plane where the text was initially added.
Centered: The text object is extruded equally forward and backward from the plane where the text was initially added.
To see the resulting effect, drag the Depth slider in the Appearance pane or HUD.
Tip: Setting an extrusion direction and then keyframing the Depth parameter lets you animate text so that it appears to extrude forward or backward or in both directions over time.
Adjust 3D text weight
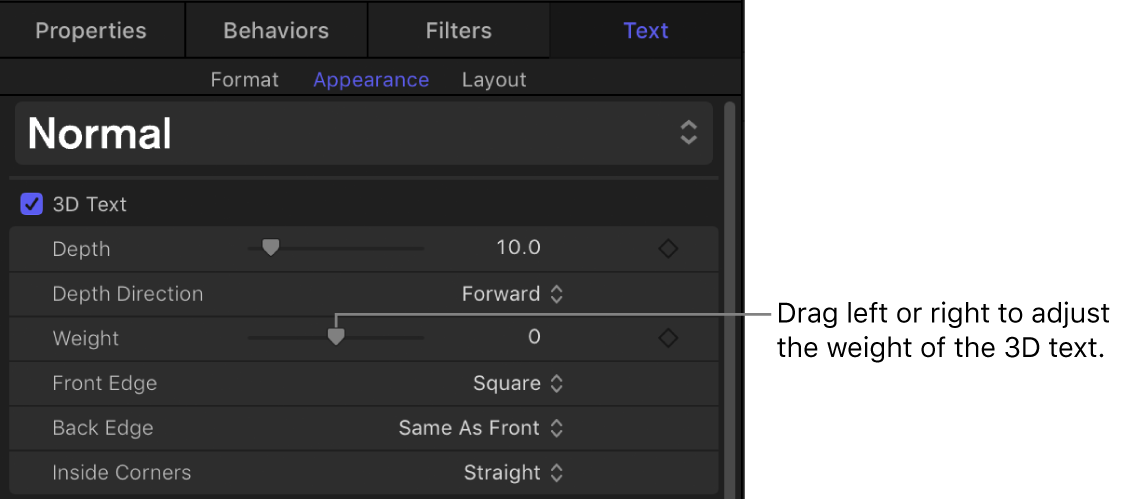
You can adjust 3D text to appear thicker or thinner. Whereas increasing the Size value in the Format pane makes text larger by substituting a larger version of the font, increasing the Weight value uniformly thickens all the lines and serifs that comprise the letters in the text object.

In the Layers list, Timeline, or canvas in Motion, select a 3D text object.
In the 3D Text section of the Text Inspector’s Appearance pane, drag the Weight slider to the left to make the text appear thinner, or to the right to make it appear thicker.
Set the style of 3D text edges
The places where the different facets of a 3D text meet are called edges. You can add bevels, ridges, rings, and other shapes to customize the appearance of these edges.
By default, the back edge of 3D text (between the back facet and the sides) is identical to the front edge (between the front facet and the sides). However, you can set the front and back edges to different edge shapes.
In the Layers list, Timeline, or canvas in Motion, select a 3D text object.
In the 3D Text section of the Text Inspector’s Appearance pane, click the Front Edge pop-up menu, then choose an edge style.
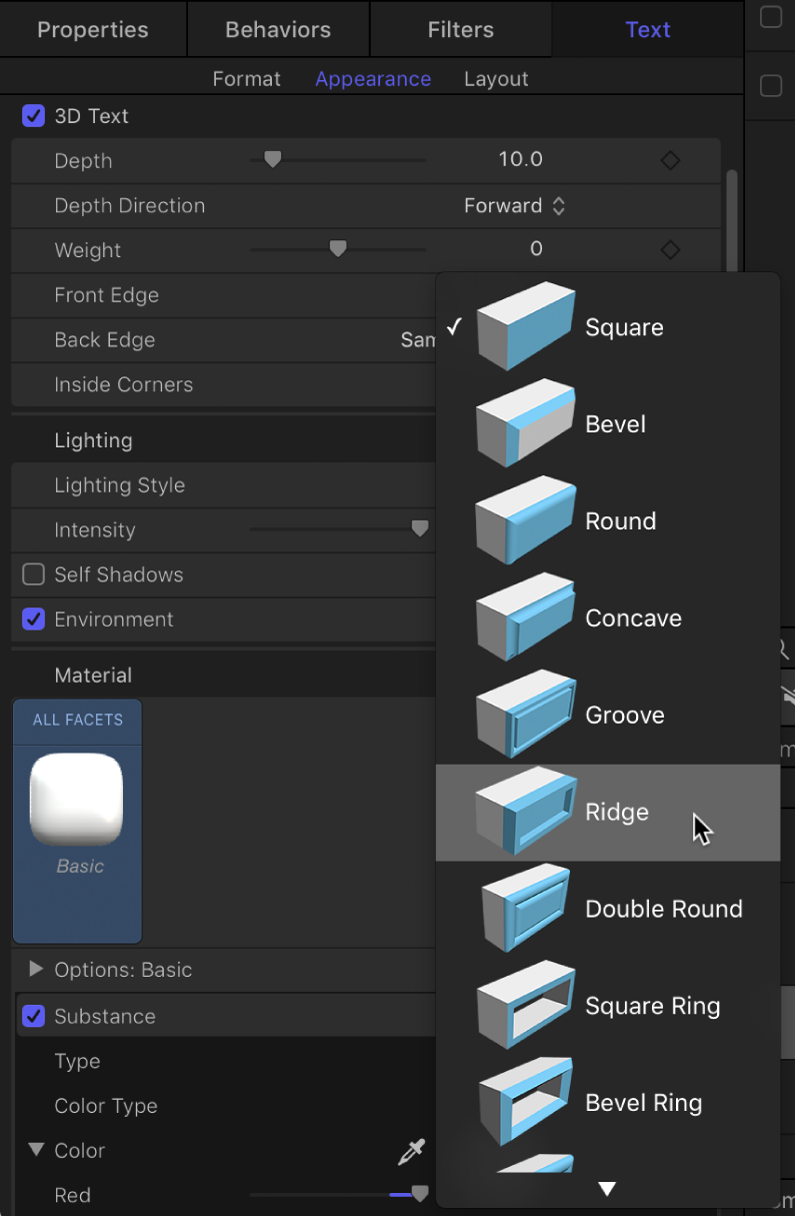
Click the Back Edge pop-up menu, then choose an edge style.
If you choose Same As Front, the style you chose in step 2 is applied to the back edge of the 3D text object.
Adjust the size of 3D text edges
After you change the style of the front edge or back edge of a 3D text object to anything other than square, you can also adjust the size of that edge. If the back edge is set to something other than Same As Front (or Square), you can adjust the size of the back edge independently from that of the front.

In the Layers list, Timeline, or canvas in Motion, select a 3D text object.
In the 3D Text section of the Text Inspector’s Appearance pane, click the Front Edge pop-up menu, then choose a setting other than Square.
The Front Edge Size slider appears.
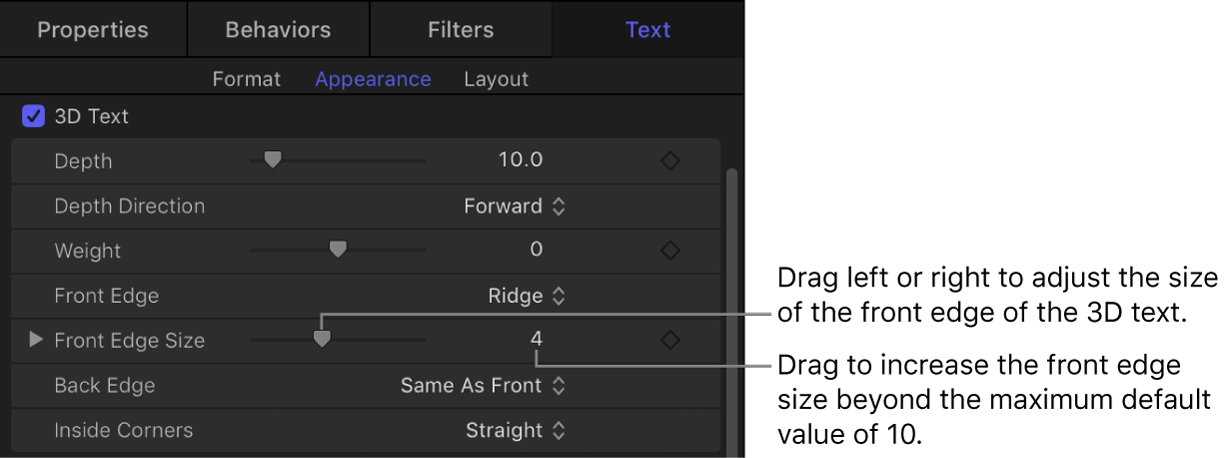
Drag the Front Edge Size slider to the left to make the edge smaller, or to the right to make the edge larger.
To modify the width and depth of the edges independently, click the disclosure triangle to the left of the Front Edge Size slider, then drag the Width or Depth slider.
Click the Back Edge pop-up menu, then choose a setting other than Same As Front or Square.
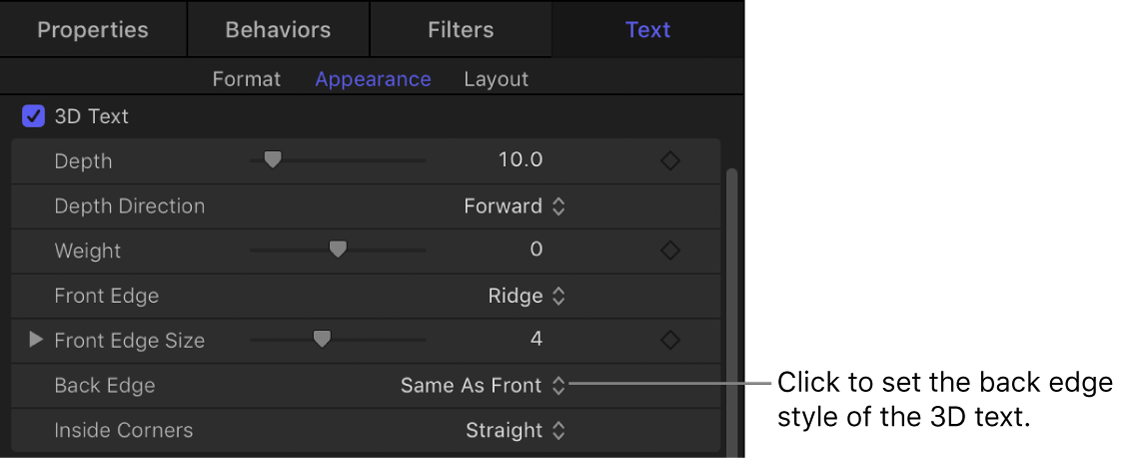
The Back Edge Size slider appears.
Drag the Back Edge Size slider to the left to make the edge smaller, or to the right to make the edge larger.
Note: You can’t see the back edge of the object unless you rotate the object or add a camera that’s pointed at the back of the object. See Move and rotate 3D text in Motion.
Set the style of 3D text inside corners
When the front edge or back edge of a text object is set to anything other than Square, you can customize the inside edge corners (such as the angles in a letter E).

In the Layers list, Timeline, or canvas in Motion, select a 3D text object.
In the 3D Text section of the Text Inspector’s Appearance pane, click the Inside Corners pop-up menu, then choose an option:
Straight: Sets all edge corners to sharp angles.
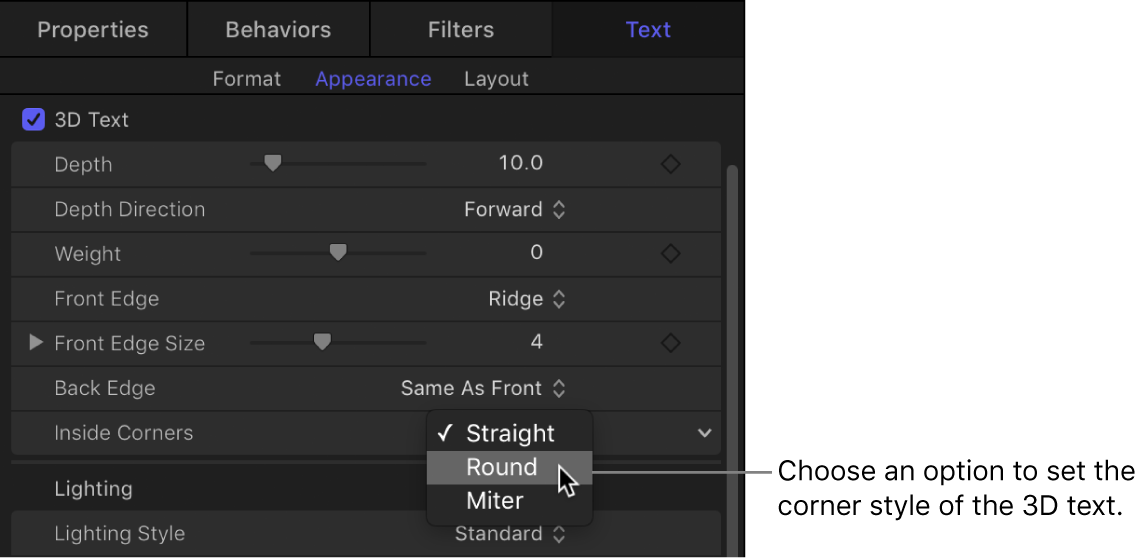
Round: Softens the sharpness of edge corners by adding a round curve to each sharp angle.
Miter: Smooths the sharpness of edge corners in a more subtle way, by adding an additional angle, known as a miter.
Adjust the depth, weight, or edge size of individual text characters
You can also create different depths, weights, or edge sizes for different characters (glyphs) in a 3D text object.
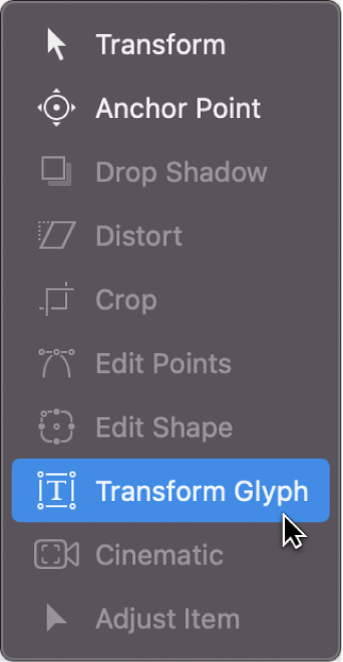
In the Motion canvas toolbar, click and hold the transform tools pop-up menu, then choose Transform Glyph.
In the canvas, click the glyph you want to adjust.
A 3D bounding box appears around the character.
Do one of the following:
In the 3D Text section of the Text Inspector’s Appearance pane, drag the Depth, Weight, or Front Edge Size slider left or right.
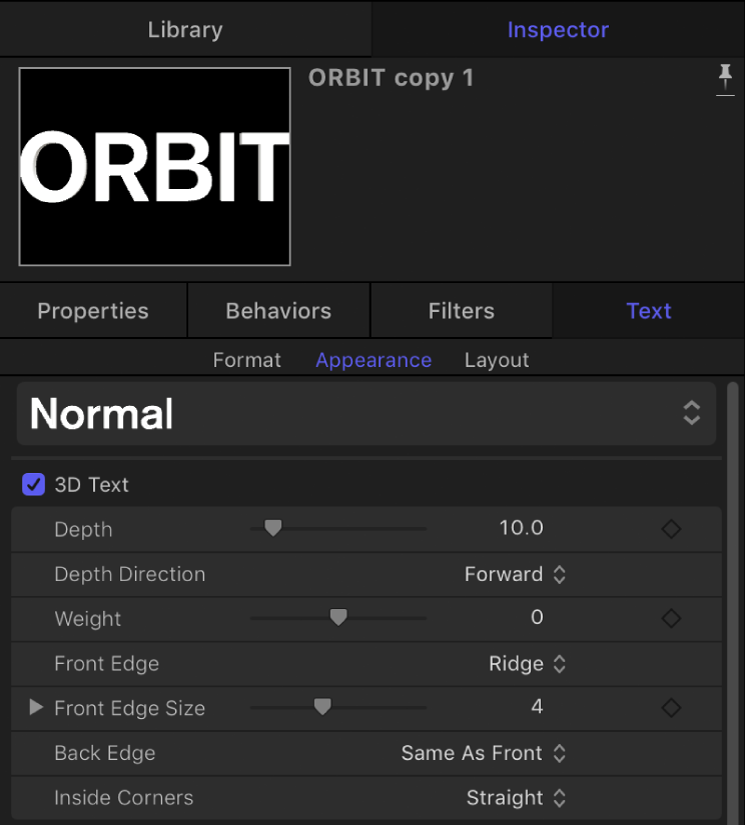
In the HUD (press F7 if it’s not visible), drag the Depth, Weight, or Front Edge Size slider left or right.
For more information about transforming glyphs, see Intro to text glyphs in Motion.
For a complete list of depth, weight, and edge controls, see 3D Text controls in Motion.
Download this guide: Apple Books | PDF