Manual de uso del iPad
- Te damos la bienvenida
-
-
- Modelos de iPad compatibles con iPadOS 26
- iPad mini (quinta generación)
- iPad mini (sexta generación)
- iPad mini (A17 Pro)
- iPad (octava generación)
- iPad (novena generación)
- iPad (décima generación)
- iPad (A16)
- iPad Air (tercera generación)
- iPad Air (cuarta generación)
- iPad Air (quinta generación)
- iPad Air de 11 pulgadas (M2)
- iPad Air de 13 pulgadas (M2)
- iPad Air de 11 pulgadas (M3)
- iPad Air de 13 pulgadas (M3)
- iPad Air de 11 pulgadas (M4)
- iPad Air de 13 pulgadas (M4)
- iPad Pro de 11 pulgadas (primera generación)
- iPad Pro de 11 pulgadas (segunda generación)
- iPad Pro de 11 pulgadas (tercera generación)
- iPad Pro de 11 pulgadas (cuarta generación)
- iPad Pro de 11 pulgadas (M4)
- iPad Pro de 11 pulgadas (M5)
- iPad Pro de 12.9 pulgadas (tercera generación)
- iPad Pro de 12.9 pulgadas (cuarta generación)
- iPad Pro de 12.9 pulgadas (quinta generación)
- iPad Pro de 12.9 pulgadas (sexta generación)
- iPad Pro de 13 pulgadas (M4)
- iPad Pro de 13 pulgadas (M5)
- Información de configuración esencial
- Personalizar el iPad
- Agilizar el flujo de trabajo en el iPad
- Hacer más con el Apple Pencil
- Personalizar el iPad para un menor
-
- Novedades de iPadOS 26
-
- Encender y configurar el iPad
- Activar, bloquear y desbloquear
- Configurar los servicios celulares
- Conectarse a Internet
- Consultar o modificar la configuración de datos celulares
- Buscar configuraciones
- Configurar cuentas de correo, contactos y calendario
- Aprender el significado de los íconos de estado
-
- Cambiar o desactivar los sonidos
- Crear una pantalla bloqueada personalizada
- Cambiar el fondo de pantalla
- Usar y personalizar el centro de control
- Grabar audio y video
- Ajustar el brillo y el balance de color de la pantalla
- Mantener la pantalla del iPad encendida durante más tiempo
- Ajustar la configuración de pantalla y texto del iPad
- Cambiar el nombre del iPad
- Cambiar la fecha y hora
- Cambiar el idioma y la región
- Cambiar las apps predeterminadas
- Cambiar el motor de búsqueda predeterminado en el iPad
- Girar la pantalla del iPad
- Personalizar las opciones para compartir
-
-
- Introducción a Calendario
- Crear y editar eventos en Calendario
- Enviar invitaciones
- Responder a invitaciones
- Cambiar cómo se muestran los eventos
- Buscar eventos
- Cambiar la configuración de Calendario
- Programar o mostrar eventos en una zona horaria diferente
- Mantenerse al tanto de los eventos
- Usar varios calendarios
- Usar recordatorios en la app Calendario
- Usar el calendario de días festivos
- Compartir calendarios de iCloud
-
- Introducción a FaceTime
- Crear un enlace de FaceTime
- Tomar una Live Photo
- Usar las herramientas para llamadas de audio de FaceTime
- Usar los subtítulos en vivo y la traducción en vivo
- Usar otras apps durante una llamada
- Realizar una llamada grupal de FaceTime
- Usar SharePlay para ver, escuchar o jugar con más personas
- Compartir la pantalla en una llamada de FaceTime
- Solicitar o permitir control remoto en una llamada de FaceTime
- Colaborar en un documento en una llamada de FaceTime
- Usar las funciones de videoconferencia
- Pasar una llamada de FaceTime a otro dispositivo Apple
- Cambiar la configuración de video de FaceTime
- Cambiar la configuración de audio de FaceTime
- Cambiar tu aspecto
- Salir de una llamada o cambiar a Mensajes
- Revisar y filtrar llamadas
- Bloquear una llamada de FaceTime y reportarla como no deseada
-
- Introducción a la app Archivos
- Modificar archivos y carpetas
- Encontrar y ver archivos y carpetas
- Encontrar los archivos descargados en el iPad
- Organizar archivos y carpetas
- Enviar archivos desde la app Archivos
- Configurar iCloud Drive
- Compartir archivos y carpetas en iCloud Drive
- Transferir archivos desde el iPad a un dispositivo de almacenamiento, un servidor o la nube
-
- Introducción a Encontrar
-
- Agregar un AirTag
- Compartir un AirTag u otro artículo en Encontrar en el iPad
- Compartir la ubicación de un artículo perdido en Encontrar en el iPad
- Agregar un artículo de otro fabricante
- Obtener notificaciones de olvido de un artículo
- Localizar un artículo
- Marcar un artículo como perdido
- Eliminar un artículo
- Ajustar la configuración del mapa
- Desactivar la función Encontrar
-
- Introducción a la app Apple Games
- Configurar el perfil de Game Center
- Buscar y descargar juegos
- Suscribirse a Apple Arcade
- Conectar con amistades en la app Apple Games
- Jugar con amistades en la app Apple Games
- Administrar la biblioteca de juegos
- Conectar un control de videojuegos
- Cambiar la configuración relacionada con los juegos
- Reportar un problema con un juego
-
- Introducción a Casa
- Introducción a Casa
- Actualizar a la nueva versión de Casa de Apple
- Configurar accesorios
- Controlar accesorios
- Usar la previsión de la red eléctrica para planificar tu consumo de energía
- Consultar el consumo y las tarifas de electricidad
- Recomendaciones para la temperatura adaptativa y la energía limpia
- Configurar tu HomePod
- Controlar tu casa de forma remota
- Crear y usar ambientaciones
- Usar automatizaciones
- Configurar cámaras de seguridad
- Usar el reconocimiento de caras
- Configurar un router
- Invitar a otros a controlar accesorios
- Agregar más casas
-
- Introducción a Diario
- Escribir en el diario
- Editar o eliminar una entrada
- Agregar formato, fotos y más
- Escribir en el diario para tu bienestar
- Crear un hábito de escribir en un diario
- Ver y buscar las entradas de diario
- Imprimir y exportar entradas
- Proteger las entradas de diario
- Cambiar la configuración de Diario
-
- Introducción a Mail
- Revisar el correo
- Usar categorías
- Limpiar automáticamente Mail en iCloud
- Configurar notificaciones de correo electrónico
- Buscar correos
- Organizar los correos en buzones
- Usar las reglas de Mail en iCloud para aplicar acciones automáticamente a los correos
- Cambiar la configuración de Mail
- Eliminar y recuperar correos
- Agregar un widget de Mail a la pantalla de inicio
- Imprimir correos
- Usar funciones rápidas de teclado
-
- Introducción a Mapas
- Establecer la ubicación y la vista del mapa
-
- Establecer la dirección de casa, trabajo o escuela
- Usar Mapas
- Obtener una ruta en auto
- Visualizar el resumen de una ruta o una lista de las vueltas
- Cambiar o agregar paradas a una ruta
- Obtener una ruta a pie
- Guardar caminatas o excursiones
- Obtener una ruta en transporte público
- Obtener una ruta en bicicleta
- Descargar mapas para cuando no tengas conexión a Internet
-
- Buscar lugares
- Buscar atracciones, restaurantes y servicios cercanos
- Explorar aeropuertos o centros comerciales
- Obtener información sobre lugares
- Consultar y administrar los lugares visitados
- Agregar lugares y notas a Lugares
- Compartir lugares
- Agregar marcadores a los lugares
- Calificar lugares y agregar fotos
- Explorar lugares con las guías
- Organizar lugares con guías personalizadas
- Borrar el historial de ubicaciones
- Eliminar indicaciones recientes
- Reportar un problema con Mapas
-
- Introducción a Mensajes
- Configurar Mensajes
- Acerca de iMessage
- Enviar y responder mensajes
- Programar un mensaje de texto para enviarlo más tarde
- Cancelar el envío de los mensajes o editarlos
- Mantenerse al tanto de los mensajes
- Buscar
- Reenviar y compartir mensajes
- Conversaciones grupales
- Compartir la pantalla
- Colaborar en proyectos
- Agregar fondos
- Usar apps de iMessage
- Hacer una encuesta en una conversación
- Tomar y editar fotos o videos
- Compartir fotos, enlaces y más
- Enviar stickers
- Crear y enviar Memojis
- Reaccionar con Tapbacks
- Aplicar formato al texto y animar mensajes
- Dibujar y escribir mensajes a mano
- Enviar y guardar GIF
- Enviar y recibir mensajes de audio
- Compartir tu ubicación
- Activar o desactivar las notificaciones de lectura
- Detener, silenciar y cambiar las notificaciones
- Revisar y filtrar mensajes de texto
- Reportar mensajes no deseados y bloquear remitentes
- Eliminar mensajes y archivos adjuntos
- Recuperar mensajes eliminados
-
- Introducción a Música
- Obtener música
- Personalizar la app Música
-
-
- Reproducir música
- Usar los controles del reproductor de música
- Reproducir audio Lossless
- Reproducir audio espacial
- Escuchar la radio
- Reproducir música con alguien más mediante SharePlay
- Reproducir música con otras personas en un auto
- Poner la música en fila
- Usar el fundido entre canciones
- Repetir canciones o reproducirlas aleatoriamente
- A cantar con Apple Music
- Mostrar los créditos y la letra de una canción
- Indicarle a Apple Music lo que te gusta
- Ajustar la calidad del sonido
-
- Introducción a News
- Obtener notificaciones y boletines de News
- Usar widgets de News
- Ver artículos de noticias seleccionados para ti
- Leer y compartir artículos
- Leer las noticias locales
- Seguir a tus equipos favoritos con My Sports
- Buscar canales, temas, artículos o recetas
- Saved Stories:
- Borrar el historial de lectura
- Personalizar la barra de pestañas
- Suscribirse a canales de noticias individuales
-
- Introducción a Notas
- Crear y aplicar formato a notas nuevas
- Usar notas rápidas
- Agregar dibujos y texto escrito a mano
- Ingresar fórmulas y ecuaciones
- Agregar fotos, videos y más
- Grabar y transcribir audio
- Escanear texto y documentos
- Trabajar con archivos PDF
- Agregar enlaces
- Buscar en las notas
- Organizar en carpetas
- Organizar con etiquetas
- Usar carpetas inteligentes
- Compartir y colaborar
- Exportar o imprimir notas
- Bloquear notas
- Eliminar y recuperar notas
- Agregar o eliminar cuentas
- Cambiar la vista de Notas
- Cambiar la configuración de Notas
- Usar funciones rápidas de teclado
-
- Usar contraseñas en el iPad
- Encontrar tu contraseña para un sitio web o app
- Cambiar la contraseña para un sitio web o app
- Eliminar una contraseña
- Recuperar una contraseña eliminada
- Crear una contraseña para un sitio web o app
- Mostrar contraseñas en un tipo de letra más grande
- Usar llaves de acceso para iniciar sesión en sitios web y apps
- Iniciar sesión con Apple
- Compartir contraseñas
- Rellenar automáticamente una contraseña segura
- Revisar los sitios web excluidos del autorrelleno
- Cambiar contraseñas vulneradas o no seguras
- Consultar tus contraseñas y la información relacionada
- Consultar el historial de contraseñas
- Buscar la contraseña de una red Wi-Fi
- Compartir contraseñas de forma segura mediante AirDrop
- Hacer que tus contraseñas estén disponibles en todos tus dispositivos
- Rellenar automáticamente códigos de verificación
- Iniciar sesión con menos desafíos CAPTCHA
- Usar la autenticación de dos factores
- Usar llaves de seguridad
- Consultar la clave de recuperación de FileVault de tu Mac
-
- Realizar una llamada
- Grabar y transcribir una llamada
- Cambiar la configuración de Teléfono
- Consultar y eliminar el historial de llamadas
- Contestar o rechazar llamadas entrantes
- Durante una llamada
- Realizar una llamada de conferencia o tripartita
- Configurar el buzón de voz
- Revisar el buzón de voz
- Cambiar la configuración y el saludo del buzón de voz
- Seleccionar todos de llamada
- Realizar llamadas utilizando Wi-Fi
- Configurar el desvío de llamadas
- Configurar las llamadas en espera
- Revisar y bloquear llamadas
-
- Introducción a Fotos
- Explorar tu fototeca
- Explorar tus colecciones de fotos
- Visualizar fotos y videos
- Ver información sobre una foto o video
-
- Encontrar fotos y videos por fecha
- Encontrar y asignar un nombre a personas y mascotas
- Encontrar fotos y videos de grupos
- Explorar fotos y videos por ubicación
- Encontrar fotos y videos guardados recientemente
- Encontrar fotos y videos de viajes
- Encontrar recibos, códigos QR, fotos editadas y más
- Encontrar fotos y videos por tipo de contenido
- Ordenar y filtrar la fototeca
- Respaldar y sincronizar fotos y videos con iCloud
- Eliminar u ocultar fotos y videos
- Buscar fotos y videos
- Obtener sugerencias de fondos de pantalla
-
- Compartir fotos y videos
- Compartir videos largos
- Crear álbumes compartidos
- Agregar y eliminar personas de un álbum compartido
- Agregar y eliminar fotos y videos en un álbum compartido
- Configurar una fototeca compartida en iCloud o entrar a una
- Usar la fototeca compartida en iCloud
- Agregar contenido a una fototeca compartida en iCloud
- Crear stickers a partir de las fotos
- Ocultar personas, recuerdos o días festivos
- Duplicar y copiar fotos y videos
- Fusionar fotos duplicadas
- Importar y exportar fotos y videos
- Imprimir fotos
-
- Introducción a Podcasts
- Buscar podcasts
- Ver y escuchar podcasts
- Obtener la transcripción de un podcast
- Seguir tus podcasts favoritos
- Calificar o escribir una reseña de podcasts
- Usar el widget de Podcasts
- Seleccionar categorías y canales favoritos de Podcasts
- Organizar tu biblioteca de podcasts
- Descargar, guardar, eliminar y compartir podcasts
- Suscribirse a podcasts
- Escuchar contenido exclusivo para suscriptores
- Cambiar la configuración de las descargas
-
- Introducción a Recordatorios
- Crear recordatorios
- Crear una lista de compras del súper
- Agregar detalles
- Marcar elementos como terminados
- Eliminar y recuperar recordatorios
- Editar y organizar una lista
- Buscar en tus listas
- Organizar varias listas
- Etiquetar elementos
- Usar listas inteligentes
- Compartir y colaborar
- Imprimir una lista
- Trabajar con plantillas
- Agregar o eliminar cuentas
- Cambiar la configuración de Recordatorios
- Usar funciones rápidas de teclado
-
- Introducción a Safari
- Navegar por Internet
- Buscar sitios web
- Ver contenido destacado
- Personalizar la configuración de Safari
- Cambiar la disposición
- Crear varios perfiles para Safari
- Escuchar una página web
- Silenciar el audio de las pestañas
- Agregar un marcador a un sitio web
- Abrir una app web
- Marcar un sitio web como favorito
- Guardar páginas en la lista de lecturas
- Encontrar los enlaces compartidos contigo
- Descargar un archivo PDF
- Anotar y guardar una página web como PDF
- Rellenar formularios
- Obtener extensiones
- Borrar la caché y las cookies
- Habilitar cookies
- Atajos
- Consejos
-
- Introducción a Notas de Voz
- Grabar
- Ver una transcripción
- Reproducir una grabación
- Trabajar con grabaciones en capas
- Exportar una grabación a Archivos
- Editar o eliminar una grabación
- Mantener las grabaciones actualizadas
- Organizar grabaciones
- Buscar o renombrar una grabación
- Compartir una grabación
- Duplicar una grabación
-
- Introducción a Apple Intelligence
- Traducir mensajes y llamadas
- Crear imágenes originales con Image Playground
- Crear tu propio emoji con Genmoji
- Usar Imagen mágica con Apple Intelligence
- Usar Apple Intelligence con Siri
- Encontrar las palabras adecuadas con las herramientas de escritura
- Usar ChatGPT con Apple Intelligence
- Resumir notificaciones y reducir interrupciones
- Apple Intelligence y la privacidad
- Bloquear el acceso a las funciones de Apple Intelligence
-
- Configurar Compartir en familia
- Agregar miembros de Compartir en familia
- Eliminar a un integrante de un grupo de Compartir en familia
- Compartir suscripciones
- Compartir compras
- Compartir ubicaciones con familiares y localizar dispositivos perdidos
- Configurar Apple Cash familiar y Apple Card familiar
- Configurar controles parentales
- Configurar el dispositivo de un menor
- Compartir los rangos de edad con las apps
-
- Introducción a Tiempo en pantalla
- Proteger la salud visual con Distancia de la pantalla
- Crear, administrar y supervisar un código de Tiempo en pantalla
- Configurar horarios con Tiempo en pantalla
- Bloquear apps, descargas de apps, sitios web y compras
- Bloquear llamadas y mensajes con Tiempo en pantalla
- Revisar si hay imágenes o videos íntimos
- Configurar Tiempo en pantalla para un menor de edad
- Responder a una solicitud de Tiempo en pantalla
-
- Adaptador de corriente y cable de carga
- Usar las funciones de nivel de audio de los audífonos
-
- Compatibilidad del Apple Pencil
- Enlazar y recargar el Apple Pencil (primera generación)
- Enlazar y recargar el Apple Pencil (segunda generación)
- Enlazar y recargar el Apple Pencil (USB-C)
- Enlazar y recargar el Apple Pencil Pro
- Ingresar texto con Escribir a mano
- Dibujar con el Apple Pencil
- Tomar una captura de pantalla y hacerle anotaciones con el Apple Pencil
- Escribir notas rápidamente
- HomePod y otras bocinas inalámbricas
- Dispositivos de almacenamiento externo
- Conectar accesorios Bluetooth
- Reproducir audio del iPad en un accesorio Bluetooth
- Apple Watch con Fitness+
- Impresoras
- Paño de limpieza
-
- Introducción a Continuidad
- Usar AirDrop para enviar elementos a dispositivos cercanos
- Pasar tareas entre dispositivos
- Copiar y pegar contenido entre dispositivos
- Transmitir video o duplicar la pantalla del iPad
- Permitir llamadas telefónicas y mensajes de texto en el iPad
- Compartir la conexión a Internet
- Usar el iPad como cámara web en un Apple TV 4K
- Insertar dibujos, fotos y documentos escaneados desde en una Mac
- Usar el iPad como pantalla secundaria
- Usar un teclado y un mouse para controlar la Mac y el iPad
- Conectar el iPad a una computadora mediante un cable
- Transferir archivos entre dispositivos
-
- Introducción a las funciones de accesibilidad
- Usar funciones de accesibilidad durante la configuración inicial
- Cambiar la configuración de accesibilidad de Siri
- Activar y desactivar rápidamente las funciones de accesibilidad
- Compartir la configuración de accesibilidad con otro dispositivo
-
- Visión general de las funciones de accesibilidad para la visión
- Leer o escuchar el texto de las apps con el lector de accesibilidad
- Acercar
- Ver una versión más grande del texto que estás leyendo o tecleando
- Cambiar los colores de la pantalla
- Hacer que el texto sea más fácil de leer
- Personalizar el movimiento en pantalla
- Usar el iPad más cómodamente mientras viajas en un vehículo
- Personalizar la configuración visual para apps específicas
- Escuchar lo que hay en la pantalla o lo que se escribe
- Escuchar descripciones de audio
-
- Activar y practicar con VoiceOver
- Cambiar la configuración de VoiceOver
- Usar gestos de VoiceOver
- Controlar el iPad con VoiceOver activado
- Controlar VoiceOver con el rotor
- Usar el teclado en pantalla
- Escribir con el dedo
- Mantener la pantalla apagada
- Usar VoiceOver con un teclado externo
- Usar una pantalla Braille
- Escribir Braille en la pantalla
- Usar Acceso Braille con una pantalla braille
- Personalizar gestos y funciones rápidas de teclado
- Usar VoiceOver con un dispositivo apuntador
- Obtener descripciones en vivo de lo que hay en tu entorno
- Usar VoiceOver en apps
-
- Vision general de las funciones de accesibilidad para la motricidad
- Usar AssistiveTouch
- Usar un trackpad en pantalla ajustable en el iPad
- Controlar el iPad con el movimiento de los ojos
- Controlar el iPad con el movimiento de la cabeza
- Ajustar cómo el iPad responde a los toques
- Responder llamadas automáticamente
- Cambiar la configuración de atención y Face ID
- Usar Control por voz
- Ajustar el botón superior o de inicio
- Usar los botones del Apple TV 4K Remote
- Ajustar la configuración del puntero
- Ajustar la configuración del teclado
- Controlar el iPad con un teclado externo
- Ajustar la configuración de los AirPods
- Ajustar la configuración del doble toque y del gesto de apretar del Apple Pencil
-
- Vision general de las funciones de accesibilidad para la audición
- Usar dispositivos auditivos
- Usar Escucha en vivo
- Usar el reconocimiento de sonidos
- Recibir una notificación cuando se mencione tu nombre
- Configurar y usar RTT
- Parpadear el indicador luminoso o la pantalla para las notificaciones
- Ajustar la configuración de audio
- Reproducir sonidos de fondo
- Mostrar subtítulos y subtítulos opcionales
- Mostrar transcripciones para mensajes del Interfón
- Obtener subtítulos en vivo del audio hablado
-
- Controlar lo que compartes
- Activar funciones en la pantalla bloqueada
- Bloquear contactos
- Proteger tu cuenta de Apple
- Crear y administrar direcciones de Ocultar mi correo
- Proteger tu navegación web con la retransmisión privada de iCloud
- Usar una dirección de red privada
- Usar la protección de datos avanzada
- Usar el modo hermético
- Instalar mejoras de seguridad en segundo plano
- Recibir advertencias sobre contenido íntimo
- Usar la verificación de clave de contacto
-
- Encender o apagar el iPad
- Forzar el reinicio del iPad
- Actualizar iPadOS
- Respaldar el iPad
- Restablecer la configuración del iPad
- Borrar el iPad
- Restaurar todo el contenido usando un respaldo
- Restaurar los elementos comprados y eliminados
- Vender, regalar o canjear tu iPad
- Instalar o eliminar perfiles de configuración
-
- Información de seguridad importante
- Información de manejo importante
- Encontrar más recursos sobre el software y servicio
- Declaración de conformidad de la FCC
- Declaración de conformidad de la ISED Canadá
- Apple y el medio ambiente
- Información del láser clase 1
- Información sobre residuos y reciclaje
- Modificaciones no autorizadas de iPadOS
- Declaración de conformidad con ENERGY STAR
- Copyright y marcas comerciales
Introducción a las funciones de accesibilidad del iPad
Personaliza el iPad para que se adapte mejor a tus necesidades mediante funciones de accesibilidad para la visión, audición, motricidad, habla y cognición, tanto si las necesitas temporalmente o de forma continua.
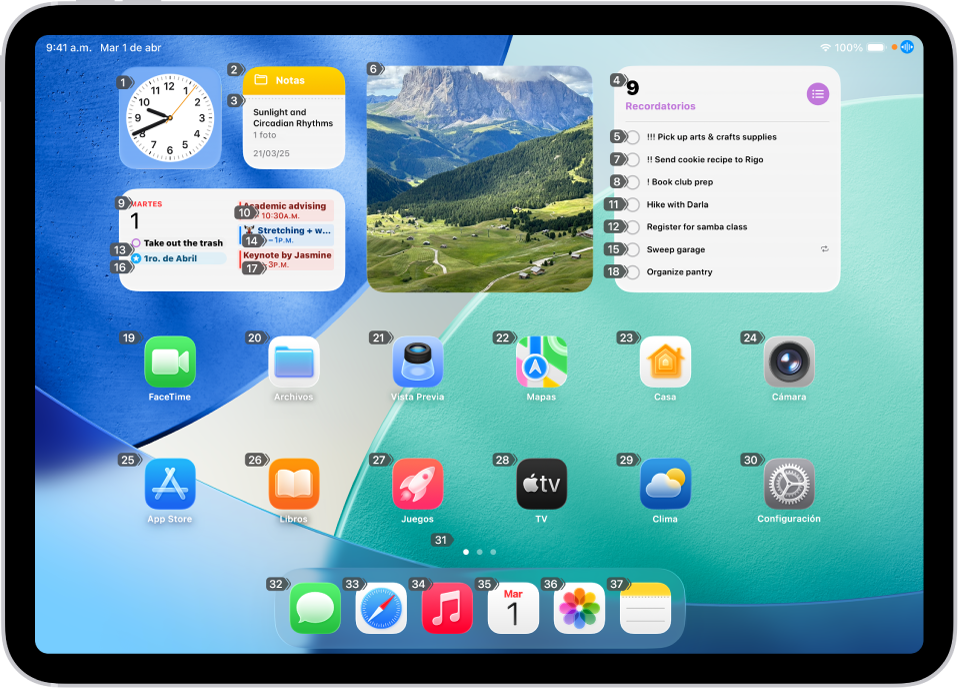
Puedes activar las funciones de accesibilidad cuando configuras tu iPad por primera vez, o en cualquier otro momento desde Configuración ![]() > Accesibilidad.
> Accesibilidad.
Visión
Usa el lector de pantalla integrado para escuchar lo que hay en pantalla y desplazarte por el iPad mediante gestos. También puedes aumentar el tamaño del texto, hacer zoom en la pantalla, ajustar los colores en pantalla, y más.
Incluso puedes usar el iPad como lupa y sostenerlo para obtener descripciones de lo que te rodea.
Obtén detalles sobre las funciones de accesibilidad para la visión
Motricidad
Explora y realiza acciones en el iPad usando sólo tus ojos o comandos de voz. También puedes conectar un dispositivo de asistencia o un teclado externo y utilizarlo para controlar el iPad.
Además, puedes facilitar el uso de gestos y configurar otras opciones para que el iPad responda mejor a los toques.
Obtén detalles sobre las funciones de accesibilidad para la motricidad
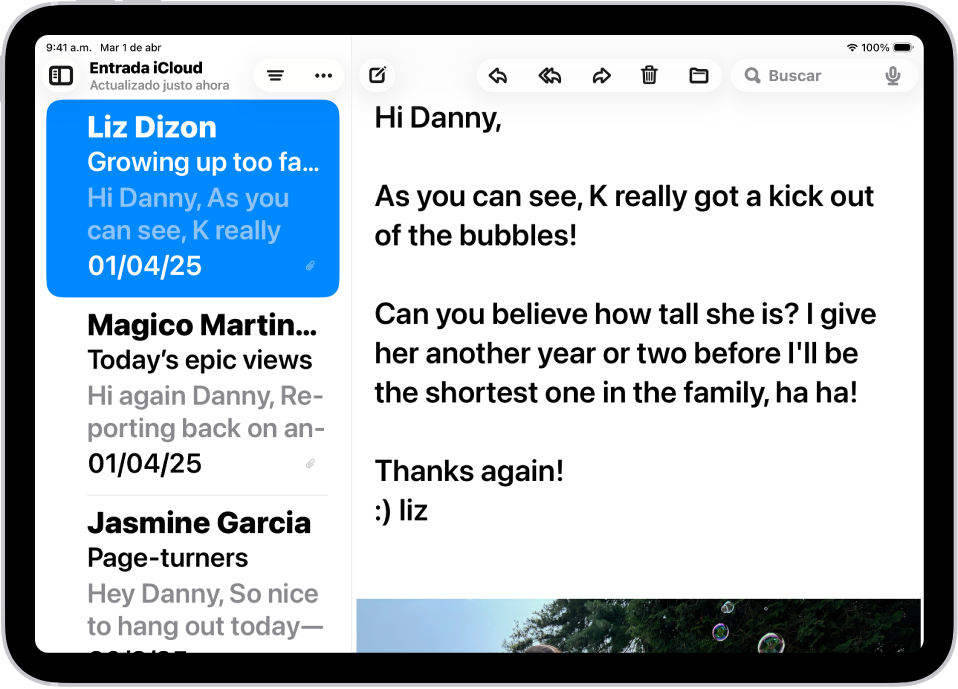
Audición
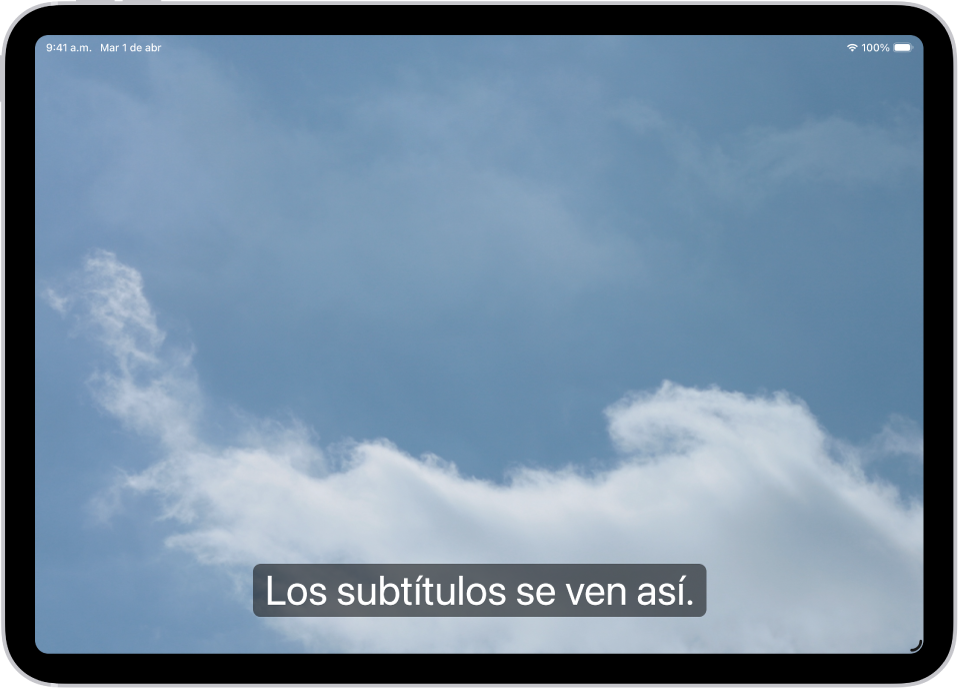
Obtén subtítulos en tiempo real del audio hablado de una app o una conversación en persona, activa las notificaciones con luz LED, haz que el iPad reconozca sonidos y más.
También puedes enlazar dispositivos auditivos con tu iPad y ajustar el audio de los audífonos para que se adapte mejor a ti.
Obtén detalles sobre las funciones de accesibilidad para la audición
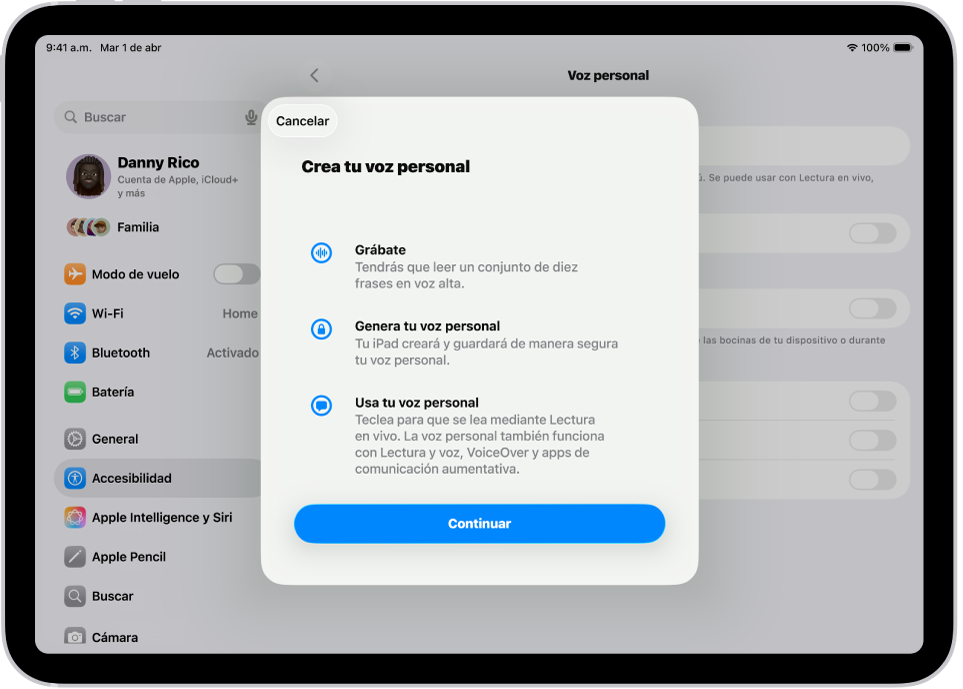
Habla
Crea una voz personalizada que suene como tú, o elige de entre muchas voces del sistema y úsala para que se lea en voz alta lo que tecleas.
También puedes hacer que Siri reconozca una amplia variedad de patrones del habla, o enseñar al iPad a realizar una acción cuando dices una palabra o haces un sonido de tu elección.
Obtén detalles sobre las funciones de accesibilidad para el habla
Cognición
Las funciones de accesibilidad de iPadOS pueden ayudarte a ti, o a alguien que está a tu cuidado, a usar el iPad con mayor independencia. Puedes configurar un iPad con una interfaz simplificada para una persona con discapacidad cognitiva, o restringirlo temporalmente a una sola app mientras dejas que un menor de edad lo use.
Obtén detalles sobre las funciones de accesibilidad cognitivas
Consejo: controla tus configuraciones y funciones de accesibilidad preferidas con Siri, con sólo presionar un botón o desde el centro de control. Consulta Activar o desactivar rápidamente funciones de accesibilidad.