Final Cut Pro User Guide
- Welcome
-
- What’s new in Final Cut Pro 10.6
- What’s new in Final Cut Pro 10.5.3
- What’s new in Final Cut Pro 10.5
- What’s new in Final Cut Pro 10.4.9
- What’s new in Final Cut Pro 10.4.7
- What’s new in Final Cut Pro 10.4.6
- What’s new in Final Cut Pro 10.4.4
- What’s new in Final Cut Pro 10.4.1
- What’s new in Final Cut Pro 10.4
- What’s new in Final Cut Pro 10.3
- What’s new in Final Cut Pro 10.2
- What’s new in Final Cut Pro 10.1.2
- What’s new in Final Cut Pro 10.1
- What’s new in Final Cut Pro 10.0.6
- What’s new in Final Cut Pro 10.0.3
- What’s new in Final Cut Pro 10.0.1
-
- Intro to effects
-
- Intro to transitions
- How transitions are created
- Add transitions
- Set the default transition
- Delete transitions
- Adjust transitions in the timeline
- Adjust transitions in the inspector and viewer
- Merge jump cuts with the Flow transition
- Adjust transitions with multiple images
- Modify transitions in Motion
-
- Add storylines
- Use the precision editor
- Conform frame sizes and rates
- Use XML to transfer projects
-
- Glossary
- Copyright

Make slip edits in Final Cut Pro
Performing a slip edit doesn’t change a clip’s position or duration in the timeline, but instead changes what portion of the clip’s media appears in the timeline. A slip edit allows you to change a clip’s start and end points simultaneously.
Whenever you arrange clips in the timeline so that edit points line up with musical beats or other fixed sync points in a movie, you want to keep your clips in position to maintain the alignment. These situations leave you with very little room to adjust a clip, because you can’t change its duration or move it elsewhere in the timeline. All you can do is move both the start and end points of the clip simultaneously, keeping the clip’s position and duration fixed. Surrounding clips are not affected, and the overall duration of your project doesn’t change.

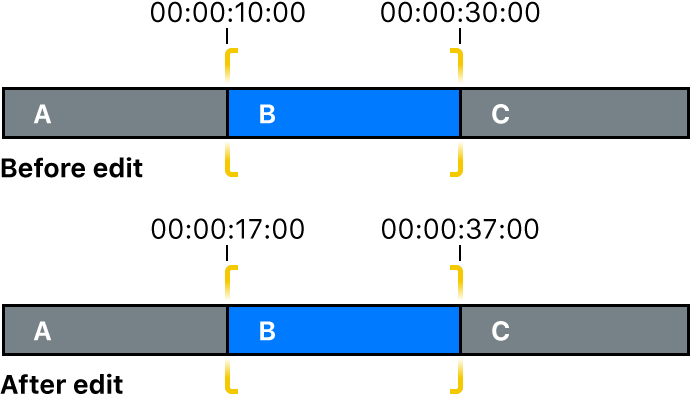
In the example above, the slip edit changes the start and end points of clip B, but not its duration or position in the timeline. When the project plays back, a different portion of clip B’s media is shown.
Note: To slip a clip, it must have media handles on both sides, meaning that there must be additional media available on both sides of the clip. If you’re having trouble slipping a clip, check that it has media handles on both sides. You can double-click any edit point to view or adjust media handles in the precision editor.
If there are no media handles available, consider using the Position tool ![]() instead. See Overwrite clips using the Position tool.
instead. See Overwrite clips using the Position tool.
For more accurate visual feedback on edits involving contiguous clips, you can see a “two-up” display in the viewer. For a slip edit, the two-up display shows the start and end points of the clip you’re slipping. See Show trimming details in the Final Cut Pro viewer.
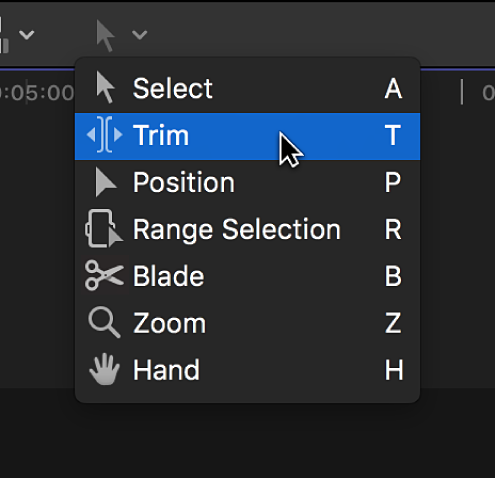
In Final Cut Pro, click the Tools pop-up menu in the top-left corner of the timeline and choose Trim (or press T).

The pointer changes to the Trim tool
 .
.Tip: To switch to the Trim tool temporarily, hold down the T key. When you release the T key, the tool reverts to the previously active tool.
Drag a clip left or right.
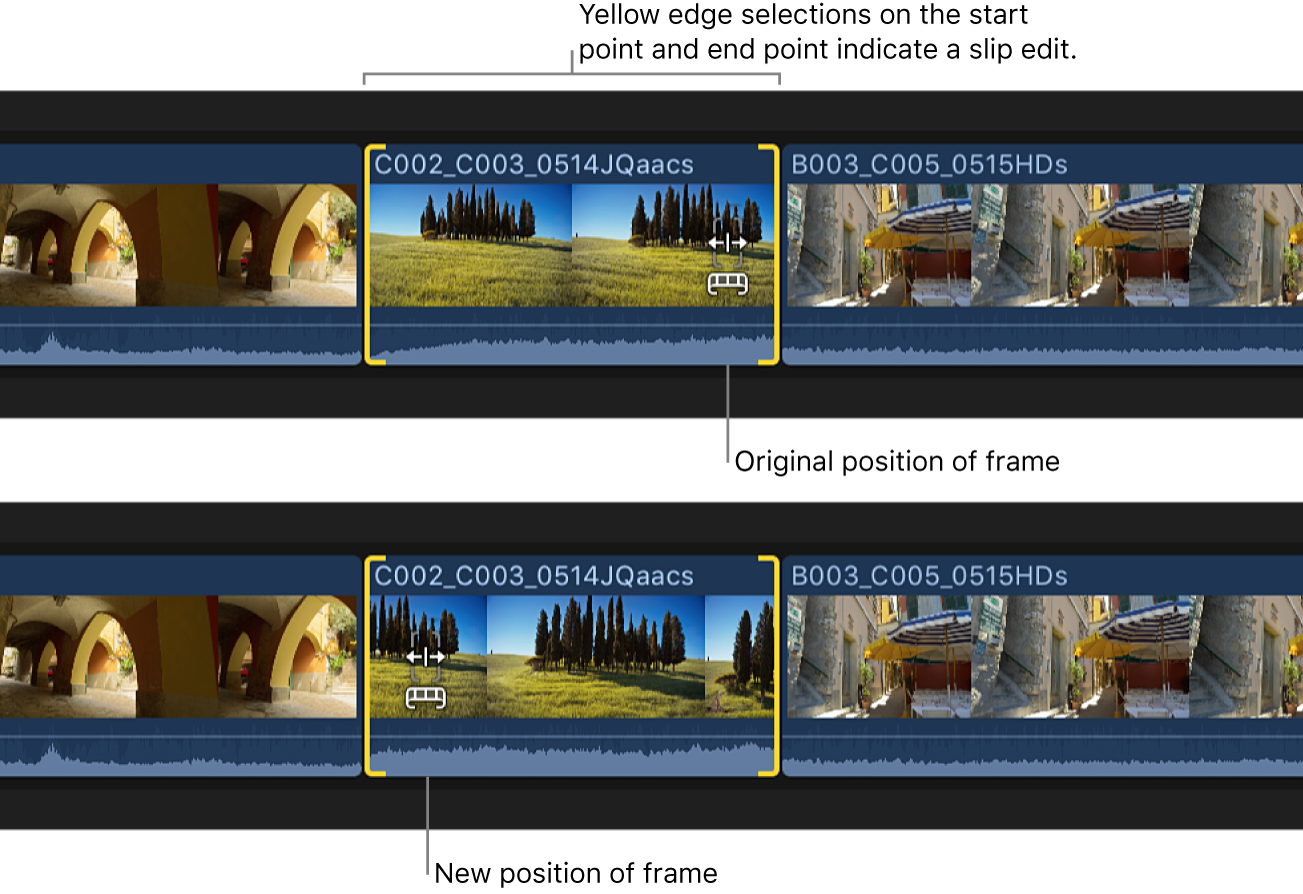
As you drag, a timecode field indicates the amount of time you’re moving the start point and the end point. Yellow edge selections on the start point and end point indicate a slip edit.

When you release the mouse or trackpad button, the slipped clip appears in the timeline with a new start point and a new end point.
Note: If either the start point or the end point turns red as you drag, you’ve reached the end of the available media for that side of the clip.

With the current selection, you can also slip the clip with keyboard shortcuts by doing one of the following:
Press Comma (,) or Period (.) to nudge the start and end points one frame to the left or right. You can also press Shift-Comma or Shift-Period to nudge the start and end points 10 frames to the left or right.
Press the Plus Sign (+) key or the Minus Sign (–) key followed by the timecode duration to slip the clip left or right, then press Return.
Download this guide: Apple Books | PDF