Final Cut Pro User Guide for Mac
- Welcome
- What’s new
-
- Intro to importing media
- If it’s your first import
- Organize files during import
-
- Import from Image Playground
- Import from iMovie for macOS
- Import from iMovie for iOS or iPadOS
- Import from Final Cut Pro for iPad
- Import from Final Cut Camera
- Import from Photos
- Import from Music
- Import from Apple TV
- Import from Motion
- Import from GarageBand and Logic Pro
- Import using workflow extensions
- Record into Final Cut Pro
- Memory cards and cables
- Supported media formats
-
- Intro to effects
-
- Intro to transitions
- How transitions are created
- Add transitions and fades
- Quickly add a transition with a keyboard shortcut
- Set the default duration for transitions
- Delete transitions
- Adjust transitions in the timeline
- Adjust transitions in the inspector and viewer
- Merge jump cuts with the Flow transition
- Adjust transitions with multiple images
- Modify transitions in Motion
- Add adjustment clips
-
- Add storylines
- Use the precision editor
- Conform frame sizes and rates
- Use XML to transfer projects
- Glossary
- Copyright and trademarks
Import stereo and spatial video in Final Cut Pro for Mac
You import stereo video the same way you import any other video media, but there are a couple of important things to keep in mind:
For proper playback and editing in Final Cut Pro, your media must be formatted for rectangular projection (not equirectangular projection).
The metadata associated with your stereo video media must be set correctly. After you import the media, you can view or change certain metadata in the browser and the Info inspector.
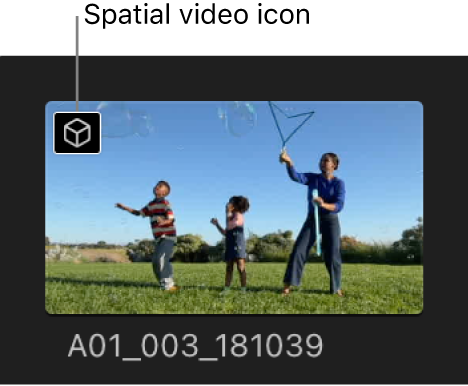
Spatial video clips appear in the Final Cut Pro browser with a spatial video icon.

By default, Final Cut Pro shows only the hero eye in the browser and the viewer.
Note: Working with MV-HEVC video in Final Cut Pro requires a Mac with Apple silicon and macOS 14 or later.
Import spatial video from Apple Vision Pro using iCloud Photos
Make sure that you set up iCloud and sign in to your Apple Account on your Apple Vision Pro and your Mac.
See Set up and use iCloud Photos and Use iCloud Photos on Apple Vision Pro.
Open Final Cut Pro on your Mac, then import the spatial video clips from Photos.
Import spatial video from Apple Vision Pro using AirDrop
AirDrop transfers files using Wi-Fi and Bluetooth (make sure both are turned on).
On Apple Vision Pro, open the Photos app, then tap Spatial in the tab bar.
Open the spatial video you want to share, tap
 , tap
, tap  , then select AirDrop and choose the Mac you want to transfer to.
Note: By default, AirDrop transfers appear in your Downloads folder.
Open Final Cut Pro on your Mac, then import the transferred spatial video files.
Import spatial video from iPhone
To import spatial video from your iPhone, see Import from iPhone, iPad, or iPod touch.
Check the settings for imported stereo video clips
Import the stereo video clips into Final Cut Pro.
Select a stereo video clip in the browser.
Open the Info inspector, then confirm the following settings:
Projection Mode: Make sure the Projection Mode pop-up menu is set to Rectangular.
Stereoscopic Conform: Make sure the Stereoscopic Conform pop-up menu is set to Side by Side.
Hero Eye: The hero eye is set automatically based on camera metadata in the MV-HEVC file. See Record spatial video on Apple Vision Pro or iPhone.
You can ignore the Hero Eye setting for footage shot on Apple Vision Pro, since both eyes are recorded at the same quality.
Codecs: For spatial video clips, confirm that this item includes MV-HEVC.
Tip: You can also confirm stereo video settings in the browser in list view. To add the Hero Eye column, you need to create a custom column set.
Use Swap Eyes to correct orientation issues
If you change the orientation of your iPhone during recording, a portion of your shot may have incorrect hero eye information. If you want to use that portion of the shot in your stereo video project, you can correct the hero eye designation.
In Final Cut Pro, select a stereo video clip in the browser or the timeline.
Open the Video inspector.
In the Stereoscopic section of the Video inspector, select the Swap Eyes checkbox.
The left and right eye views are switched.
Tip: To use both segments of the clip in your stereo video project, cut the clip in two at the moment in the clip when you flipped the phone, then follow the steps above for the clip segment with the incorrect hero eye.
Download this guide: PDF