Add an image gallery in Pages for iCloud
With an image gallery, you can view a collection of photos in one place on a page, so only one shows at a time. You might want to do this, for example, if you plan to export your document in EPUB format and publish it to Apple Books, so readers can click through the images as they would through a slideshow.
Click the Image button
 in the toolbar, then click Image Gallery.
Drag the image gallery to reposition it on the page, and drag any blue dot to resize it.
To add images, drag them from your computer to the image gallery.
To adjust the position or zoom level of an image, double-click it, then drag to move it in the frame, or drag the slider to zoom.
To customize the image gallery, make sure it’s still selected, then click Gallery at the top of the Format sidebar and do any of the following:
Reorder images: In the sidebar, drag the image thumbnails to reorder them.
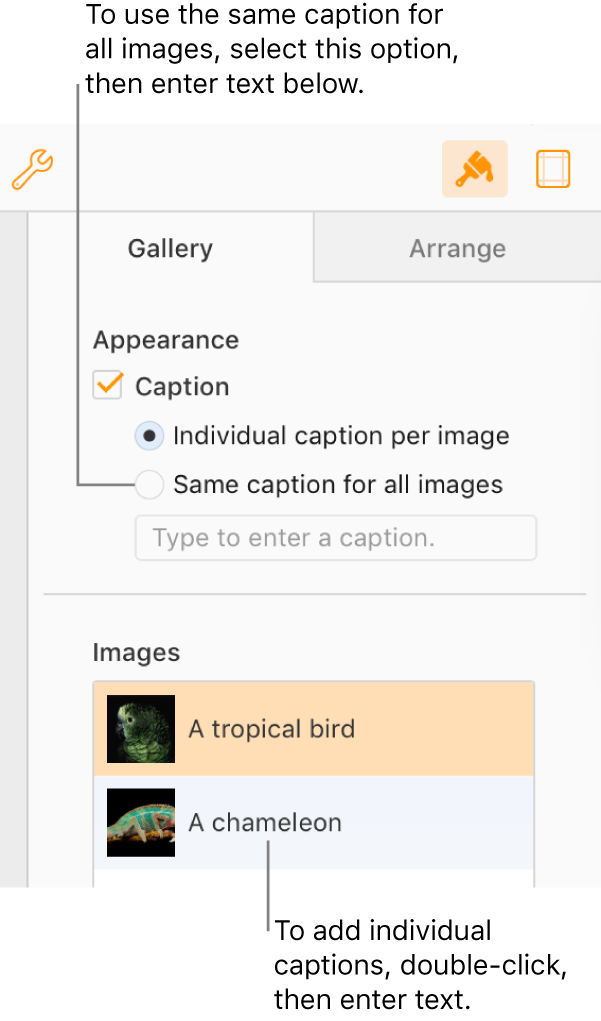
Add an image caption: Double-click the text to the right of an image thumbnail and enter your text.
To add the same caption to all images, select “Same caption for all images,” then enter your text in the text box below.
To turn off captions, deselect Caption.

Add an image description that can be used by assistive technology (for example, VoiceOver): Click the image thumbnail, then click the Image Description text box (below the Images list) and enter your text. The image description won’t be visible in your document.
Remove an image: Click the image thumbnail, then press Delete.
To view the images in the image gallery, click ![]() or
or ![]() .
.