Final Cut Pro User Guide
- Welcome
- What’s new
-
- Intro to effects
-
- Intro to transitions
- How transitions are created
- Add transitions and fades
- Quickly add a transition with a keyboard shortcut
- Set the default duration for transitions
- Delete transitions
- Adjust transitions in the timeline
- Adjust transitions in the inspector and viewer
- Merge jump cuts with the Flow transition
- Adjust transitions with multiple images
- Modify transitions in Motion
-
- Add storylines
- Use the precision editor
- Conform frame sizes and rates
- Use XML to transfer projects
- Glossary
- Copyright

Skim media in Final Cut Pro for Mac
You can quickly skim your video and audio to preview it, search for a particular shot, or make an edit. When skimming is turned on and you move the pointer forward or backward over a clip in the browser or the timeline, the content under the pointer plays in the viewer.
You can also use the Blade, Trim, and Range Selection editing tools to skim clips in the timeline or the precision editor. You can also turn on clip skimming to view or hear individual clips in isolation.
As you’re editing in Final Cut Pro, you may find skimming distracting when you move the pointer from one location to another. You can disable all skimming (or just audio skimming).
Skim clips
In Final Cut Pro, move the pointer forward or backward over a clip in the browser or the timeline.
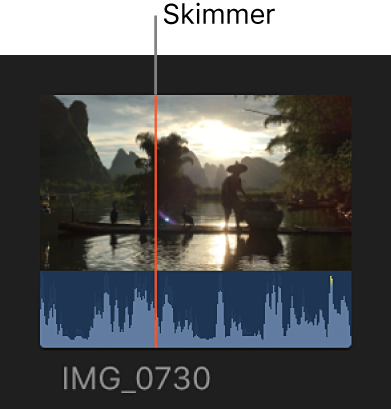
The skimmer (a vertical red line) indicates exactly where the pointer is as you skim, and the corresponding frames are displayed in the viewer.

Tip: You can also press the Space bar at any time to play forward from the skimmer position.
Skim clips with editing tools
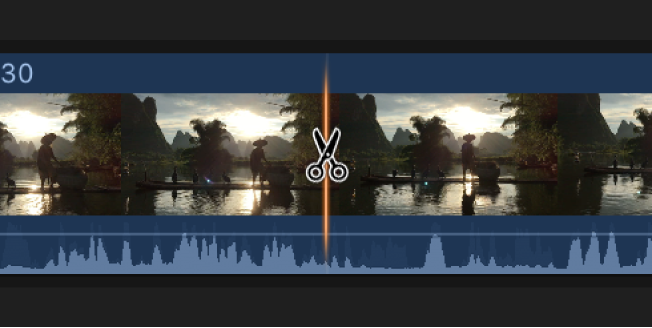
The Blade, Trim, and Range Selection tools behave as skimmers as you move the pointer over a clip.
In Final Cut Pro, select a clip in the timeline or open the precision editor.
Click the Tools pop-up menu above the timeline, then choose the Blade, Trim, or Range Selection tool.

Move the tool forward or backward over a clip.
When using an editing tool as a skimmer, you can skim and add markers to clips below connected clips in the timeline.

Note: When you skim clips with editing tools, Final Cut Pro displays the source timecode for those clips. See View source and project timecode in Final Cut Pro for Mac.
Turn skimming on and off
In Final Cut Pro, do any of the following:
Turn all skimming on or off: Click the Skimming button.
You can also choose View > Skimming (or press S).
Turn audio skimming on or off: Click the Audio Skimming button.
You can also choose View > Audio Skimming (or press Shift-S).
When skimming is turned on, the skimming buttons appear highlighted.

Note: When skimming is turned off, you can still skim with the Blade, Trim, and Range Selection editing tools.
Skim audio for individual clips or audio components
You can turn on clip skimming to limit audio skimming to an individual clip. This is useful if you have a connected clip in the timeline and want to skim it without also hearing audio from the clip in the primary storyline. When clip skimming is turned on, Final Cut Pro displays the source timecode for clips as you skim.
Important: You must turn on audio skimming to use this feature.
In Final Cut Pro, choose View > Clip Skimming (or press Option-Command-S).
A checkmark appears next to the menu item to indicate that clip skimming is turned on.
You can also use clip skimming to skim and listen to an individual audio component when editing clips that show expanded audio components. If clip skimming is turned off, you hear combined audio for all components in the clip as you skim.
Tip: To view expanded audio components, select the clip in the timeline and choose Clip > Expand Audio Components (or press Control-Option-S).
With clip skimming enabled, you can view source timecode as you skim clips in the timeline. See View source and project timecode in Final Cut Pro for Mac.
Download this guide: Apple Books | PDF