Keynote User Guide for Mac
- Welcome
-
- Send a presentation
- Intro to collaboration
- Invite others to collaborate
- Collaborate on a shared presentation
- See the latest activity in a shared presentation
- Change a shared presentation’s settings
- Stop sharing a presentation
- Shared folders and collaboration
- Use Box to collaborate
- Create an animated GIF
- Post your presentation in a blog
-
- Use iCloud Drive with Keynote
- Export to PowerPoint or another file format
- Reduce the presentation file size
- Save a large presentation as a package file
- Restore an earlier version of a presentation
- Move a presentation
- Delete a presentation
- Password-protect a presentation
- Lock a presentation
- Create and manage custom themes
- Copyright

Add rules (lines) to separate text in Keynote on Mac
You can separate text by adding a solid, dashed or dotted rule above or below paragraphs in a text box or shape.
Add lines between paragraphs
Select the text where you want to add a rule.
In the Format
 sidebar, click the Text tab, then click the Layout button near the top of the sidebar.
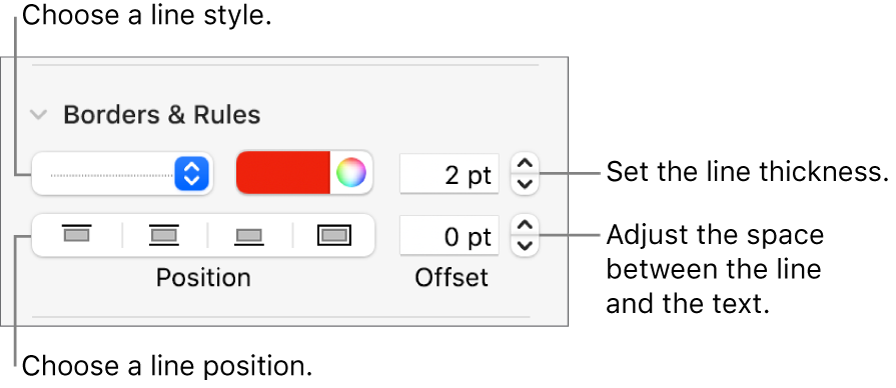
Click the pop-up menu next to Borders & Rules, then choose a line type (solid, dashed or dotted).
Click the disclosure arrow next to Borders & Rules, then do any of the following:

Set where the line appears: Click a position button.
Change the thickness of the line: Click the arrows for the value field next to the line colour controls.
Choose a colour that goes with your theme: Click the colour well on the left of the colour wheel.
Choose any colour: Click the colour wheel, then choose a colour in the Colours window.
Adjust the spacing between the line and the text it’s applied to: Click the arrows for the Offset field.
To remove a rule, select the paragraph, click the pop-up menu below Borders & Rules, then choose None.