Final Cut Pro User Guide
- Welcome
- What’s new
-
- Intro to effects
-
- Intro to transitions
- How transitions are created
- Add transitions and fades
- Quickly add a transition with a keyboard shortcut
- Set the default duration for transitions
- Delete transitions
- Adjust transitions in the timeline
- Adjust transitions in the inspector and viewer
- Merge jump cuts with the Flow transition
- Adjust transitions with multiple images
- Modify transitions in Motion
-
- Add storylines
- Use the precision editor
- Conform frame sizes and rates
- Use XML to transfer projects
- Glossary
- Copyright

Move titles in 3D space in Final Cut Pro for Mac
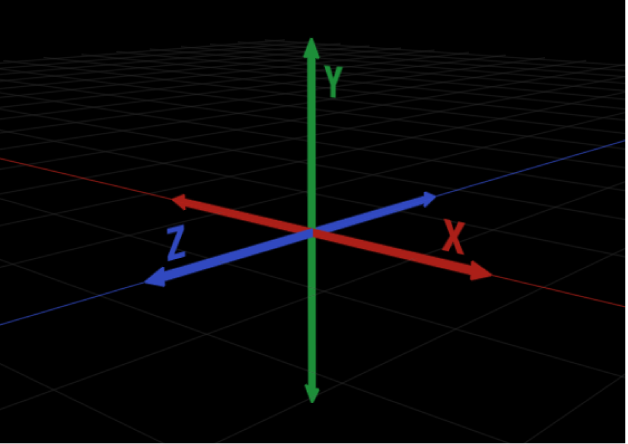
Final Cut Pro uses a 3D coordinate system to precisely control the look of your 3D titles. This system specifies the center of the viewer as 0, 0, 0. Moving a text object to the left subtracts from the X value, moving to the right adds to the X value, and so on.

One of the main differences between 2D text and 3D text is that with 3D text you can change your point of view, so that moving an object up doesn’t always mean increasing its Y position value.
In Final Cut Pro, add a 3D title to your project and select it in the timeline.
Position the playhead in the timeline so that your 3D title appears in the viewer.
In the viewer, click the 3D title once.
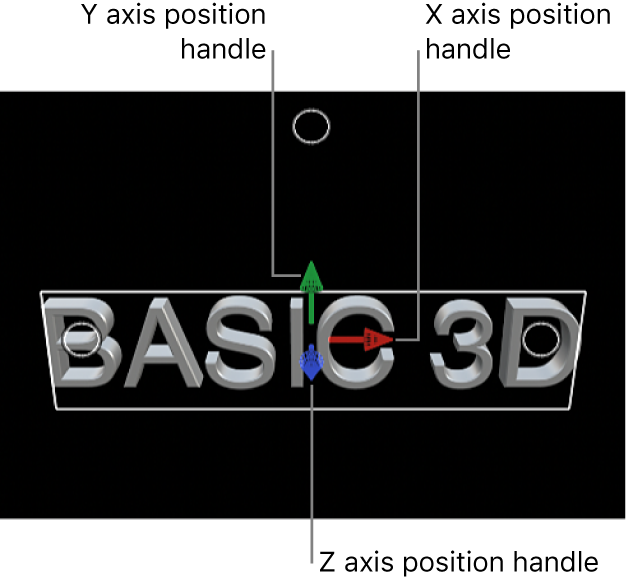
The onscreen controls for the 3D title appear in the viewer, with position handles for the X, Y, and Z axes.

Do any of the following:
Move the object horizontally along its X axis: Drag the red arrow.
Move the object vertically along its Y axis: Drag the green arrow.
Move the object forward or backward along its Z axis: Drag the blue arrow.
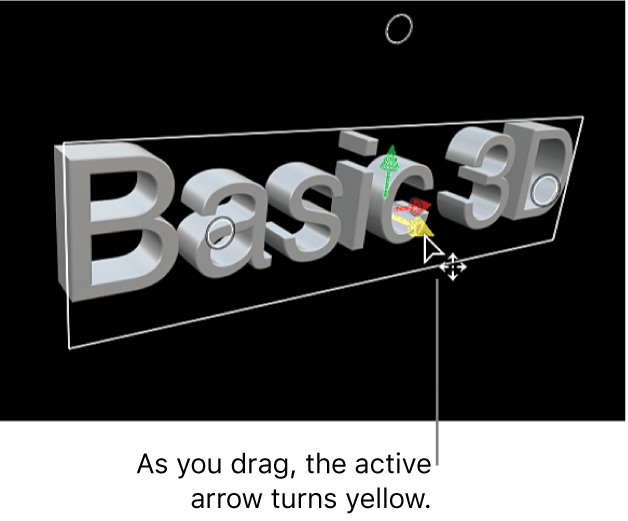
As you drag, the active arrow turns yellow, and the status bar above the viewer displays the current coordinates of the object as well as the distance the object has moved (the delta). Coordinates are given in the form of X, Y, and Z.

Download this guide: Apple Books | PDF