Final Cut Pro User Guide
- Welcome
- What’s new
-
- Intro to effects
-
- Intro to transitions
- How transitions are created
- Add transitions and fades
- Quickly add a transition with a keyboard shortcut
- Set the default duration for transitions
- Delete transitions
- Adjust transitions in the timeline
- Adjust transitions in the inspector and viewer
- Merge jump cuts with the Flow transition
- Adjust transitions with multiple images
- Modify transitions in Motion
-
- Add storylines
- Use the precision editor
- Conform frame sizes and rates
- Use XML to transfer projects
- Glossary
- Copyright

Add audio effects in Final Cut Pro for Mac
In addition to enhancing audio using the built-in audio enhancement features, you can take advantage of 64-bit macOS built-in and third-party Audio Units (AU) effects for your audio processing tasks.
Final Cut Pro also comes with an extensive range of custom audio effects and professional Logic effects, which are digital signal processing (DSP) effects and processors that are used to color or tonally shape existing audio recordings and audio sources—in real time.
Some of the most common processing options include noise reduction, pitch correction, EQs, dynamic processors, and reverbs. Further advanced features include delays, modulations, distortions, bass enhancement, and time-altering processors and utilities. Some custom effects included with Final Cut Pro combine multiple effects to create a particular sound environment, such as a cathedral.
You can add effects to individual audio clips and components or to a compound clip. After you add an effect, you can adjust its settings using the Audio inspector.
Add audio effects to a clip
Click the Effects button in the top-right corner of the Final Cut Pro timeline (or press Command-5).

In the Effects browser, select an audio effect.
You can do any of the following to help make your selection:
Preview what an effect sounds like using the audio from the currently selected timeline clip: Move the pointer over the audio effect thumbnail.
Filter the list of effects that appear: Type text in the Effects browser search field.
Do one of the following:
Drag the effect to an audio clip (or a video clip with audio) in the timeline.
Double-click the effect icon to apply the effect to the selected clip.
The effect appears in the Effects section of the Audio inspector and in the Audio Animation editor. You can now adjust the effect.
Change the order of audio effects
You can apply multiple audio effects to a timeline clip.
The order in which you apply them affects the final output. For example, if you apply a reverb effect followed by the Noise Gate effect, the Noise Gate effect will interpret some of the reverb as noise and attempt to remove it.
After you apply audio effects to a clip, you can change the order in which they process the audio signal by reordering them in the Audio inspector or the Audio Animation editor. The first effect applied appears at the top of the list.
In the Final Cut Pro timeline, select a clip you’ve added effects to.
Do one of the following:
In the Effects section of the Audio inspector, drag an effect up or down.
In the Audio Animation editor, drag an effect up or down.
Tip: Apply audio effects in this order: any noise reduction (if needed), then EQ or special effects, then compression or limiters.
Copy all of a clip’s effects to another clip
You can copy effects and their settings from one clip to another. This can be especially useful if you’ve made adjustments to effects in a clip that you want to preserve and use with other clips.
Select a clip in the Final Cut Pro timeline, then choose Edit > Copy (or press Command-C).
Select the clip or clips you want to apply the effects to, then choose Edit > Paste Effects (or press Option-Command-V).
If a clip has more than one effect applied to it, all of the effects and their settings are applied to the other clip.
Copy selected clip attributes to another clip
You can copy selected audio attributes, such as settings and effects, from one clip to another. For example, you can copy pan settings, or any effects you’ve added to a clip, including any keyframe adjustments.
Select a clip in the Final Cut Pro timeline, then choose Edit > Copy (or press Command-C).
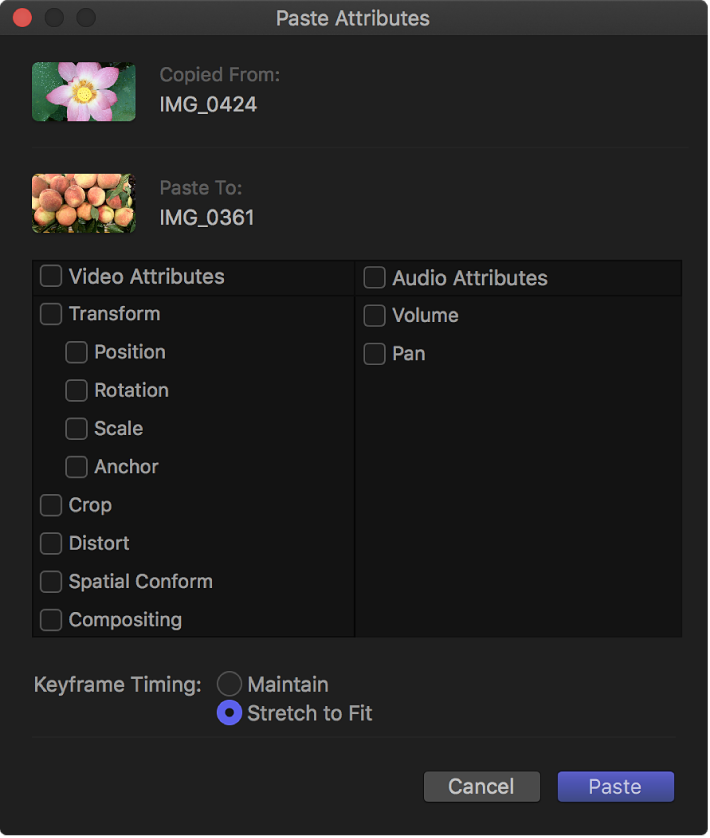
Select the clip or clips you want to apply the attributes to, then choose Edit > Paste Attributes (or press Shift-Command-V).
In the Paste Attributes window, do any of the following:
Apply all audio attributes from the source clip: Select the Audio Attributes checkbox.
Apply individual attributes: Select the checkboxes for the attributes you want to apply.
If you made any keyframe adjustments to the source clip: In the Keyframe Timing section, select either Maintain or Stretch to Fit. If you choose Stretch to Fit, Final Cut Pro adjusts the keyframes in time to match the duration of the destination clip.

Click Paste.
For more information about using the Logic effects that are included with Final Cut Pro, see Final Cut Pro Logic Effects for Mac.
Download this guide: Apple Books | PDF