Final Cut Pro User Guide for Mac
- Welcome
- What’s new
-
- Intro to importing media
- If it’s your first import
- Organize files during import
-
- Import from Image Playground
- Import from iMovie for macOS
- Import from iMovie for iOS or iPadOS
- Import from Final Cut Pro for iPad
- Import from Final Cut Camera
- Import from Photos
- Import from Music
- Import from Apple TV
- Import from Motion
- Import from GarageBand and Logic Pro
- Import using workflow extensions
- Record into Final Cut Pro
- Memory cards and cables
- Supported media formats
-
- Intro to effects
-
- Intro to transitions
- How transitions are created
- Add transitions and fades
- Quickly add a transition with a keyboard shortcut
- Set the default duration for transitions
- Delete transitions
- Adjust transitions in the timeline
- Adjust transitions in the inspector and viewer
- Merge jump cuts with the Flow transition
- Adjust transitions with multiple images
- Modify transitions in Motion
- Add adjustment clips
-
- Add storylines
- Use the precision editor
- Conform frame sizes and rates
- Use XML to transfer projects
-
- Intro to sharing projects
- Share to Apple devices
- Share on the web
- Send a video frame to Pixelmator Pro
- Share in email
- Share stereo or spatial video
- Batch sharing
- Share using Compressor
- Create share destinations
- Change metadata for shared items
- View the status of shared items
- Speed up exports with simultaneous processing
- Glossary
- Copyright and trademarks
Add the Tiny Planet effect in Final Cut Pro for Mac
You can use the Tiny Planet mapping setting on 360° clips in a standard rectilinear project. The entire 360° sphere is converted to a stereographic projection (mapped onto a flat plane), creating the effect of a tiny planet.

In contrast, the Normal mapping setting shows a standard image (a portion of the 360° image) in the viewer in a rectilinear project, and the full equirectangular image in the viewer in a 360° project.

Note: You can apply 360° clip effects such as 360° Patch and 360° Noise Reduction to 360° clips in a rectilinear project. You can also add 360° titles and generators to rectilinear projects.
In Final Cut Pro, create a standard rectilinear project, and add one or more 360° clips.
Select the clip or clips in the timeline.
In the Video inspector, scroll down to the Orientation section, then click the Mapping pop-up menu and choose Tiny Planet.
To modify the tiny planet effect, do one of the following:
Adjust the parameter controls in the Orientation section of the Video inspector.
Click the Orientation button
 in the Orientation section of the inspector, then drag in the viewer to adjust the Orientation parameters. See Change the 360° orientation using the onscreen control.
To constrain the movement to one axis, hold down the Shift key as you drag.
The following parameters are particularly useful for tiny planets:
Field of View: Zoom in or out on the tiny planet.
Pan (Y): Rotate the planet.
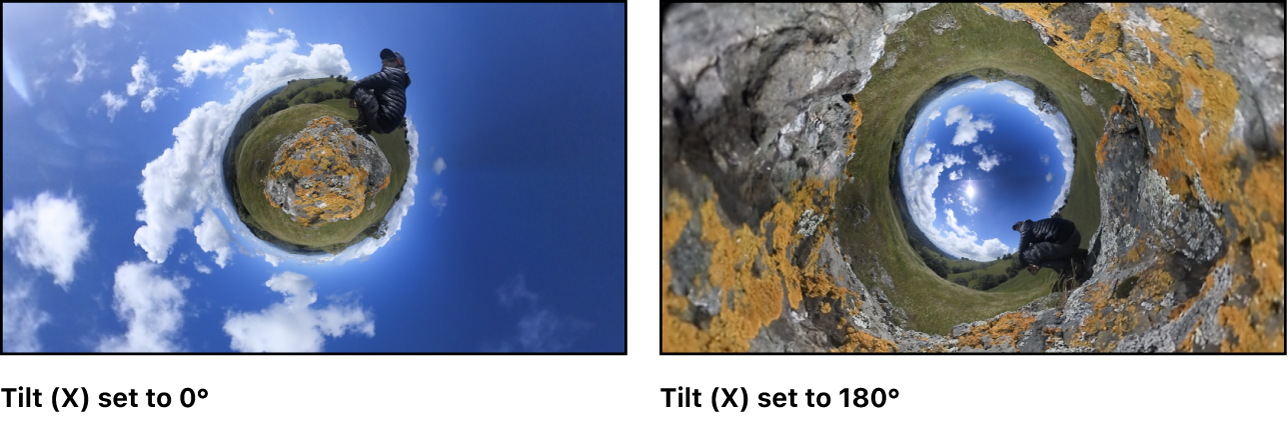
Tilt (X): Create an inverted tiny planet.

Tip: During production, have some fun and take a stroll around your tiny planet: Position your 360° camera, start recording, take two or three large steps away from the camera, then walk, ride, or skate in a concentric circle around the camera.
Download this guide: PDF