Numbers User Guide for Mac
- Welcome
- What’s new
-
- Get started with Numbers
- Intro to images, charts, and other objects
- Create a spreadsheet
- Open or close spreadsheets
- Personalize templates
- Use sheets
- Undo or redo changes
- Save your spreadsheet
- Find a spreadsheet
- Delete a spreadsheet
- Print a spreadsheet
- Change the sheet background
- Change Numbers privacy and analytics settings
-
- Use iCloud with Numbers
- Import an Excel or text file
- Export to Excel or another file format
- Reduce the spreadsheet file size
- Save a large spreadsheet as a package file
- Restore an earlier version of a spreadsheet
- Move a spreadsheet
- Lock a spreadsheet
- Password-protect a spreadsheet
- Create and manage custom templates
- Copyright

Add borders and rules (lines) to separate text in Numbers on Mac
You can add a solid, dashed, or dotted rule (line) above or below a paragraph in a text box or shape.
Note: If the text is in a table cell, you can add a border around the cell. See Change the table outline and gridlines.
Go to the Numbers app
on your Mac.Open a spreadsheet, then select the text where you want to add a rule.
In the Format
 sidebar, click the Text tab, then click the Layout button near the top of the sidebar.
Click the pop-up menu in the Paragraph Borders controls, then choose a line style.
A rule appears above each paragraph you selected.
Do any of the following:
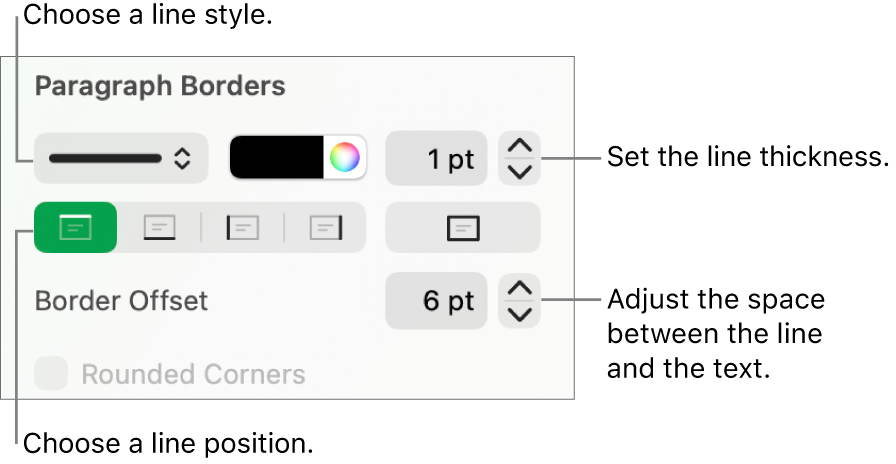
Add one or more lines: Click one or more position buttons (below the line style pop-up menu and color well).
Choose a color that goes with your template: Click the color well to the left of the color wheel, then choose a color.
Choose any color: Click the color wheel, then choose a color in the Colors window.
Change the line thickness: Click the arrows for the value field next to the line color controls.
Change the amount of space between the line or border and the text: Click the Border Offset arrows.

To quickly remove the border or rule, select the paragraph, click the pop-up menu below Borders & Rules, then choose None.