Use your Beats Studio Buds +
When you’re wearing your Beats Studio Buds +, you can use controls to play, pause, adjust volume, answer phone calls, switch between noise cancellation and transparency modes, use Siri, and more.

When you take Beats Studio Buds + out of the charging case, they’re turned on and ready to use.
Charge Beats Studio Buds +
Pair Beats Studio Buds + with your Apple or Android device
See Pair Beats.
Play audio on Beats Studio Buds +
Wear your Beats Studio Buds +, and make sure they’re connected to your Apple or Android device.
Go to an audio app, then play something—for example, a song in the Music app
 or an episode in the Podcasts app
  .
.Do any of the following using either earbud:
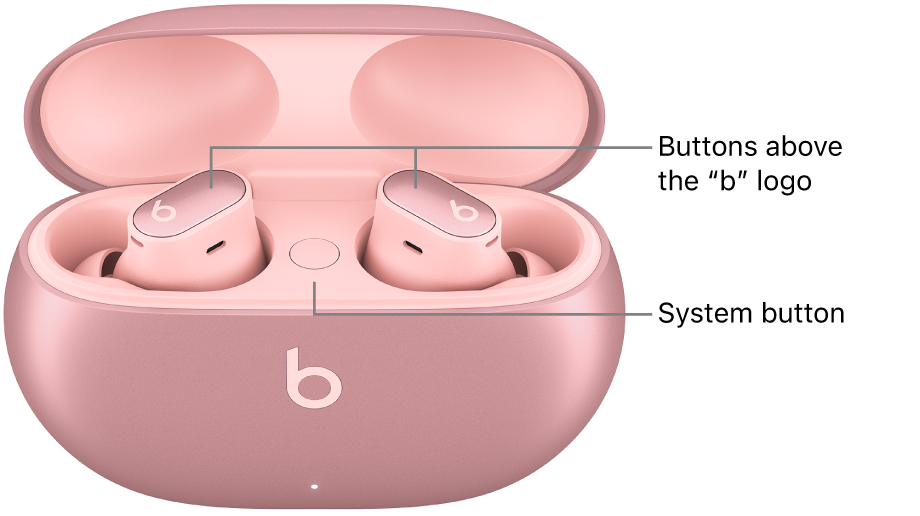
Play and pause audio: Press the button above the
 logo. To resume playback, press it again.
Play the next track: Double-press the button above the
 logo.
logo.Play the previous track: Triple-press the button above the
 logo.
logo.
Change the volume on Beats Studio Buds +
Do one of the following:
iPhone or iPad: Say “Hey Siri,” then when you hear a chime, say something like “Turn down the volume.” You can also drag the volume slider in Control Center, or use the volume controls in your audio app or the volume buttons on your iPhone or iPad.
Android device: Use Google Assistant (or another voice assistant) to say something like “Turn down the volume.” You can also use the volume controls in your audio app or the volume buttons on your Android device.
For the best experience, make sure you’ve set up Siri on iPhone or iPad, or your voice assistant on your Android device.
Switch between noise cancellation and transparency modes on Beats Studio Buds +
Press and hold the button above the ![]() logo on either earbud to switch between Active Noise Cancellation (ANC) and Transparency.
logo on either earbud to switch between Active Noise Cancellation (ANC) and Transparency.
A tone plays when the listening mode changes.
You can turn off Active Noise Cancellation (ANC) and Transparency using the Off listening mode (not enabled by default). To cycle between Off, Transparency, and Noise Cancellation, see Change Beats press-and-hold settings.
Note: You can also switch between listening modes using your Apple or Android device.
Turning ANC and Transparency mode off maximizes battery life.
To customize the press-and-hold actions on Beats Studio Buds +, see Change Beats press-and-hold settings.
Listen to Spatial Audio on Beats Studio Buds +
Make and answer calls on Beats Studio Buds +
Do any of the following using either earbud:
Make a call using Siri or another voice assistant: Make sure you’ve set up Siri. Press and hold the button above the
 logo, then when you hear a chime, say something like “Call Eliza’s mobile.”
Answer or end a call: When you receive a call, press the button above the
 logo. To end the call, double-press it.
Answer a second incoming call and put the first call on hold, or switch between two active calls: Press the button above the
 logo.
logo.Decline an incoming call: Press and hold the button above the
 logo.
logo.Mute or unmute the microphone: During a call, press the button above the
 logo. To unmute, press it again.
Send the audio from your earbuds to your device: Double-press the button above the
 logo.
logo.
To customize the end-call, mute/unmute, and press-and-hold actions on Beats Fit Pro, see Customize controls on your Beats.
Ask Siri on Beats Studio Buds +
Set up Siri (if you haven’t already done so).
Do either of the following:
Say “Hey Siri.”
Press and hold the button above the
 logo on either earbud.
When you hear a chime, make your request.
Learn how to change your settings to activate Siri or to use Siri to announce calls or notifications on your Beats.