Final Cut Pro User Guide
- Welcome
-
- What’s new in Final Cut Pro 10.5
- What’s new in Final Cut Pro 10.4.9
- What’s new in Final Cut Pro 10.4.7
- What’s new in Final Cut Pro 10.4.6
- What’s new in Final Cut Pro 10.4.4
- What’s new in Final Cut Pro 10.4.1
- What’s new in Final Cut Pro 10.4
- What’s new in Final Cut Pro 10.3
- What’s new in Final Cut Pro 10.2
- What’s new in Final Cut Pro 10.1.2
- What’s new in Final Cut Pro 10.1
- What’s new in Final Cut Pro 10.0.6
- What’s new in Final Cut Pro 10.0.3
- What’s new in Final Cut Pro 10.0.1
-
- Intro to effects
-
- Intro to transitions
- How transitions are created
- Add transitions
- Set the default transition
- Delete transitions
- Adjust transitions in the timeline
- Adjust transitions in the inspector and viewer
- Merge jump cuts with the Flow transition
- Adjust transitions with multiple images
- Modify transitions in Motion
-
- Add storylines
- Use the precision editor
- Conform frame sizes and rates
- Use XML to transfer projects
-
- Glossary
- Copyright

Add the 360° Patch effect in Final Cut Pro
You can use the 360° Patch effect to cover up (patch) a portion of a 360° clip with pixels from another location in the 360° sphere. The 360° Patch effect is typically used to hide the tripod or camera support by cloning an area of the ground near the camera. You use the source controls to specify where in the image you want to copy the patch from, and the target controls to specify where to paste the patch.
Unlike a static image, a patch created with the 360° Patch effect adjusts dynamically as the lighting changes in the scene.

Apply the 360° Patch effect
In Final Cut Pro, create a 360° project.
Add a 360° clip to the timeline, then select the clip.
Position the playhead over the clip in the timeline so that the clip’s video is displayed in the viewer.
Open the Effects browser, select the 360° category on the left, then double-click 360° Patch to add the effect to the clip selected in the timeline.
If the Video inspector isn’t already shown, do one of the following:
Choose Window > Show in Workspace > Inspector (or press Command-4).
Click the Inspector button on the right side of the toolbar.

In the Video inspector, click the Patch Region pop-up menu and choose a general area of the 360° sphere to work on.
You can choose Nadir (Bottom), Zenith (Top), Front, Back, Left, or Right.
Select the Setup Mode checkbox.
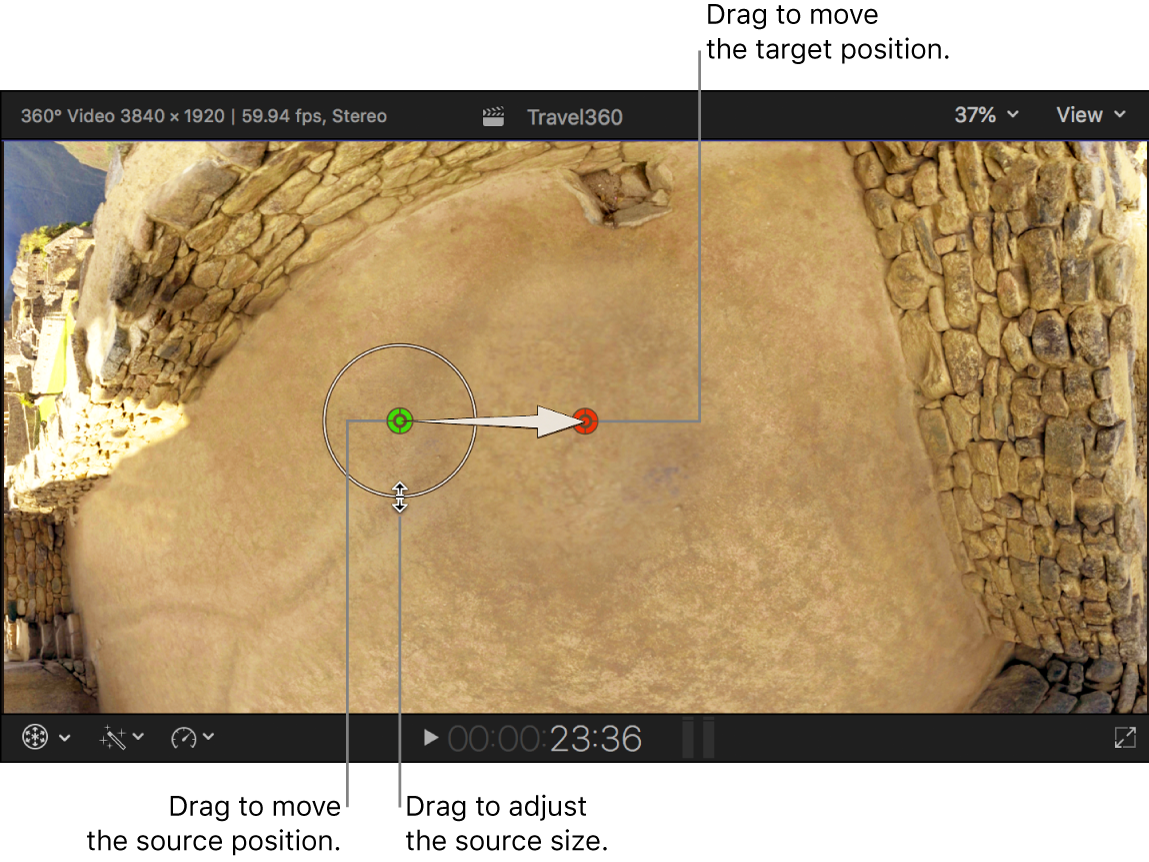
The area of the image you chose in the Patch Region pop-up menu appears in the viewer, with onscreen controls for the patch source and target areas.
Drag the red (target) control over the area you want to patch (cover up).
Drag the green (source) control over the area you want to clone (copy).
To adjust the source radius (the size of the area you want to clone), drag the white circle around the green control.
In the Video inspector, adjust any of the following source parameters (which define the portion of the 360° image to copy for the patch):
Source Position: Adjust the source location.
Source Radius: Adjust the source size.
Source Softness: Adjust the softness of the patch edge.
Source Aspect: Adjust the patch shape.
Source Angle: Rotate the source shape.
To “spotlight” the source selection, dimming the rest of the image, select the Highlight Source checkbox.
Adjust any of the following target parameters (which define the portion of the 360° image to patch):
Target Position: Adjust the target location.
Target Opacity: Adjust the patch opacity.
Target Angle: Rotate the target shape.
Target Scale: Adjust the target size.
To flop the cloned image horizontally, vertically, or both horizontally and vertically, click the Target Flip Flop pop-up menu and choose an option.
To dismiss the onscreen controls and return to the standard view in the viewer and the 360° viewer, deselect the Setup Mode checkbox.
The patch appears on the 360° clip. (You may need to use the 360° viewer to navigate to it.)
Note: You can keyframe most of the parameters in the 360° Patch effect. See Add video effect keyframes in Final Cut Pro.
Create a separate clip with only the 360° Patch image
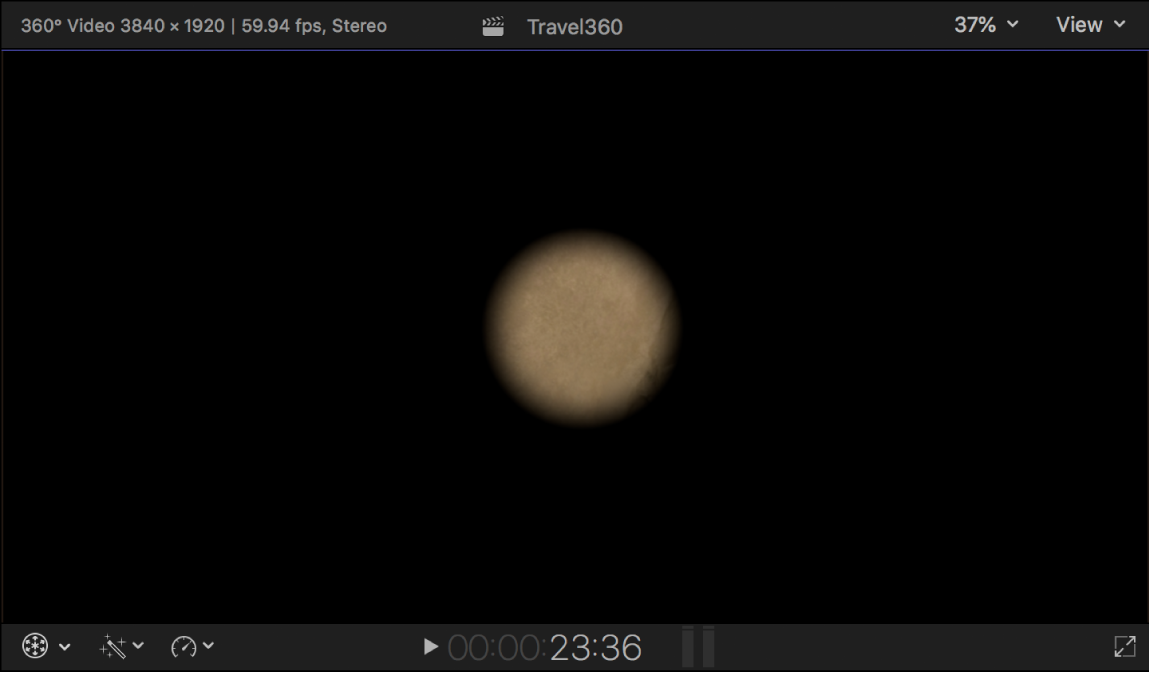
By default, the 360° Patch effect is composited onto the 360° image as a permanent change in the output media file. You can isolate the patch image in a separate connected clip, which is particularly useful if you need to color correct the patch in isolation from the rest of the 360° image.
Apply the 360° Patch effect to a clip in your 360° project.
Duplicate the clip, then connect the duplicate clip above the original clip in the timeline.
Tip: A quick way to do this is to Option-drag the clip to the area in the timeline just above the clip.
Select the connected clip.
If the Video inspector isn’t already shown, do one of the following:
Choose Window > Show in Workspace > Inspector (or press Command-4).
Click the Inspector button on the right side of the toolbar.

Deselect the Show Background checkbox at the bottom of the 360° Patch effect controls in the Video inspector.
Final Cut Pro creates an alpha channel mask, isolating the patch image. You can now apply color correction and video effects to the patch image, separately from the original clip.
