Use the Color Curves effect in Final Cut Pro for Mac
You can use color curves to adjust the components of individual color channels in a clip image. You can adjust the overall luma as well as the red, green, and blue color channels. A feature unique to Final Cut Pro is that you can adjust any custom color you specify—for example, you can select any mixture of chroma and then adjust its intensity.
First you add the Color Curves color correction effect to the clip, and then you adjust its settings in the Color inspector.
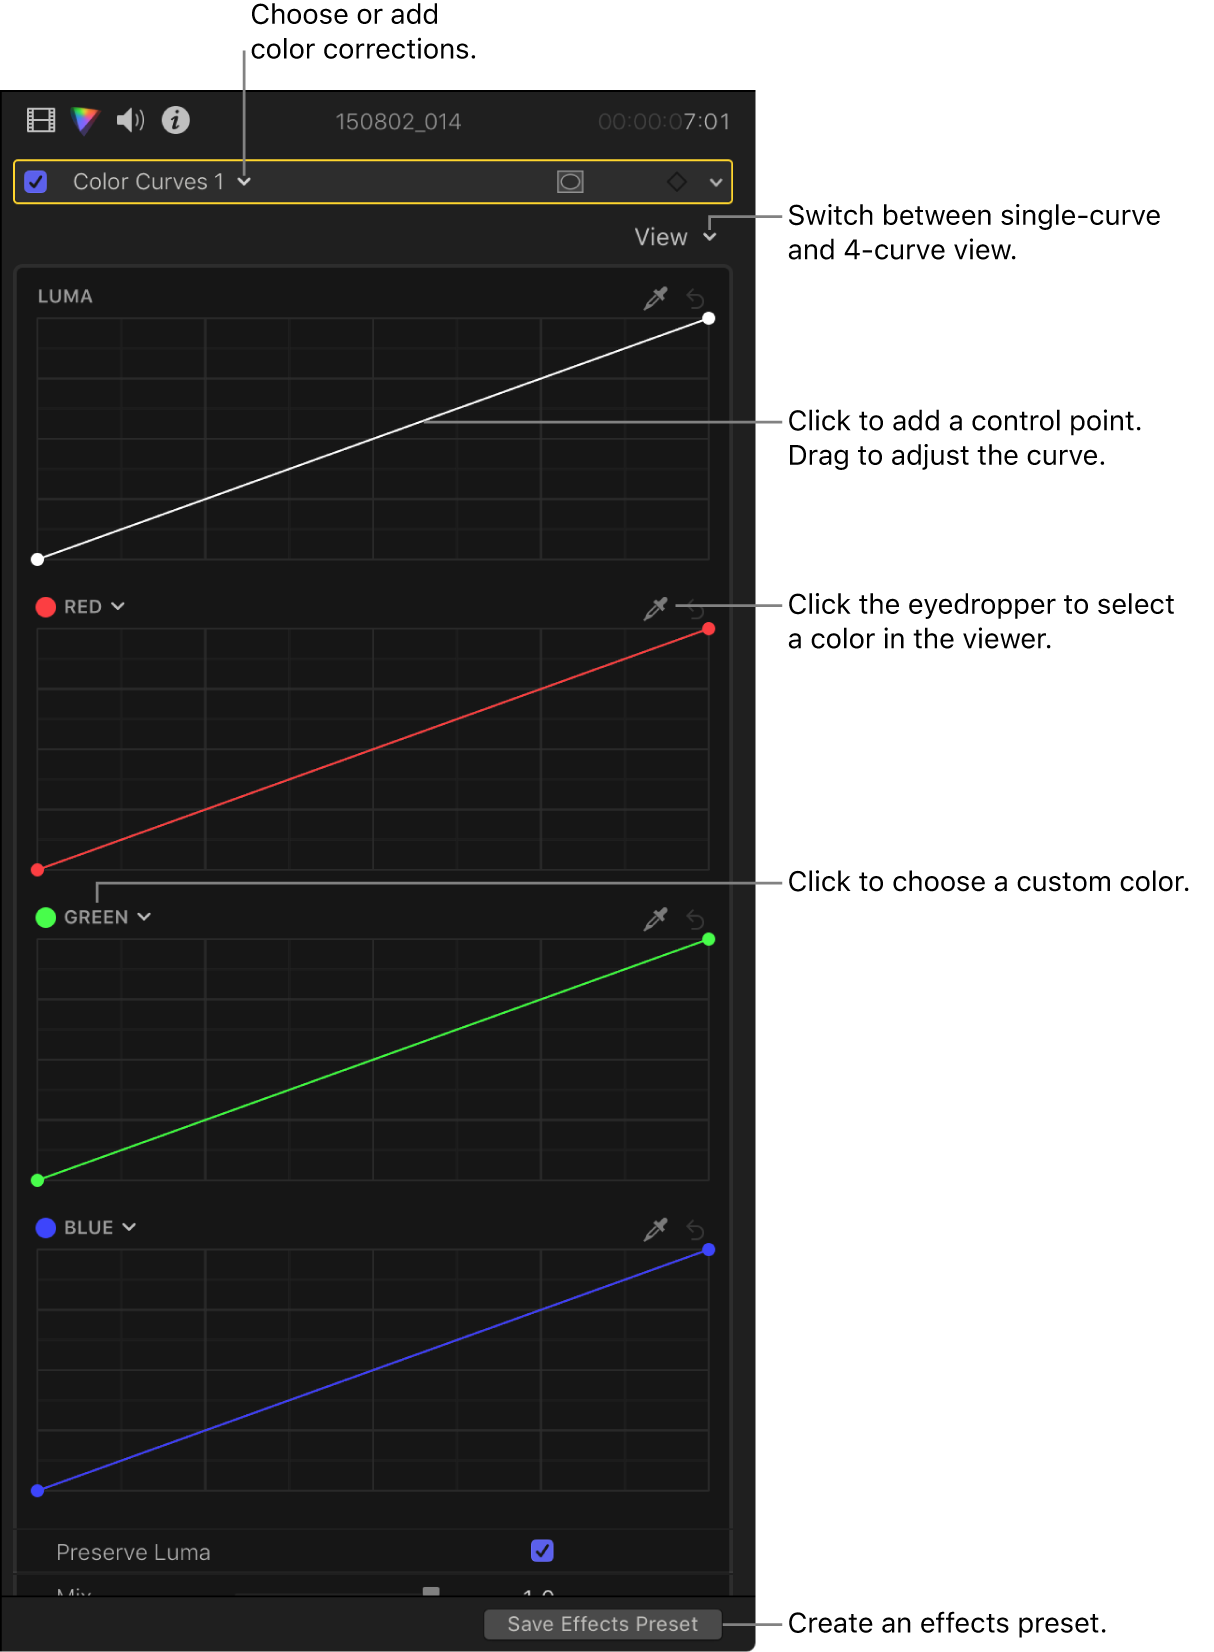
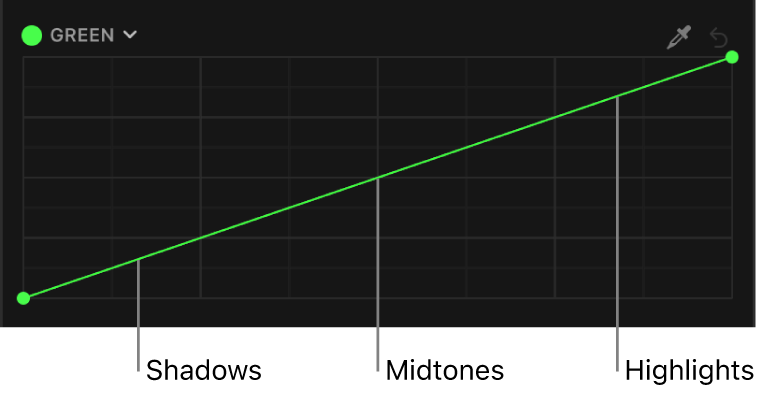
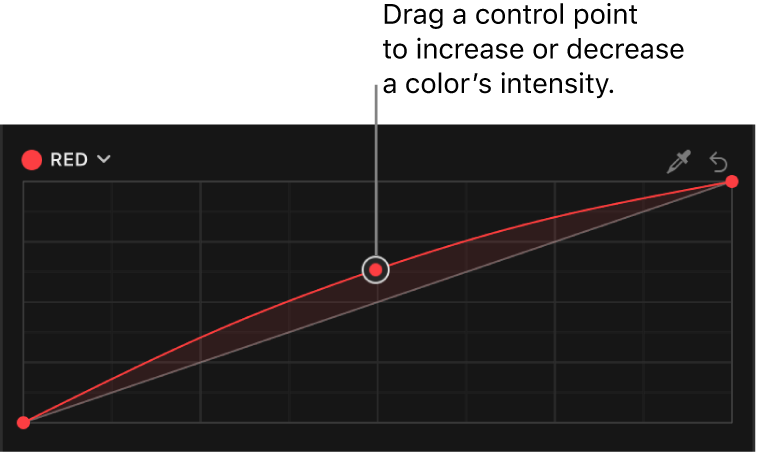
A color curve is like an interactive histogram that is tilted at a 45-degree angle. The different tonal ranges of the image (the shadows, midtones, and highlights) are distributed along the curve. You can click the curve to create control points, then drag the control points up or down to increase or decrease the intensity of the color for a given tonal range.
To provide objective, precise information as you color correct a clip, use the video scopes and other video measurement tools (see Intro to measuring video).
You can create a custom workspace layout for color correction or switch to the predefined Color & Effects layout (see Change the workspace layout).
Note: Because you can apply multiple color correction effects to a clip, you’re not required to follow all of the steps below, nor the order of those steps. For example, you might adjust the overall contrast with the Color Curves effect and adjust a color tint with the Color Wheels effect. Or you could achieve the same results with multiple instances of the same effect. For a summary of the color correction effects, see Intro to color correction effects.
Use the color curves to adjust the intensity of a color channel
In the Final Cut Pro timeline, select the clip you want to correct, then position the playhead in the clip so that the clip appears in the viewer.
Open the Color inspector.
Tip: If you frequently add a particular color correction effect, you can speed up your workflow by setting it as the default color correction. Then just select a timeline clip and press Command-6 to start adjusting the effect in the Color inspector.
Click the pop-up menu at the top of the Color inspector, then do one of the following:
Add a new instance of the Color Curves effect: Choose Color Curves from the Add Correction section at the bottom of the menu.
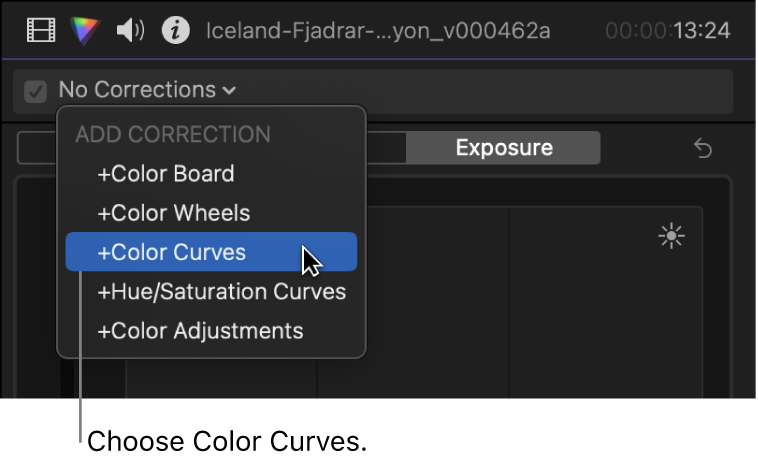
For more details and methods, see Add color correction effects.
Correct a Color Curves effect already applied to the clip: Choose the Color Curves effect you want to correct from the Corrections section at the top of the menu.
Color Curves controls appear in the Color inspector. The effect also appears in the Effects section of the Video inspector.

Tip: To switch the inspector between full-height view and half-height view, double-click the top bar of the inspector.
Click the View pop-up menu at the top of the Color inspector and choose a display option:
All Curves: Displays all four color curves at once.
The default color curves are Luma, Red, Green, and Blue.
Single Curves: Displays one large color curve at a time. Click a button at the top of the Color inspector to select the curve to display.
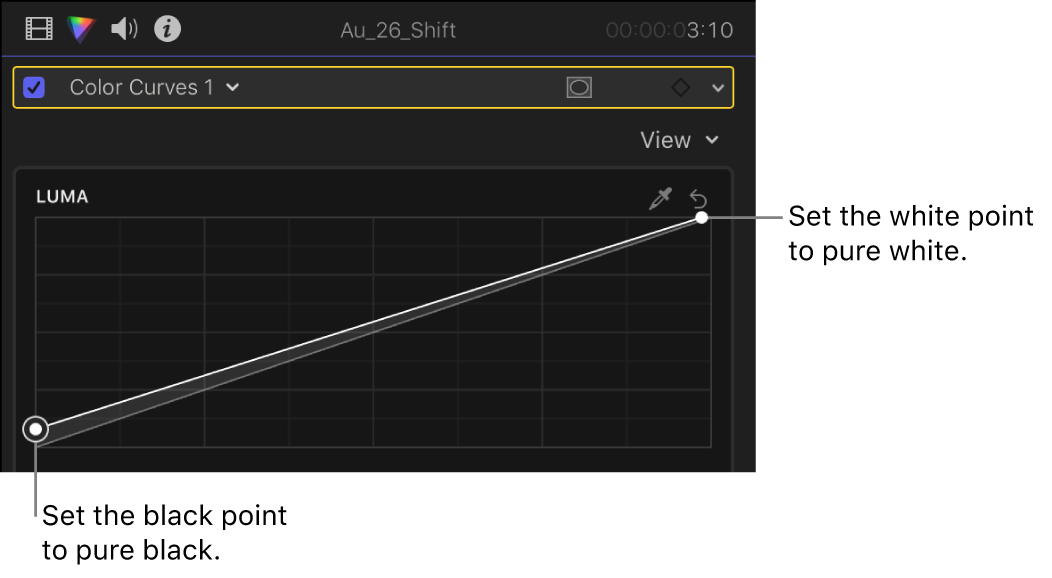
To set the black and white points, drag the control points on the ends of the Luma curve.
It’s a good idea to use the waveform monitor as you do this, to make sure you don’t clip the highlights or crush the blacks more than you want to, and to make sure the image remains broadcast-safe. To show the waveform monitor, see Display video scopes.
To adjust a color channel, click a curve to set a control point, then drag it up to increase the intensity of the color or down to decrease the intensity.
To constrain the control point to vertical or horizontal movement, hold down the Shift key as you drag. To make fine adjustments, hold down the Option key as you drag.
Adjusting the image with a single control point affects most of the midtones as well as some shadows and highlights.
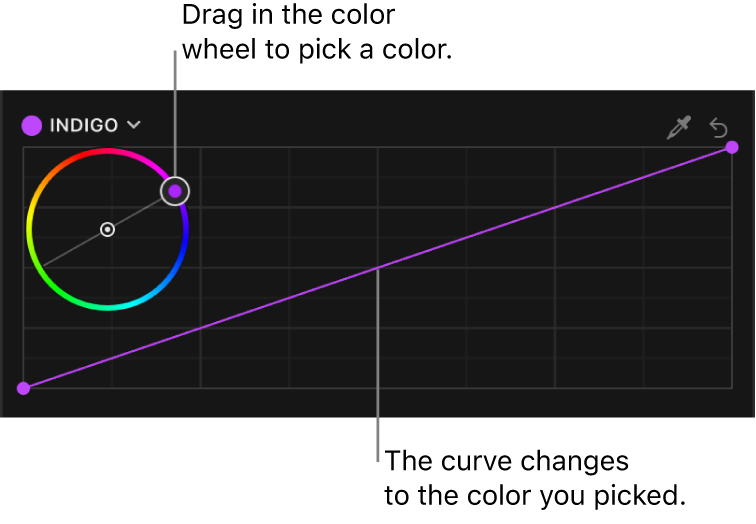
To select a custom color to adjust, click the eyedropper at the top of one of the color curves, then click or drag over a color in the viewer. You can also click the name of a color curve (at the top left of the curve), then click or drag in the color wheel.
Tip: To remove a color cast from a clip with manual control and precision, click the eyedropper at the top of one of the color curves, then, in the viewer, click or drag over an area of the image that’s supposed to be white, such as a white sheet of paper. A vertical gray line appears on the color curve. Click to add a control point where the gray line intersects the curve, then drag the control point down until the selected color turns white. Use the waveform monitor in RGB Parade view to verify the change.
To narrow the tonal range for your adjustments, add more control points.
The default diagonal line for each curve indicates the original state of the image. Wherever the curve diverges from the diagonal line, the image is altered. Wherever the curve touches the diagonal line, the values of the image at that tonality are the same as in the original image. For example, to prevent any change to the shadows, you could add a control point to pin the curve to the diagonal line in the shadows area.
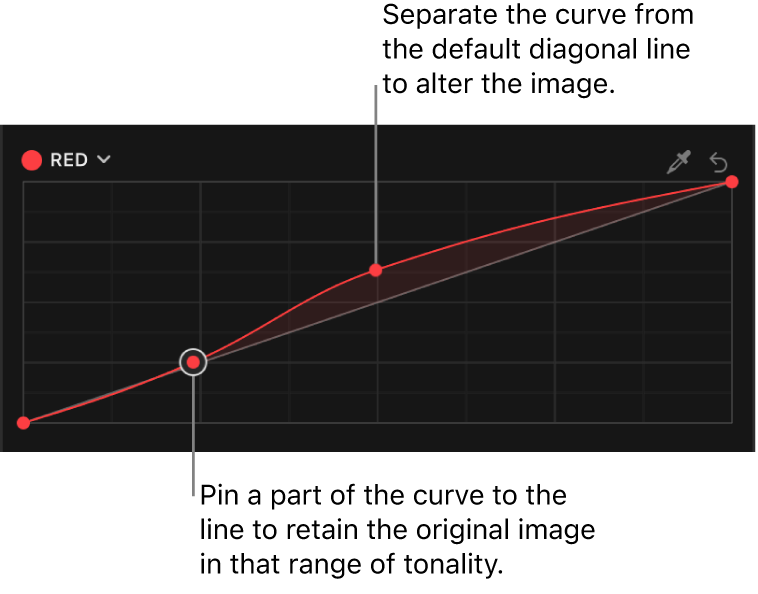
Add and move control points as needed.
To delete a control point, select it and press Delete.
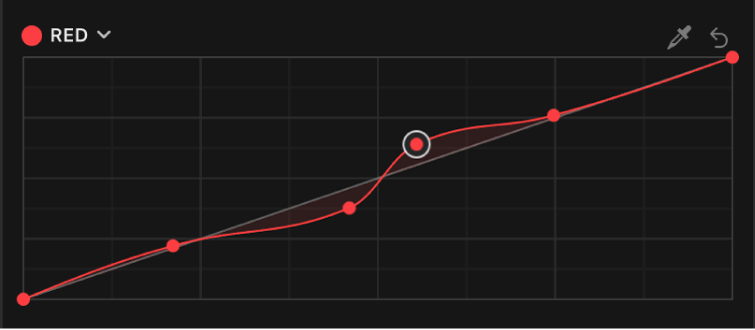
To reset the values for a color curve, click its Reset button
 .
.At the bottom of the Color inspector, adjust any of the following:
Preserve Luma: Select this checkbox to maintain the overall brightness of a clip despite changes in one or more color channels.
Mix: Set the amount of the original image to be blended with the color-corrected image.
Tip: If you want to color correct the next or previous clip in the timeline, press Command-Right Arrow or Command-Left Arrow to move the playhead to the next or previous clip and select it. These shortcuts select clips in the same role only, so you can quickly move between video clips and skip over clips not suited for color correction (such as music or titles).
After you apply a color correction, you can copy it to another clip or group of clips. See Copy effects between clips.
Download this guide: PDF