Use video scopes and overlays in Final Cut Camera
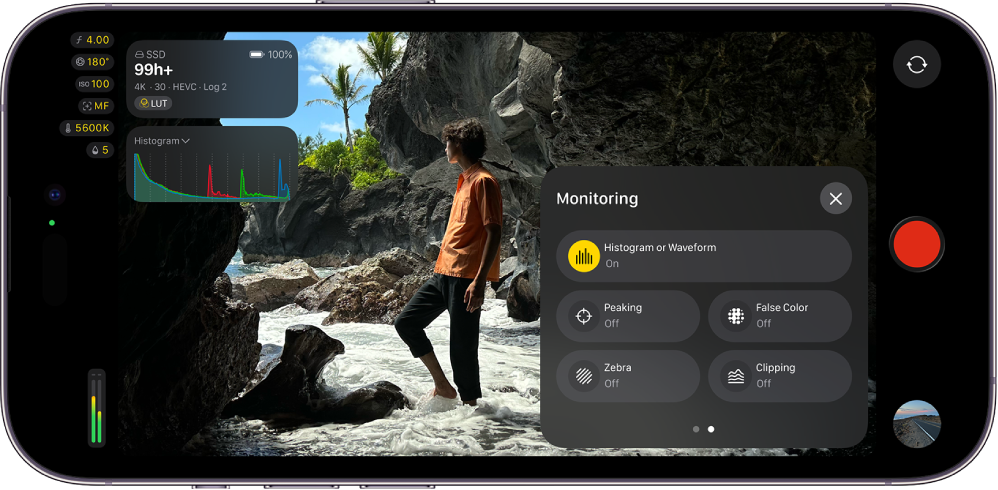
You can turn on video scopes and overlays in Final Cut Camera to perfect exposure and color in your recordings.
Tip: Overexposed video lacks detail and typically appears as pure white. You can adjust the exposure before you record to restore detail to overexposed areas.
Turn on video scopes
Video scopes provide measurements of the luma and chroma levels of your clips before and during your recordings with Final Cut Camera.
Note: Video scopes require iOS 27, iPadOS 27, or later.
Final Cut Camera includes two video scopes:
Histogram: The histogram provides a statistical analysis of the image by calculating how many pixels fall at each luma or color level and plotting that as a graph. Each increment of the scale from left to right represents a percentage of luma or color, and the height of each segment shows the number of pixels at that percentage. The histogram is the default video scope.
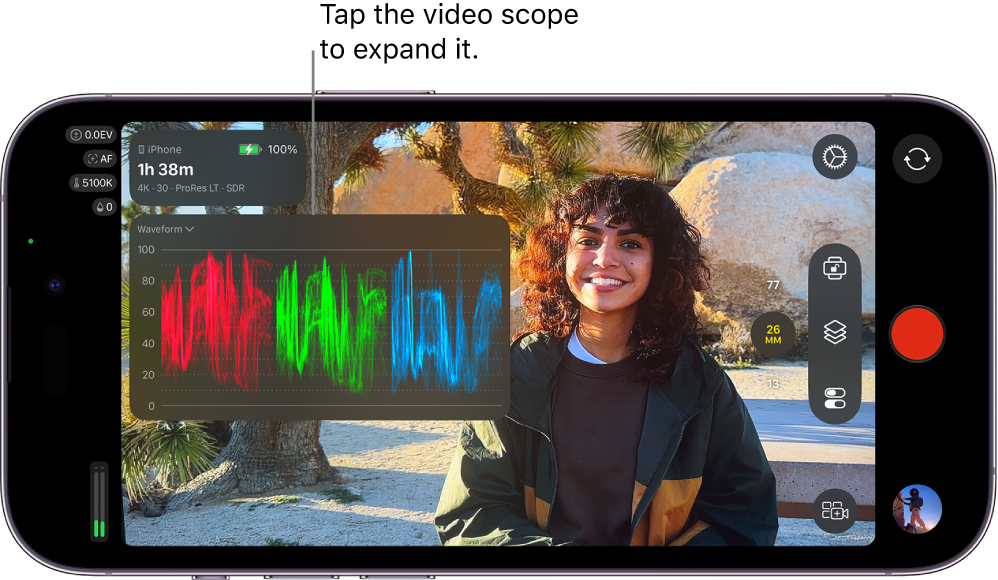
Waveform monitor: The waveform monitor features three side-by-side waveform displays that show your video as separate red, green, and blue components. Within each waveform, the signal level is shown vertically, whereas the horizontal position corresponds to the horizontal position of each pixel in the image. Spikes and dips in the displayed waveforms correspond to bright and dark areas in the image.
Go to the Final Cut Camera app
 on your iPhone or iPad.
In the camera screen, tap
 , swipe left to view more controls, then tap Histogram or Waveform.
Tap
 .
.You can tap the video scope to expand it and view more detail, or swipe left to temporarily hide it from view.
To switch between displaying the histogram and the waveform, tap  next to Histogram or Waveform in the camera screen, then tap an option.
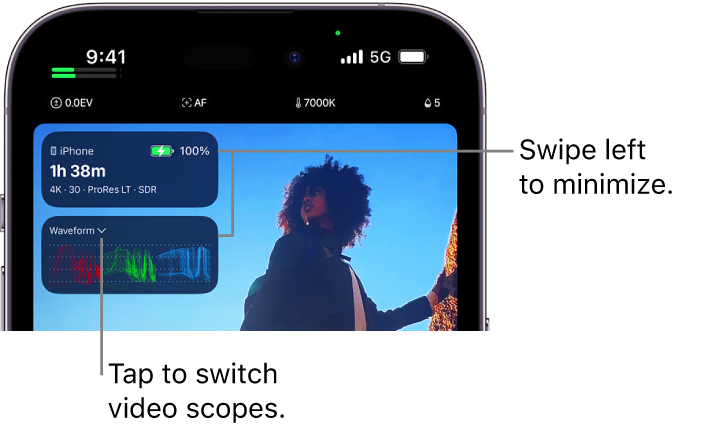
To turn off video scopes, tap in the camera screen, swipe left to view more controls, then tap Histogram or Waveform.
Turn on the focus peaking overlay
Focus peaking highlights areas in the viewfinder that are in sharp focus with a color overlay, so you can accurately determine what part of the image is in focus while you record.
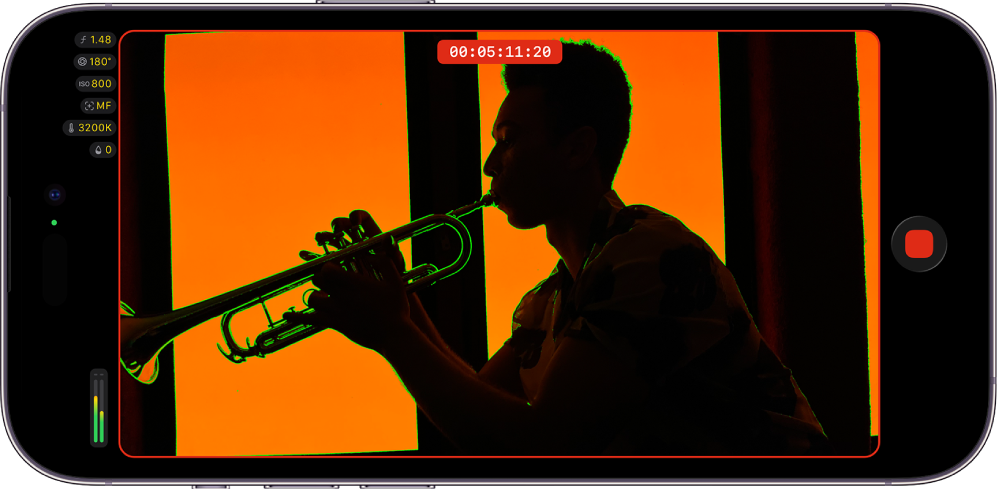
Note: Focus peaking requires iPhone or iPad models with the A13 Bionic chip or later.
Go to the Final Cut Camera app
on your iPhone or iPad.In the camera screen, tap
, swipe left to view more controls, then tap Peaking.Tap
.
To change the color or sensitivity of the focus peaking overlay, tap  in the camera screen, tap Tools, tap Peaking, then tap either Sensitivity or Color and tap an option.
Tip: Turn on focus peaking, then change the focus manually to see which parts of the image come into focus.
To turn off the focus peaking overlay, tap in the camera screen, swipe left to view more controls, then tap Peaking.
Turn on the false color overlay
False color is an exposure-monitoring tool that translates image brightness into a color display in the style of a heat map. The false color overlay replaces different luminance (brightness) values with specific colors so you know immediately which parts of your frame are too bright or too dark.
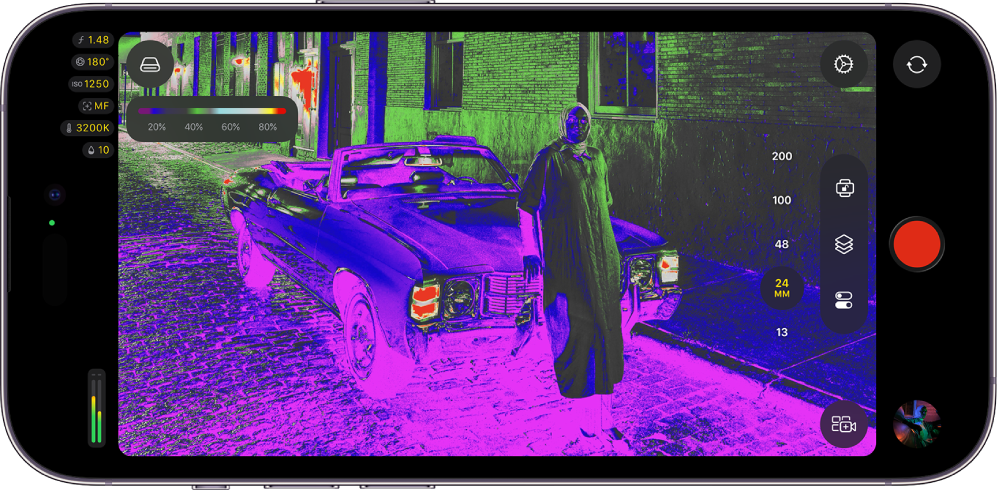
Go to the Final Cut Camera app
on your iPhone or iPad.In the camera screen, tap
, swipe left to view more controls, then tap False Color.Tap
.
The diagram below shows how colors in the false color overlay are mapped to different luminance levels.
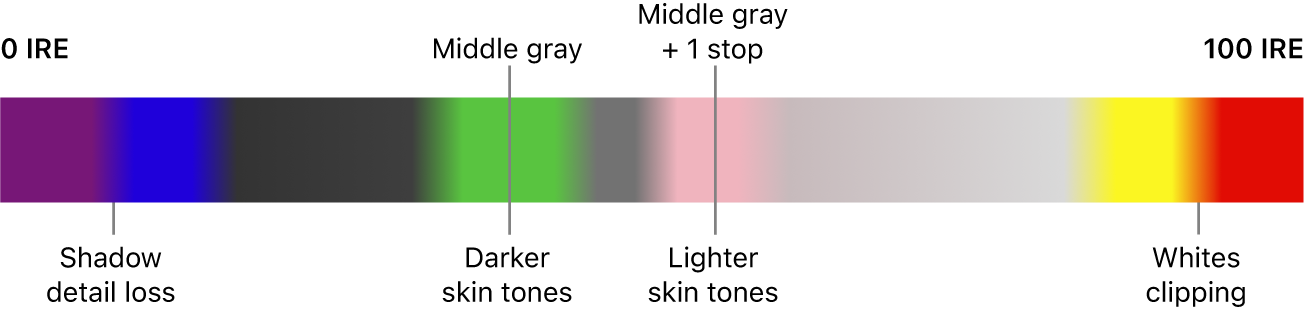
To turn off the false color overlay, tap in the camera screen, swipe left to view more controls, then tap False Color.
Turn on the zebra overexposure overlay
Use the zebra overlay to show areas of your image that are overexposed. Overexposed areas are marked with diagonal red lines, also known as “zebra stripes.” Overexposed video lacks detail and typically appears as pure white. You can adjust the exposure before you record to restore detail to overexposed areas.
Note: Showing the zebra overlay requires iPhone or iPad models with the A13 Bionic chip or later.
Go to the Final Cut Camera app
on your iPhone or iPad.In the camera screen, tap
, swipe left to view more controls, then tap Zebra.Tap
.
To change the exposure level at which the zebra overlay appears, tap in the camera screen, tap Tools, tap Zebra, then tap an option.
Tip: To quickly correct the exposure, tap the zebra lines when they appear in the camera viewfinder.
To turn off the zebra overlay, tap in the camera screen, swipe left to view more controls, then tap Zebra.
Turn on the clipping overexposure overlay
Like the zebra overlay, the clipping overlay shows areas of your image that are overexposed. However, the clipping overlay marks overexposed areas with a distinctive solid color.
Note: Showing the clipping overlay requires iPhone or iPad models with the A13 Bionic chip or later.
Go to the Final Cut Camera app
on your iPhone or iPad.In the camera screen, tap
, swipe left to view more controls, then tap Clipping.Tap
.
To change the exposure level at which the clipping overlay appears, tap in the camera screen, tap Tools, tap Clipping, then tap an option.
To turn off the clipping overlay, tap in the camera screen, swipe left to view more controls, then tap Clipping.
The video scopes and overlays remain on the camera screen until you turn them off, including while recording with the front-facing camera.