Final Cut Pro User Guide for Mac
- Welcome
- What’s new
-
- Intro to importing media
- If it’s your first import
- Organize files during import
-
- Import from Image Playground
- Import from iMovie for macOS
- Import from iMovie for iOS or iPadOS
- Import from Final Cut Pro for iPad
- Import from Final Cut Camera
- Import from Photos
- Import from Music
- Import from Apple TV
- Import from Motion
- Import from GarageBand and Logic Pro
- Import using workflow extensions
- Record into Final Cut Pro
- Memory cards and cables
- Supported media formats
-
- Intro to effects
-
- Intro to transitions
- How transitions are created
- Add transitions and fades
- Quickly add a transition with a keyboard shortcut
- Set the default duration for transitions
- Delete transitions
- Adjust transitions in the timeline
- Adjust transitions in the inspector and viewer
- Merge jump cuts with the Flow transition
- Adjust transitions with multiple images
- Modify transitions in Motion
- Add adjustment clips
-
- Add storylines
- Use the precision editor
- Conform frame sizes and rates
- Use XML to transfer projects
-
- Intro to sharing projects
- Share to Apple devices
- Share on the web
- Send a video frame to Pixelmator Pro
- Share in email
- Share stereo or spatial video
- Batch sharing
- Share using Compressor
- Create share destinations
- Change metadata for shared items
- View the status of shared items
- Speed up exports with simultaneous processing
- Glossary
- Copyright and trademarks
Add still images in Final Cut Pro for Mac
In Final Cut Pro, you can add and edit a variety of still-image formats in your projects, including photos and graphics files.
Add a still image to the timeline
You can add still images to your Final Cut Pro project using the Libraries sidebar, the Photos, Videos, and Audio sidebar, or the Finder.
In Final Cut Pro, do any of the following:
Add a still image using the Libraries sidebar: Import the still image into an event, select the event in the Libraries sidebar, then select all or part of the still-image clip in the browser and drag it to the timeline. For information about importing media, see Intro to importing media.
Note: After a still image is imported, it functions like any other clip in Final Cut Pro. You can use any of the techniques described in this chapter to add still-image clips to the timeline.
Add a still image using the Photos, Videos, and Audio sidebar: Open the Photos, Videos, and Audio sidebar, select a still image in the browser, and drag it directly into the timeline.
Add a still image from the Finder: Select a still-image file in the Finder, then drag it directly into the timeline.
The default initial duration for still images is 4 seconds, but you can change this setting in the Editing pane of Final Cut Pro settings.
There’s no limit on the duration of a still-image clip. To adjust the duration of a still-image clip in the timeline, use any of the trimming techniques described in this chapter (see Intro to trimming). To adjust the duration of multiple still-image clips at once, select the clips, then choose Modify > Change Duration (or press Control-D).
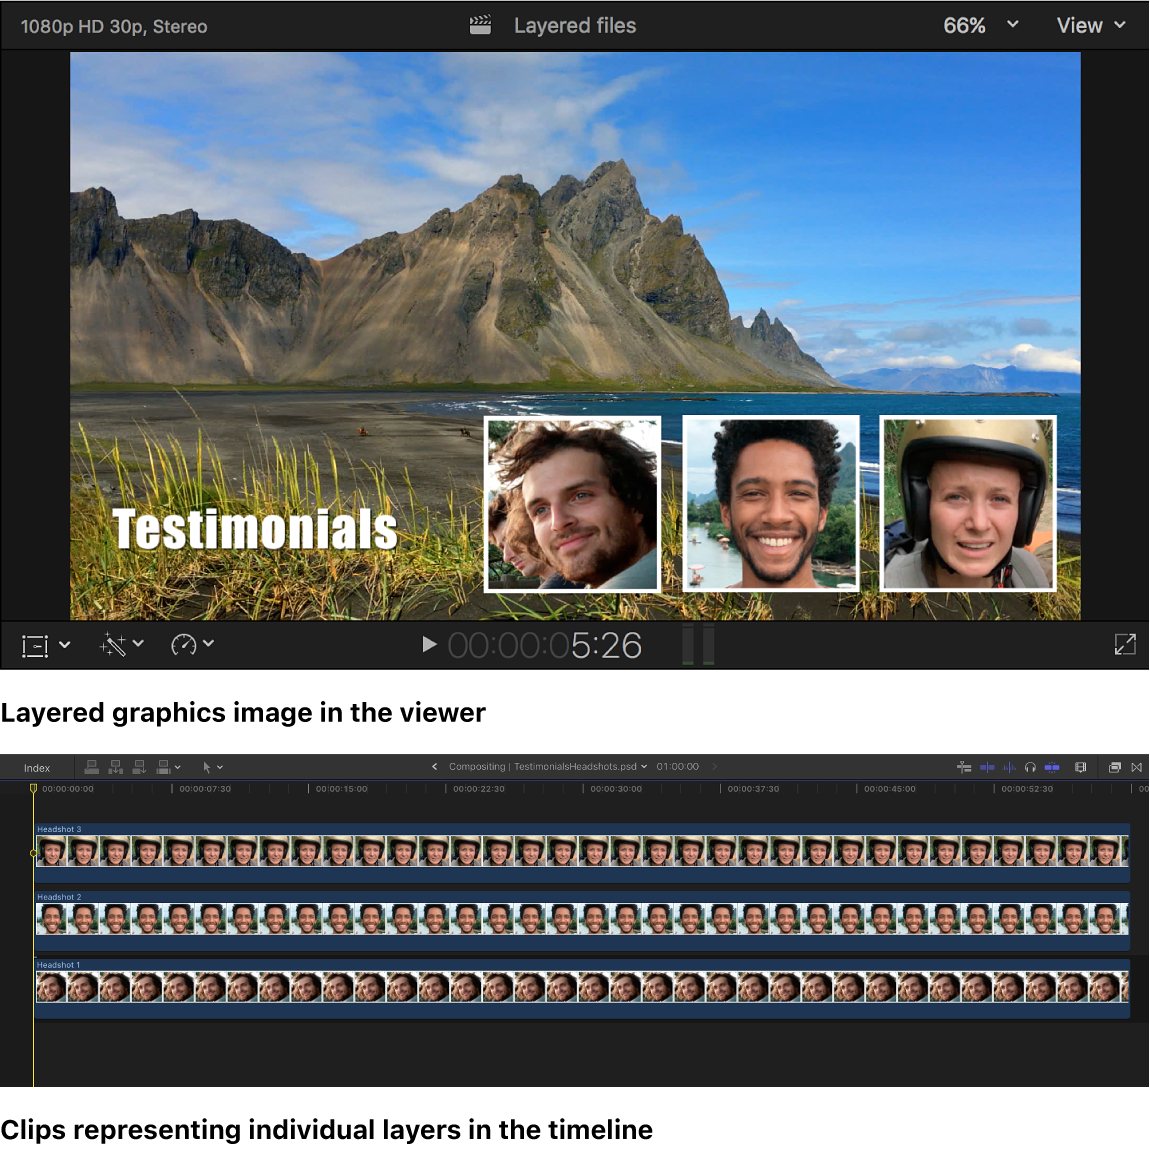
Edit layered graphics files
You can edit layered graphics files, such as Adobe Photoshop (PSD) files, created with another image editing app.
Import the layered graphics files into Final Cut Pro.
For information about importing media, see Intro to importing media.
Important: If the layered graphics file has a transparent background, make sure your project’s rendering format is set to Apple ProRes 4444 to preserve the transparency when rendering. See Modify a project’s settings.
In the browser or the timeline, select the layered graphics image.
Choose Clip > Open Clip.
Each layer appears in the timeline as a connected clip that you can edit as you would any other clip. For example, you can animate layers by fading them in or out.

The default duration for a layered graphics file is one minute. To adjust the duration of one of the layers in the timeline, use any of the trimming techniques described in this chapter (see Intro to trimming). To adjust the duration of all the layers, select them, then choose Modify > Change Duration (or press Control-D).
For more information on creating layered graphics files for Final Cut Pro, see Best practices for creating layered graphics files.
Edit a still image with an external image editing app
You can modify a still image with an external image editing app, and the changes appear automatically in the clip in Final Cut Pro.
In Final Cut Pro, add a still image to the timeline.
To locate the clip’s source media file in the Finder, press Shift-Command-R.
Open the source media file in the external image editing app.
In the image editing app, modify the image and save the changes.
Switch back to Final Cut Pro.
The changes appear automatically in the still-image clip in Final Cut Pro.
You can also create freeze frames from your video clips. See Create freeze frames.
Download this guide: PDF