Final Cut Pro Logic Effects
- Welcome
-
- Intro to echo effects
-
- Intro to Delay Designer
- Delay Designer interface
- Main display controls
- View buttons
- Navigate the Tap display
- Create taps
- Select taps
- Move and delete taps
- Use the tap toggle buttons
- Edit taps in the Tap display
- Align tap values
- Edit filter cutoff
- Edit pan
- Tap parameter bar
- Tap shortcut menu
- Reset tap values
- Master section controls
- Work with Delay Designer in surround
- Modulation Delay
- Stereo Delay
- Tape Delay
- Copyright
Flanger controls in Final Cut Pro
The Flanger effect works in much the same way as the Chorus effect but uses a significantly shorter delay time. In addition, the effect signal can be fed back into the input of the delay line.
Flanging is typically used to add a spacey or underwater quality to input signals.
For information about adding the Flanger effect to a clip and showing the effect’s controls, see Add Logic effects to clips in Final Cut Pro.

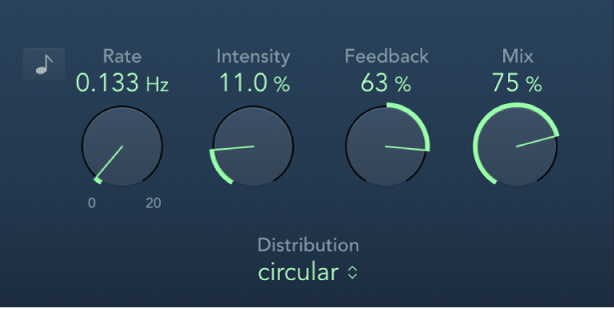
Sync button: Synchronize the modulation speed with the project tempo. Choose musical note values with the Rate knob.
Rate knob and field: Set the frequency, or speed, of the low-frequency oscillator (LFO).
Intensity knob and field: Set the modulation amount.
Feedback knob and field: Set the amount of the effect signal that is routed back to the input. This can change the tonal color and make the sweeping effect more pronounced. Negative Feedback values invert the phase of the routed signal.
Mix knob and field: Determine the balance between dry and wet signals.