Final Cut Pro User Guide for Mac
- Welcome
- What’s new
-
- Intro to effects
-
- Intro to transitions
- How transitions are created
- Add transitions and fades
- Quickly add a transition with a keyboard shortcut
- Set the default duration for transitions
- Delete transitions
- Adjust transitions in the timeline
- Adjust transitions in the inspector and viewer
- Merge jump cuts with the Flow transition
- Adjust transitions with multiple images
- Modify transitions in Motion
-
- Add storylines
- Use the precision editor
- Conform frame sizes and rates
- Use XML to transfer projects
- Glossary
- Copyright

Adjust depth of field in Cinematic mode clips in Final Cut Pro for Mac
In addition to focusing on different subjects or areas in the scene, you can adjust and animate the depth of field in a Cinematic mode video clip. For example, you can soften or sharpen the background behind your subject.
In the Final Cut Pro timeline, select a Cinematic mode clip and position the playhead so that the clip appears in the viewer.
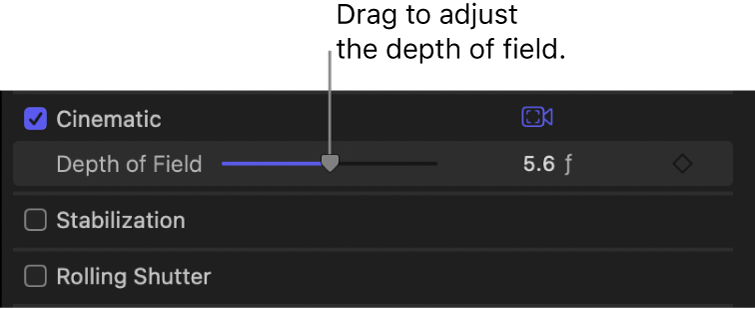
Open the Video inspector, and make sure the Cinematic checkbox is selected.
Drag the Depth of Field slider left or right.

Lower values result in a shallower depth of field. For example, if the clip is focused on a tree in the foreground and you drag the slider to the left, the background becomes more blurry (out of focus). Conversely, dragging the slider all the way to the right brings both the tree and the background into focus.
Tip: For dramatic rack focus effects, use a shallow depth of field.
You can animate the Depth of Field parameter using keyframes. See Add video effect keyframes in Final Cut Pro for Mac.
Download this guide: Apple Books | PDF