Final Cut Pro User Guide
- Welcome
-
- What’s new in Final Cut Pro 10.6.2
- What’s new in Final Cut Pro 10.6
- What’s new in Final Cut Pro 10.5.3
- What’s new in Final Cut Pro 10.5
- What’s new in Final Cut Pro 10.4.9
- What’s new in Final Cut Pro 10.4.7
- What’s new in Final Cut Pro 10.4.6
- What’s new in Final Cut Pro 10.4.4
- What’s new in Final Cut Pro 10.4.1
- What’s new in Final Cut Pro 10.4
- What’s new in Final Cut Pro 10.3
- What’s new in Final Cut Pro 10.2
- What’s new in Final Cut Pro 10.1.2
- What’s new in Final Cut Pro 10.1
- What’s new in Final Cut Pro 10.0.6
- What’s new in Final Cut Pro 10.0.3
- What’s new in Final Cut Pro 10.0.1
-
- Intro to effects
-
- Intro to transitions
- How transitions are created
- Add transitions
- Set the default transition
- Delete transitions
- Adjust transitions in the timeline
- Adjust transitions in the inspector and viewer
- Merge jump cuts with the Flow transition
- Adjust transitions with multiple images
- Modify transitions in Motion
-
- Add storylines
- Use the precision editor
- Conform frame sizes and rates
- Use XML to transfer projects
-
- Glossary
- Copyright

Track an image or other clip to a moving object in Final Cut Pro
You can track an image or other clip (such as a title, generator, or video clip) to a moving object in a video clip.
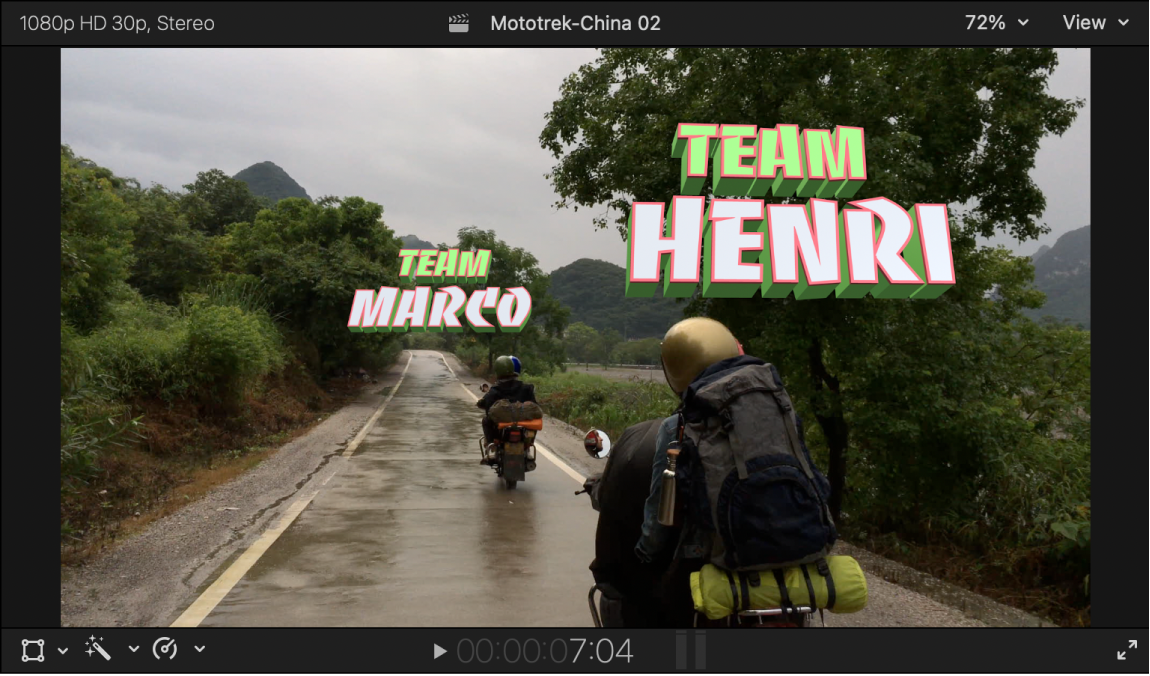
In the examples below, a title is tracked to moving motorcycles.
Track an image or other clip to a moving object
In Final Cut Pro, position the playhead in the timeline so that the object or face that you want to track appears in the viewer.
For the best results, make sure the object is in focus and has details with high contrast.
In the browser, locate the image or other clip you want to use, then drag it to the viewer.
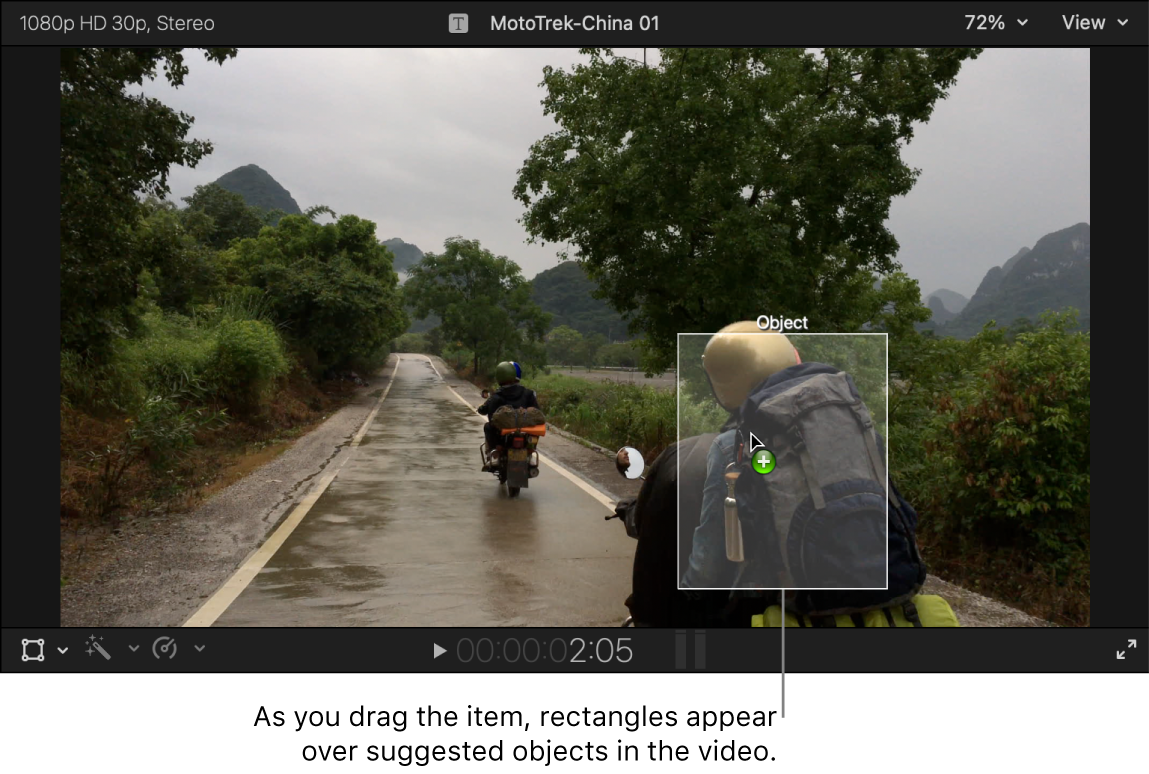
As you drag the item over the viewer, rectangles appear over objects in the video clip and oval shapes appear over faces, indicating objects or regions that can be tracked.

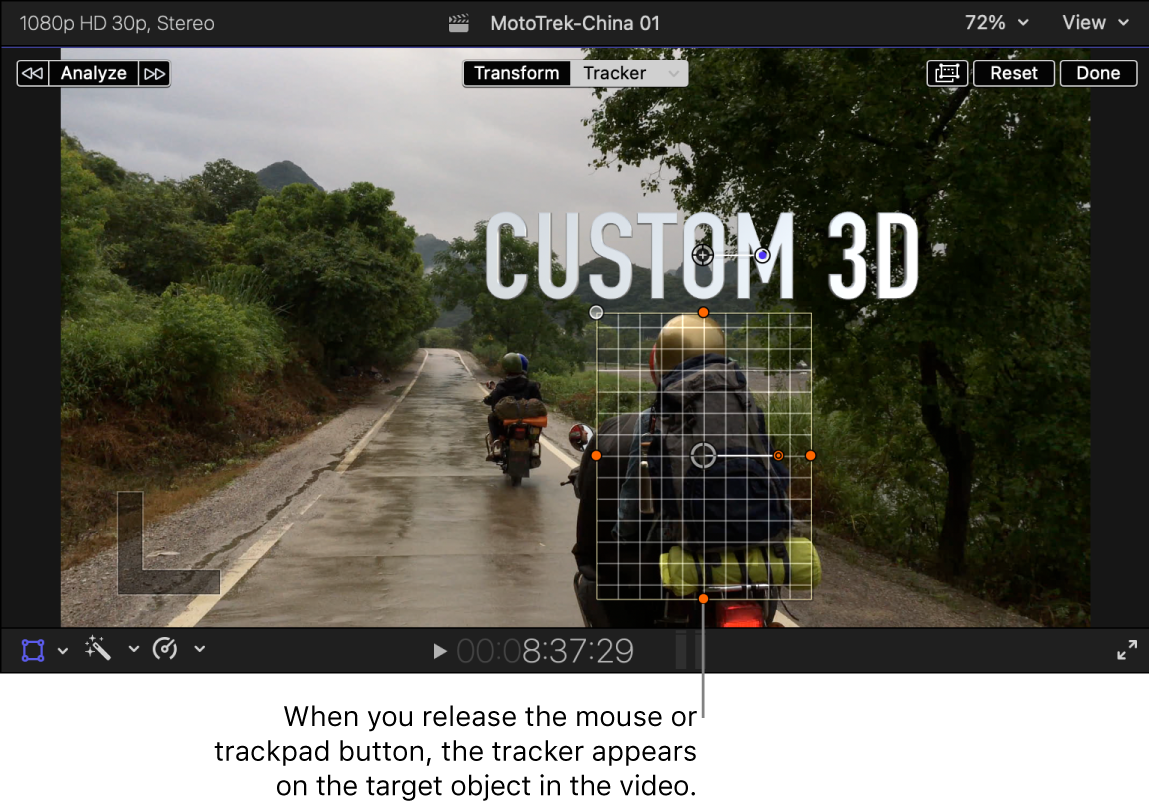
When a rectangle or oval shape appears over the object or face you want to track, release the mouse or trackpad button.
An onscreen tracker appears on the object in the viewer, and the item you dragged is superimposed on the clip.

By default, the item you dragged (a title, in this example) is offset from the tracker area. See Offset the position of a tracking effect in Final Cut Pro.
Additionally, the Tracking Editor appears on the clip in the timeline.
Optionally, drag the sides and the corners of the grid to further fit the tracker to the object or face you want to track.
Confirm that Tracker is selected at the top of the viewer.
In the upper-left corner of the viewer, click one of the following buttons:
Analyze: Final Cut Pro tracks forward from the playhead position, then tracks backward before the playhead until the entire clip has been analyzed.
Left arrow: Final Cut Pro analyzes the portion of the clip before the playhead position only.
Right arrow: Final Cut Pro analyzes the portion of the clip after the playhead position only.
Final Cut Pro applies the tracking data from the analysis to the clip. See How does object tracking work in Final Cut Pro?
To view the tracking effect, position the skimmer (or the playhead) at the start of the clip in the timeline, then press the Space bar to play the clip.
You can track multiple moving objects in a single clip, and you can track multiple images or other clips to a single moving object. See Assign an effect or clip to an existing motion track.

Resize, move, or rotate a tracking clip
In the Final Cut Pro timeline, select a superimposed image or clip that is tracking an object, then position the playhead so that the clip appears in the viewer.
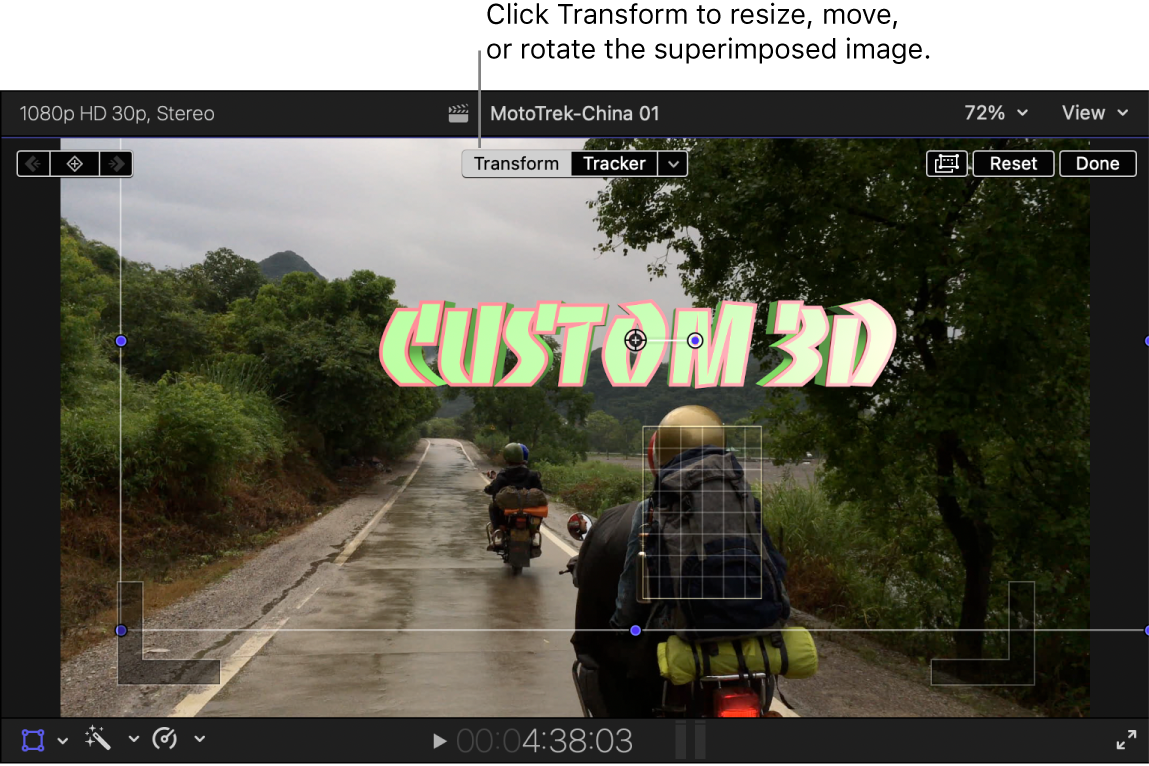
If the Transform and Tracker buttons are not already shown at the top of the viewer, click the pop-up menu in the lower-left corner of the viewer and choose Transform (or press Shift-T).
Click Transform at the top of the viewer, then use the onscreen controls to resize, move, or rotate the superimposed image.
See Resize, move, and rotate clips in Final Cut Pro.

To adjust how tracking data is applied to the tracking clip, click the down arrow to the right of the Tracker button at the top of the viewer, then select or deselect any of the following checkboxes:
Position: Apply tracking data to horizontal (x-axis) and vertical (y-axis) movement.
Rotation: Apply tracking data to rotation around the clip’s anchor point.
Scale: Choose how the clip is scaled in relation to the tracker area:
Scale All (Fit): Scales the clip proportionally so that the clip’s longest dimension fits within the tracker area.
Scale All (Fill): Scales the clip proportionally so that the clip’s shortest dimension fills the tracker area.
Scale X & Y: Allows you to adjust the clip’s horizontal and vertical dimensions independently (disproportionally).
Note: The Scale option is selected automatically (for a tracking image or clip) when you choose Pin to Tracker from the Behavior pop-up menu.
You can keyframe any transform effects independently of the tracking keyframes, which creates additional animation on top of the object tracking transforms. See Animate built-in effects.
Download this guide: Apple Books | PDF