Logic Pro User Guide for iPad
- Welcome
-
- What is Logic Pro?
- Working areas
- Work with the menu bar
- Work with function buttons
- Work with numeric values
- Undo and redo edits in Logic Pro for iPad
-
- Intro to tracks
- Create tracks
- Create tracks using drag and drop
- Choose the default region type for a software instrument track
- Select tracks
- Duplicate tracks
- Reorder tracks
- Rename tracks
- Change track icons
- Change track colors
- Use the tuner on an audio track
- Show the output track in the Tracks area
- Delete tracks
- Edit track parameters
- How to get help
-
- Intro to recording
-
- Before recording software instruments
- Record software instruments
- Record additional software instrument takes
- Record to multiple software instrument tracks
- Record multiple MIDI devices to multiple tracks
- Record software instruments and audio simultaneously
- Merge software instrument recordings
- Spot erase software instrument recordings
- Replace software instrument recordings
- Route MIDI internally to software instrument tracks
- Record with Low Latency Monitoring mode
- Use the metronome
- Use the count-in
-
- Intro to arranging
-
- Intro to regions
- Select regions
- Cut, copy, and paste regions
- Move regions
- Remove gaps between regions
- Delay region playback
- Trim regions
- Loop regions
- Repeat regions
- Mute regions
- Split and join regions
- Stretch regions
- Separate a MIDI region by note pitch
- Bounce regions in place
- Change the gain of audio regions
- Normalize audio regions in the Tracks area in Logic Pro for iPad
- Create regions in the Tracks area
- Convert a MIDI region to a Session Player region or a pattern region
- Replace a MIDI region with a Session Player region in Logic Pro for iPad
- Rename regions
- Change the color of regions
- Delete regions
-
- Intro to chords
- Add and delete chords
- Select chords
- Cut, copy, and paste chords
- Move and resize chords
- Loop chords on the Chord track
- Color chords on the Chord track
- Edit chords
- Work with chord groups
- Use chord progressions
- Change the chord rhythm
- Choose which chords a Session Player region follows
- Analyze the key signature of a range of chords
- Use Chord ID to analyze the chords in an audio or MIDI region
- Create fades on audio regions
- Extract vocal and instrumental stems with Stem Splitter
- Access mixing functions using the Fader
-
- Intro to Step Sequencer
- Use Step Sequencer with Drum Machine Designer
- Chords and pitch in Step Sequencer
- Record Step Sequencer patterns live
- Step record Step Sequencer patterns
- Load and save patterns
- Modify pattern playback
- Edit steps
- Edit rows
- Edit Step Sequencer pattern, row, and step settings in the inspector
- Customize Step Sequencer
-
- Intro to mixing
-
- Channel strip types
- Channel strip controls
- Peak level display and clipping
- Set channel strip volume
- Set channel strip input format
- Set the output for a channel strip
- Set channel strip pan position
- Mute and solo channel strips
- Reorder channel strips
- Replace a patch on a channel strip using drag and drop
- Work with plug-ins in the Mixer
- Search for plug-ins in the Mixer
-
-
- Effect plug-ins overview
-
- Instrument plug-ins overview
-
- ES2 overview
-
- Modulation overview
- Use the Mod Pad
-
- Vector Envelope overview
- Use Vector Envelope points
- Use Vector Envelope solo and sustain points
- Set Vector Envelope segment times
- Vector Envelope XY pad controls
- Vector Envelope Actions menu
- Vector Envelope loop controls
- Vector Envelope point transition shapes
- Vector Envelope release phase behavior
- Use Vector Envelope time scaling
- Modulation source reference
- Via modulation source reference
- Use macro controls
-
- Sample Alchemy overview
- Interface overview
- Add source material
- Save a preset
- Edit mode
- Play modes
- Source overview
- Synthesis modes
- Granular controls
- Additive effects
- Additive effect controls
- Spectral effect
- Spectral effect controls
- Filter module
- Low, bandpass, and highpass filters
- Comb PM filter
- Downsampler filter
- FM filter
- Envelope generators
- Mod Matrix
- Modulation routing
- Motion mode
- Trim mode
- More menu
- Sampler
- Studio Piano
- Copyright and trademarks
Oscillators
The audio signal of a synthesizer is generated by the oscillator. You can choose from a selection of waveforms that contain various types and amounts of harmonics. The level relationships between the fundamental tone and the harmonics of the chosen waveform are responsible for the basic sound color or timbre.
Waveform types
Sine wave: Clean and clear-sounding, a sine wave contains only the first harmonic; in other words, it is the fundamental tone. The sine wave, used alone, can create “pure” sounds like whistles, the sound of wet fingers on the rim of a glass, tuning forks, and so on.

Sawtooth wave: Clear and bright-sounding, a sawtooth wave contains both odd and even harmonics, as well as the fundamental tone. It is ideal for creating string, pad, bass, and brass sounds.

Square and pulse waves: Hollow and woody-sounding, a square wave can contain a wide range of odd harmonics, as well as the fundamental tone. It is useful for creating reed instruments, pads, and basses. It can also be used to emulate kick drums, congas, tom-toms, and other percussive instruments—often when blended with another oscillator waveform, such as noise.

The square wave can be reshaped to make the waveform cycles, or pulses, more rectangular, by using a pulse width modulation (PWM) control. The more rectangular the wave becomes, the more nasal it sounds. When modulated in this way, the square wave is known as a pulse wave, and contains fewer harmonics. It can be used for reeds, basses, and brass sounds.

Triangle wave: A triangle wave contains only odd harmonics, as well as the fundamental tone. The higher harmonics of the triangle wave roll off faster than those of a square wave, making the triangle wave sound softer. It is ideal for creating flute sounds, pads, and vocal “oohs.”

Noise: white, pink and red, blue: Noise is useful for emulating percussive sounds, such as snare drums, or wind and surf sounds. There are more noise wave colors than those listed, but they are rarely found in synthesizers.
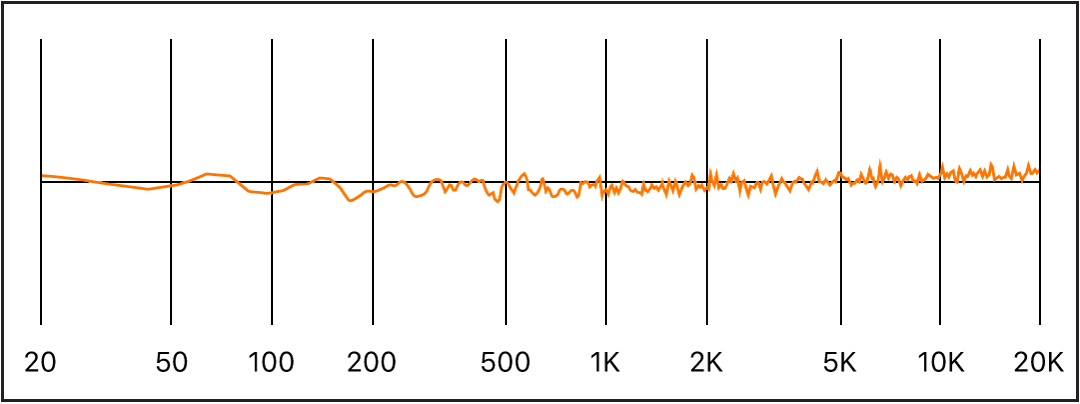
White noise: The most common noise waveform found on synthesizers. White noise contains all frequencies—at full level—around a center frequency.

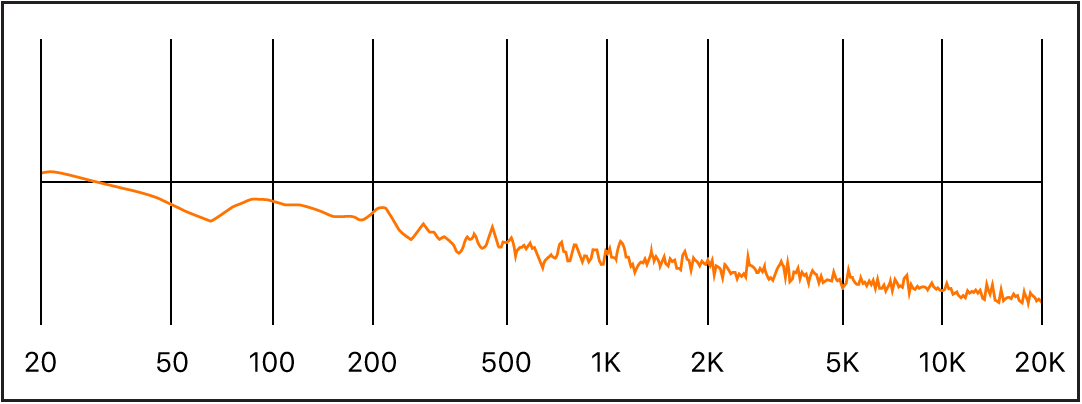
Pink and red noise: These noise colors also contain all frequencies, but they are not at full level across the frequency spectrum. Pink noise decreases the level of higher frequencies by 3 dB per octave. Red noise decreases the level by 6 dB per octave.

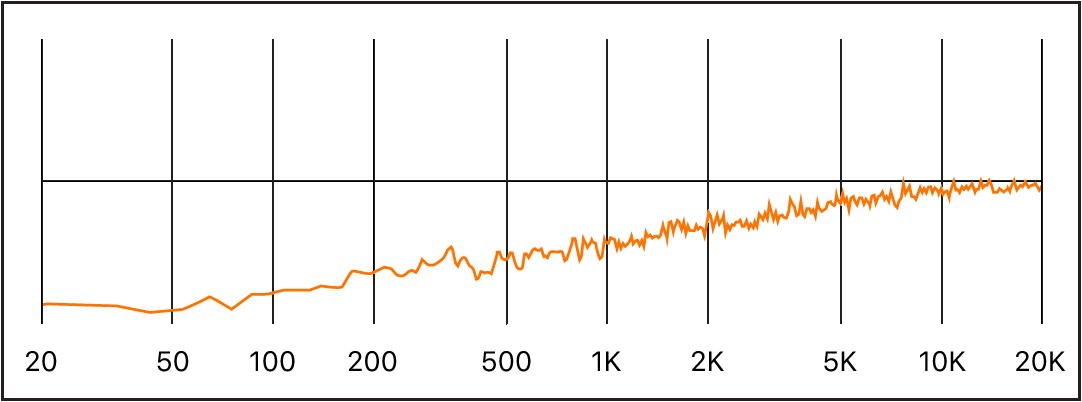
Blue noise: Blue noise is inverse pink noise, and increases the level of all frequencies in higher octaves by 3 dB.

You can deform the basic waveforms to create new waveforms, which results in a different timbre, or tonal color, thus expanding the palette of sounds you can create.
There are many ways to reshape a waveform, the most common of which is changing the pulse width of a square wave. Other ways include changing the phase angle, moving the start point of a waveform cycle, or combining multiple waveforms in multioscillator synthesizers.
When waveforms are reshaped in these and other ways, the relationships between the fundamental tone and other harmonics change, thus altering the frequency spectrum and the basic sound being produced.
Download this guide: PDF