Format closed caption text in Final Cut Pro for Mac
You can change the style and formatting of closed caption text using the inspector. The CEA-608, iTT, and SRT closed caption standards have varying specifications for text, placement, color, transitions, and so on.
Format the text in CEA-608 closed captions
Select one or more CEA-608 closed caption clips in the Final Cut Pro timeline.
To open the Closed Caption inspector, do one of the following:
Choose Window > Show in Workspace > Inspector (or press Command-4).
Click the Inspector button on the right side of the toolbar.

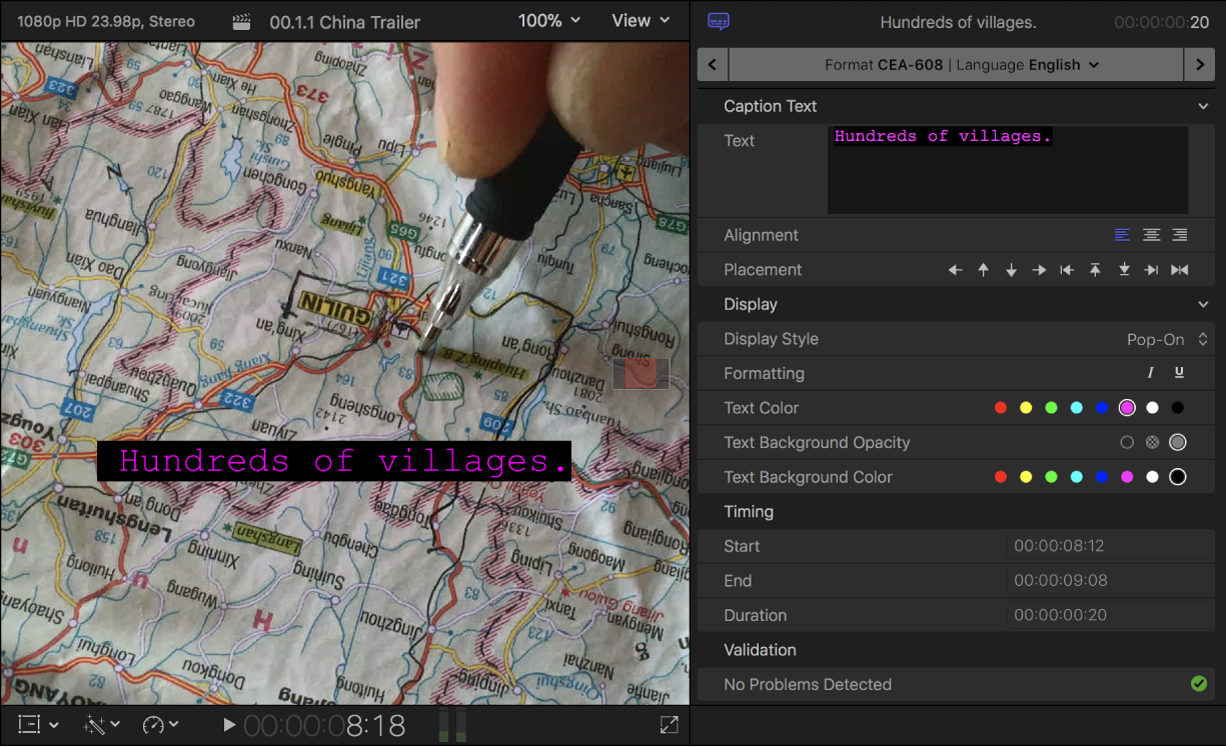
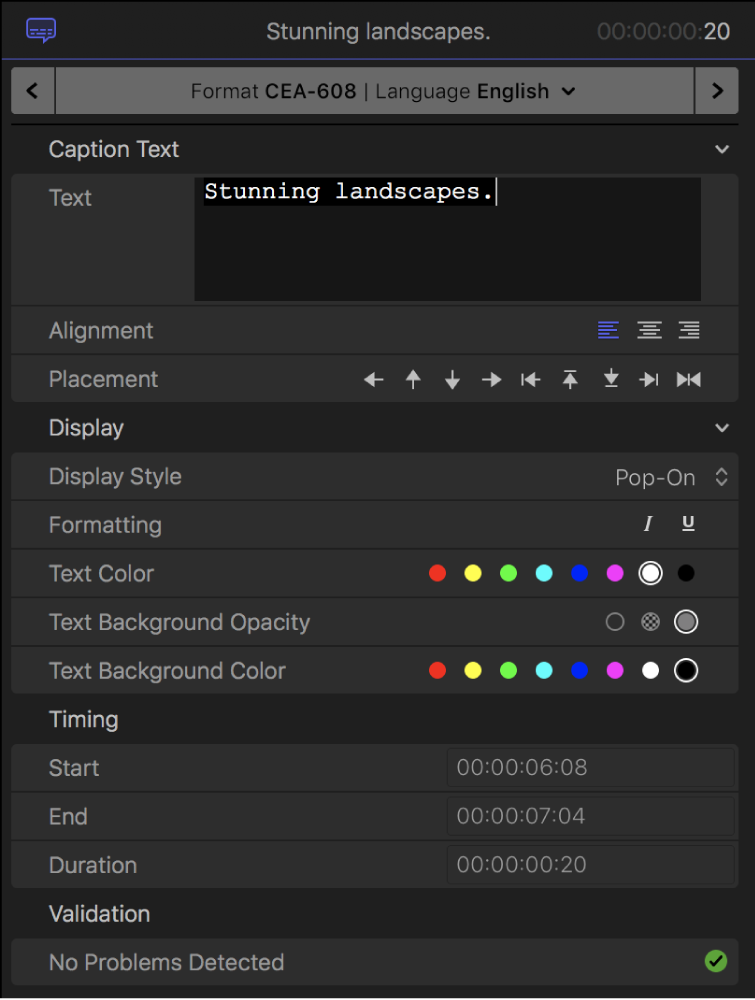
The Closed Caption inspector appears, showing closed caption text formatting controls for the CEA-608 format.
If you selected a single closed caption and want to format just a portion of it, select the portion of the closed caption text that you want to format in the Text field.
To select an alignment style for closed captions with multiple lines of text, click an Alignment button.
You can center the text or align it to the left or right.
To place closed captions within the allowable area in the video frame, click a Placement button.
You can move the closed caption left, right, up, or down; move the closed caption to the left, right, top, or bottom margin; and center the closed caption horizontally.
To set the style of transitions between closed captions, click the Display Style pop-up menu and choose an option:
Pop-On: No transition (a simple cut between closed captions).
Paint-On: Starting with the topmost line of text, each line of text in the closed caption is revealed from left to right, one at a time.
Roll-Up: Each line of text in the closed caption is revealed at the bottom of the screen using the Paint-On style, and is then animated upward to make room for the next line of text.
If you choose the Roll-Up style, a Lines pop-up menu appears. Choose how many lines of text to show at once in the Roll-Up style: 2, 3, or 4 lines.
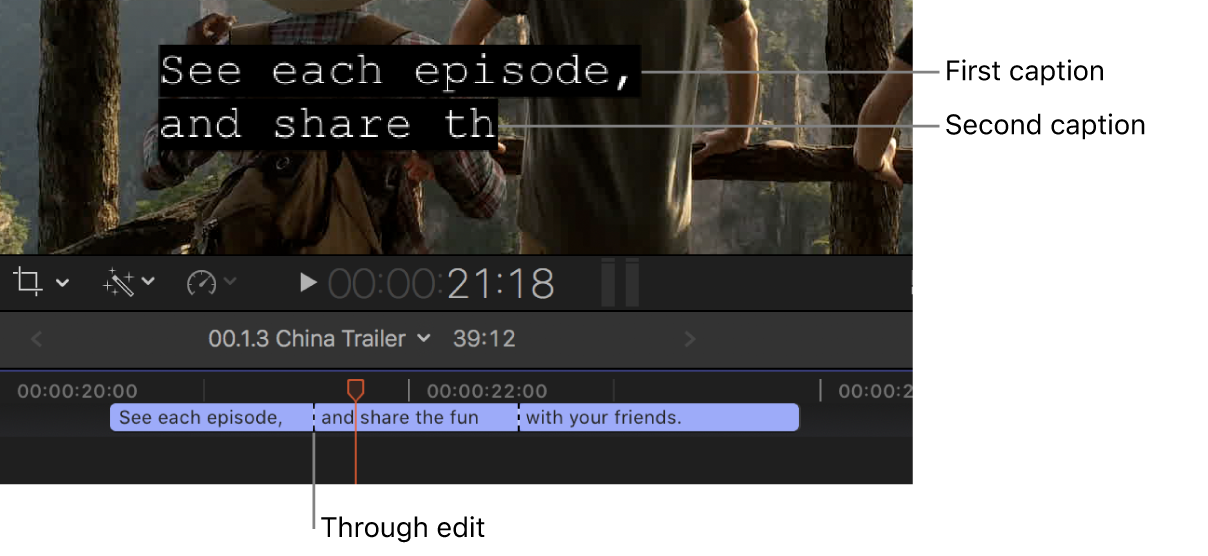
If a series of abutting closed captions are set to either the Paint-On or the Roll-Up style, their edit points in the timeline become through edits, indicating that the closed captions will interact. In the example below, all the closed captions are set to the Roll-Up style. The second closed caption will push the first closed caption up, the third closed caption will push the second closed caption up, and so on. You can make roll edits on the through edit points to precisely control when the next closed caption begins to appear.
To change closed caption text to the italic or underline style, click a Formatting button.
To change the color of closed caption text, click a Text Color button.
You can select one of eight predefined colors.
To set the opacity of the closed caption text background, click a Text Background Opacity button.
You can make the background transparent, semitransparent, or opaque.
To set the closed caption text background color, click a Text Background Color button.
You can select one of eight predefined colors.

At the bottom of the Closed Caption inspector, you can view information about the selected caption or captions:
Timing: Displays start and end times and duration if you selected a single closed caption.
Validation: Displays an error message if the selection does not conform to the specifications of the CEA-608 closed caption format, or displays a green checkmark if no problems are detected.
Note: Styling and formatting closed caption text can add invisible formatting tags, which may cause closed captions to exceed the limit of 32 characters per line.
Format the text in iTT closed captions
Select one or more iTT closed caption clips in the Final Cut Pro timeline.
To open the Closed Caption inspector, do one of the following:
Choose Window > Show in Workspace > Inspector (or press Command-4).
Click the Inspector button on the right side of the toolbar.
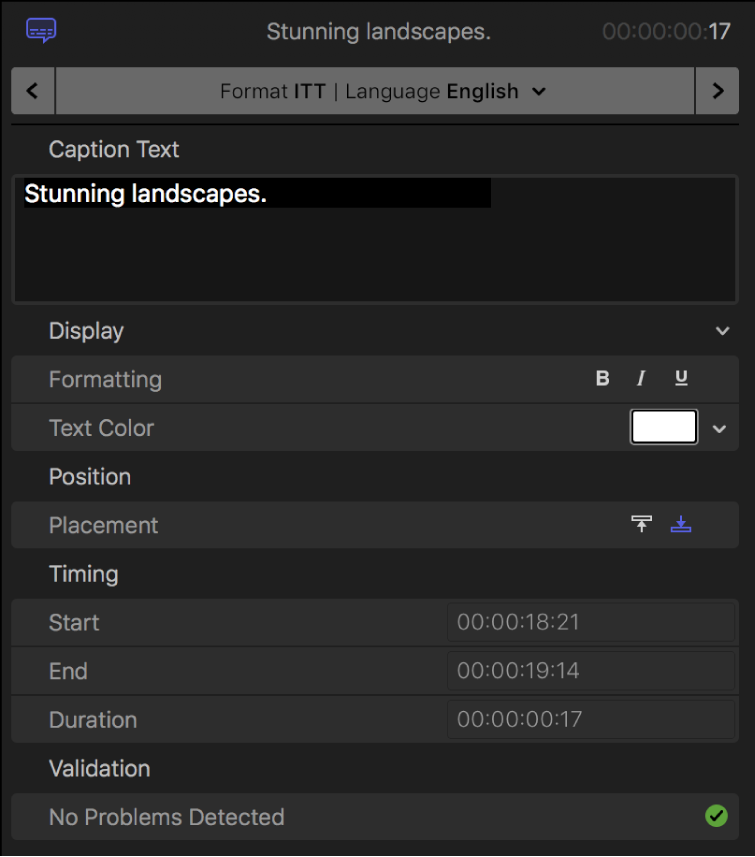
The inspector appears, showing closed caption text formatting controls for the iTT format.
If you selected a single closed caption and want to format just a portion of it, select the portion of the closed caption text that you want to format in the Caption Text field.
To change closed caption text to the bold, italic, or underline style, click a Formatting button.
To change the color of closed caption text, click the Text Color color well to open the Colors window, or click the down arrow to open a pop-up color palette.
To place closed captions at the top or bottom of the video frame, click a Placement button.
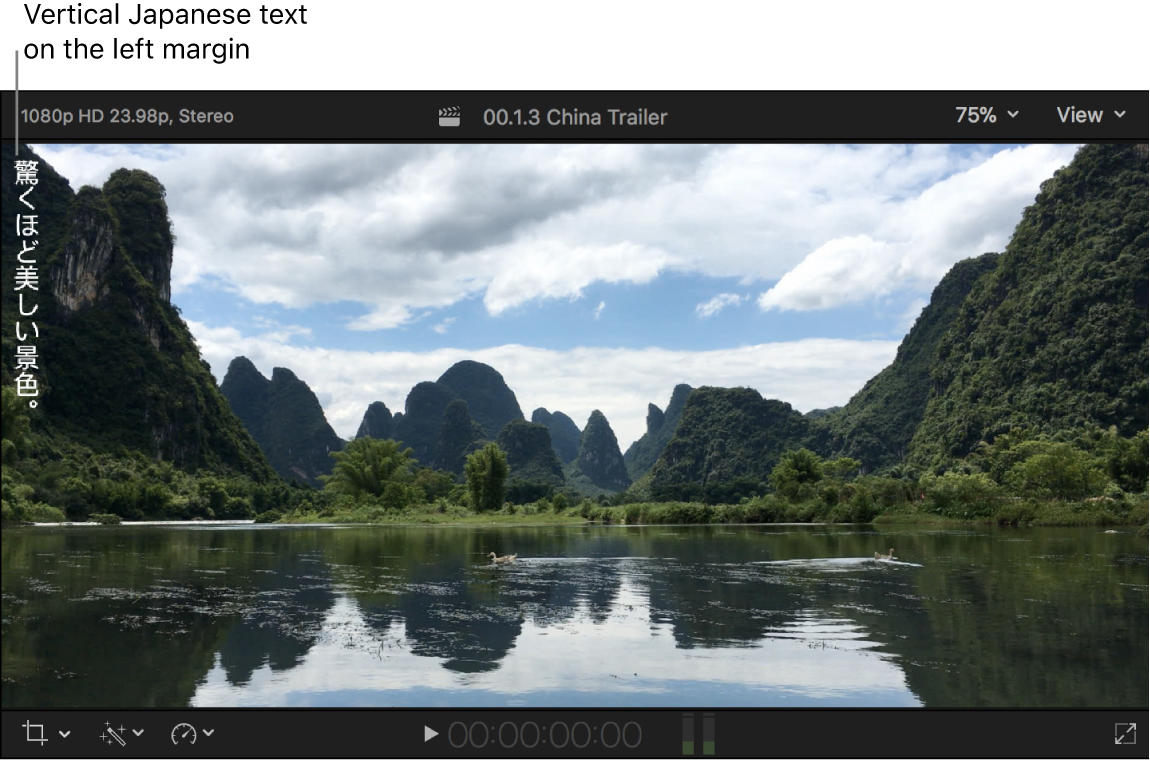
For certain languages with vertical writing, the iTT format allows vertical text on the left and right margins, as well as up to four regions of text on the screen at the same time (top, bottom, left, and right).

At the bottom of the Closed Caption inspector, you can view information about the selected caption or captions:
Timing: Displays start and end times and duration if you selected a single closed caption.
Validation: Displays an error message if the selection does not conform to the specifications of the iTT closed caption format, or displays a green checkmark if no problems are detected.
Format the text in SRT closed captions
Important: Because of the absence of text formatting specifications in the SRT standard, any formatting style (such as bold, italic, or underline) that you apply to SRT closed captions in Final Cut Pro may not appear correctly in your intended player or playback device. For this reason, you can choose to remove all text formatting from SRT closed captions when you export or share them. See Export closed captions.
Select one or more SRT closed caption clips in the Final Cut Pro timeline.
To open the Closed Caption inspector, do one of the following:
Choose Window > Show in Workspace > Inspector (or press Command-4).
Click the Inspector button on the right side of the toolbar.
The inspector appears, showing closed caption text formatting controls for the SRT format.
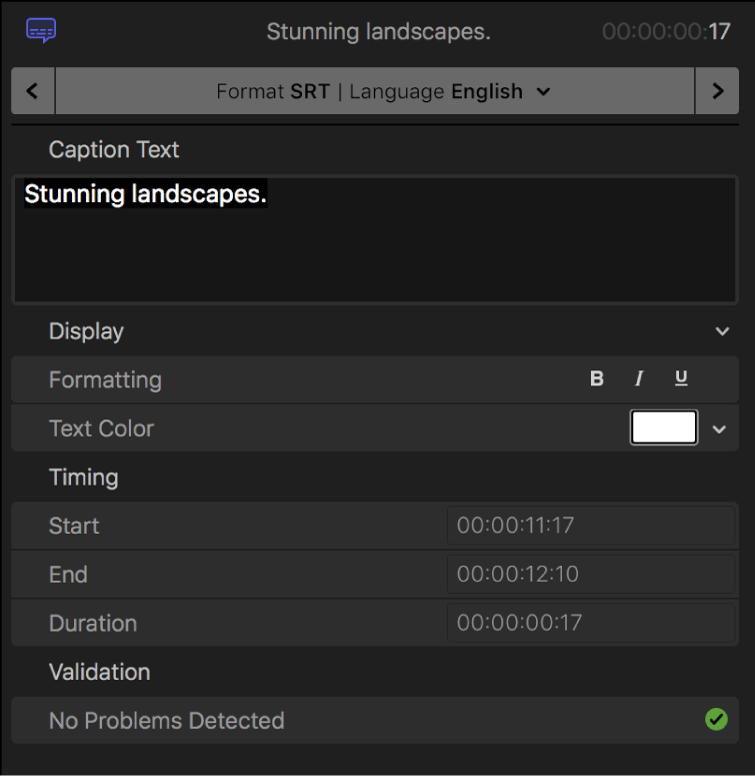
If you selected a single closed caption and want to format just a portion of it, select the portion of the closed caption text that you want to format in the Caption Text field.
To change closed caption text to the bold, italic, or underline style, click a Formatting button.
To change the color of closed caption text, click the Text Color color well to open the Colors window, or click the down arrow to open a pop-up color palette.
At the bottom of the Closed Caption inspector, you can view information about the selected caption or captions:
Timing: Displays start and end times and duration if you selected a single closed caption.
Validation: Displays an error message if the selection does not conform to the specifications of the SRT closed caption format, or displays a green checkmark if no problems are detected.
Save or apply the default style
Select one or more closed caption clips in the Final Cut Pro timeline.
To open the Closed Caption inspector, do one of the following:
Choose Window > Show in Workspace > Inspector (or press Command-4).
Click the Inspector button on the right side of the toolbar.
In the Closed Caption inspector, click the pop-up menu to the far right of the Display heading and choose one of the following:
Save Style as Default: Saves the current text style as the default setting.
Apply Default Style: Applies the default text style to the selected closed captions.
Reset Default Style: Resets the default text style to the original setting.
Add multiple text fields to CEA-608 closed captions
You can split a CEA-608 closed caption into multiple fields. For example, if two people are speaking at the same time, you can create a text field for each speaker. Each closed caption can have up to four fields, and you can format each field independently of the others.
CEA-608 closed captions are limited to four lines, but you can distribute the lines in any combination. For example, a closed caption could have three lines in one field and one line in a second field, or it could have four fields with one line each.
Select a CEA-608 closed caption clip in the Final Cut Pro timeline.
To open the Closed Caption inspector, do one of the following:
Choose Window > Show in Workspace > Inspector (or press Command-4).
Click the Inspector button on the right side of the toolbar.
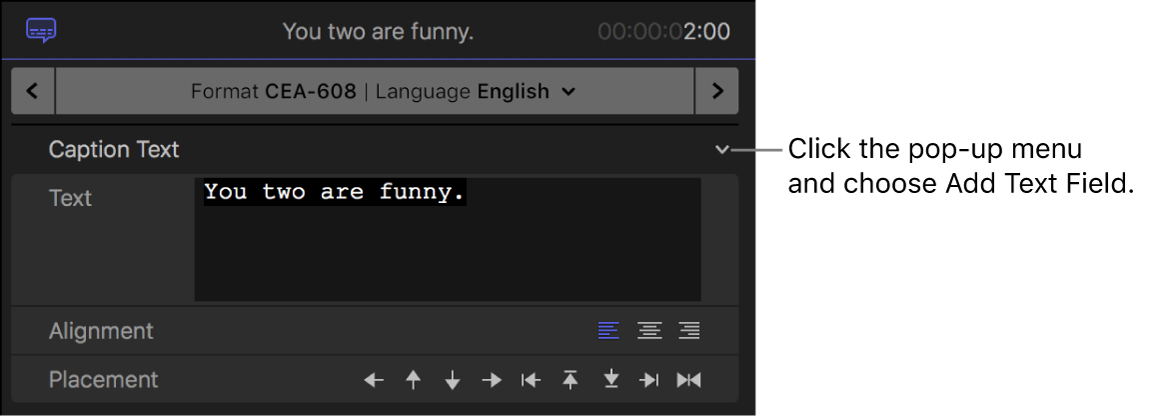
Click the pop-up menu to the far right of the Caption Text heading, then choose Add Text Field.
Enter text for the second field in the additional Caption Text section that appears in the inspector.
As you type, the text appears in a new field in the viewer.
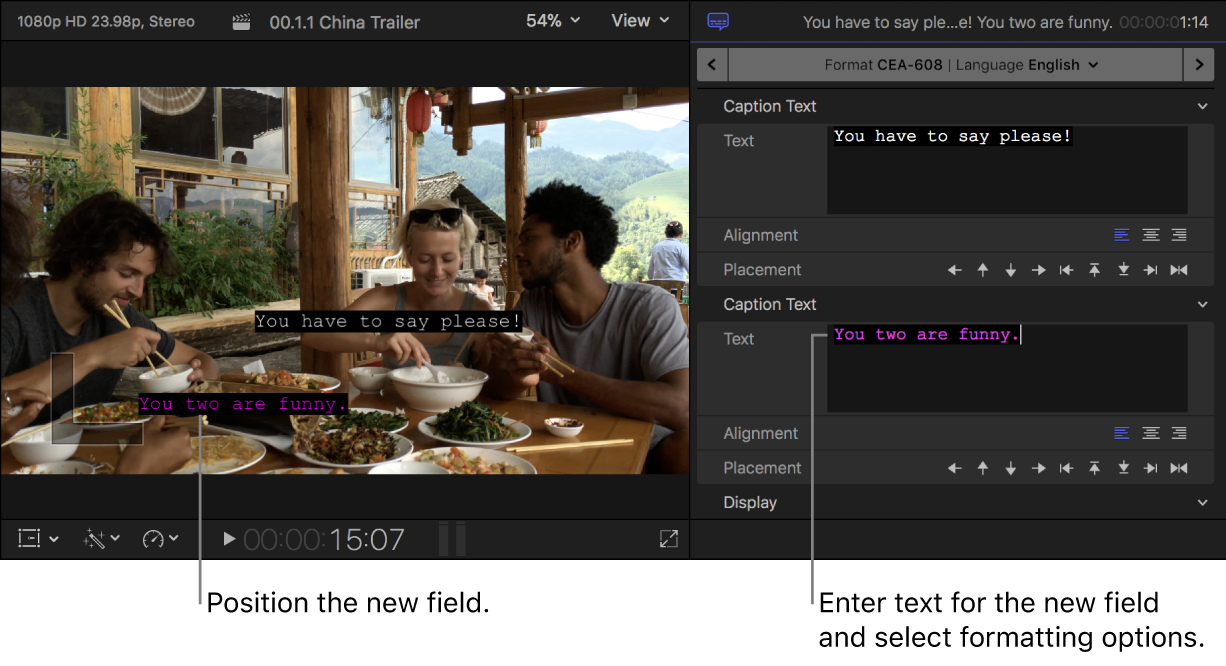
To position the new text field in the video frame, click a Placement button.
Use the text formatting controls in the Display section to adjust the look of the text in the new field.
To add additional text fields, repeat steps 3 through 6.


To remove a text field, click the pop-up menu to the far right of the Caption Text heading for that field, then choose Remove Text Field.
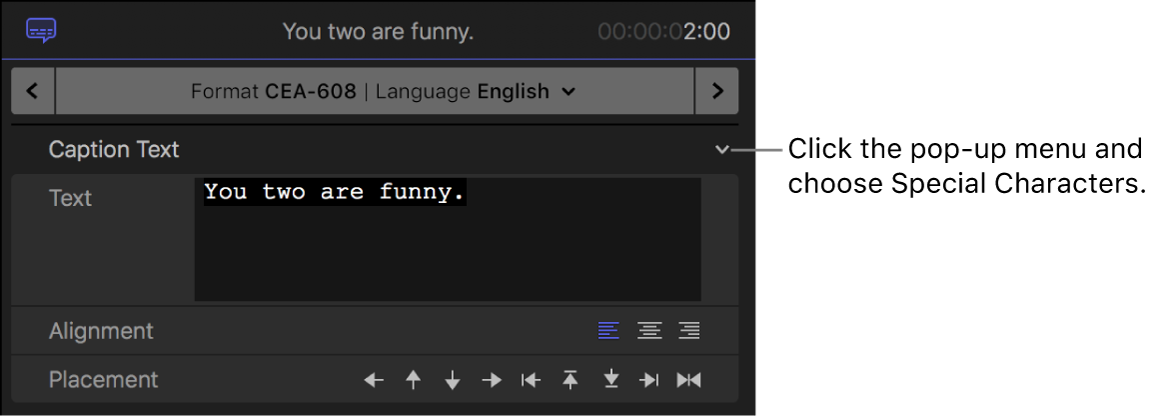
Add special characters to CEA-608 closed captions
You can add special characters (such as the trademark symbol or the degree symbol) to CEA-608 closed captions.
Select a CEA-608 closed caption clip in the Final Cut Pro timeline.
To open the Closed Caption inspector, do one of the following:
Choose Window > Show in Workspace > Inspector (or press Command-4).
Click the Inspector button on the right side of the toolbar.
In the Closed Caption inspector, position the insertion point in the Text field where you want the special character to appear.
Click the pop-up menu to the far right of the Caption Text heading, choose Special Characters, then choose the character from the submenu.

Download this guide: PDF