
Job properties in Compressor
When you import source media, Compressor detects various properties of the source media and displays them in the Job inspector. If you think the properties identified by Compressor are incorrect, you can modify them in the inspector.
Note: Not all properties are available for all job types.
Job summary
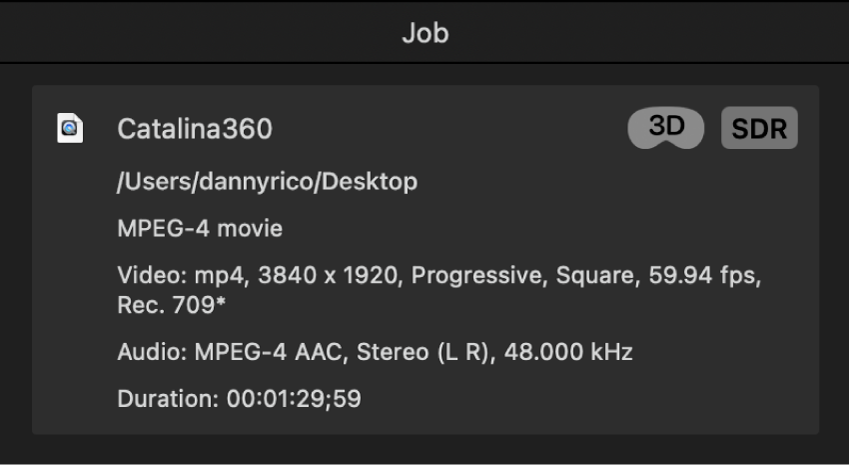
The top section of the Job inspector displays the source file’s name, location, video and audio encoding information, and duration.
If the source is a standard-dynamic-range video file, an SDR badge appears in the upper-right corner of the summary area; if the source is a high-dynamic-range video file, an HDR badge appears in the upper-right corner.
When the Stereoscopic pop-up menu in the Job inspector is set to anything other than Off/Monoscopic, a 3D badge appears next to the SDR or HDR badge.
Note: You can’t adjust the job summary directly, but it will automatically update to match any adjustments you make to the job properties below.
Media Extensions
Displays any media extensions that are being used to decode media in the selected job. See Import third-party formats with media extensions in Compressor.
Timing
Controls that adjust the starting timecode, In point, and duration of the output file. See Modify timing and timecode properties in Compressor.
File Properties
Controls that adjust the source media’s language and geographic information.
Language: Use the pop-up menu to set the default language for the selected job.
Country: After you’ve set a language, use the pop-up menu to set the country for the selected job.
Image Sequence Properties
Controls that adjust the frame rate and audio file for an image sequence job. See Import an image sequence in Compressor.
Surround Sound Properties
Controls that adjust the names of the files assigned to surround sound channels. See Import surround sound audio in Compressor.
Video Properties
Controls that adjust how Compressor interprets various video properties of the source file.
Important: Updating these values in the Job inspector does not convert the field order or color space of your file during transcoding. To apply transcoding instructions that convert the field order or color space of your output, use the corresponding properties in the Video inspector when a preset is selected. See Video properties of presets in Compressor.
Field order: This property determines what type of interlacing is present in the source file (if any). See Use deinterlacing in Compressor.
Color space: This property defines how Compressor interprets the color space of the source file. See Modify video color space and HDR metadata in Compressor.
Note: If you specify a log profile in the “Camera log” pop-up menu (described below), or you’re using ProRes RAW source footage with a value specified in the RAW to Log pop-up menu, the “Color space” pop-up menu is unavailable.
Camera log: Use this pop-up menu to choose a log profile that corresponds with the source file, including Apple Log and Apple Log 2. Compressor will try to pick the appropriate camera log based on metadata in the source file, but you can manually override Compressor’s selection.
RAW Processing
Controls that display as-shot camera settings of RAW footage and allow you to adjust various RAW camera settings. See Import and adjust RAW video in Compressor.
Projection Properties
Controls that adjust how Compressor interprets stereoscopic or projection properties of the source media when you’re working with spatial video or 360° video. See Modify stereoscopic and spatial properties in Compressor and View and modify 360° video properties in Compressor.
Job Annotations
Controls that adjust the annotation metadata in your output file. See Work with metadata annotations in Compressor.
HDR Metadata
Controls that adjust the HDR metadata that’s passed to your export file. See Modify video color space and HDR metadata in Compressor.
Audio Properties
Controls that adjust audio track assignments in the source clip. Each track is displayed with an activation checkbox to include or exclude the audio track from the job, as well as a pop-up menu that determines the audio channel layout of the audio track.
You can also add descriptive audio tracks in this section of the Job inspector.
Image Sequence Files
An ordered list of image files in an image sequence job. See Import an image sequence in Compressor.
Action
Controls for adding an automated job action to be performed after transcoding. See Add and modify job actions in Compressor.
You can also use the “Save captions to disk” checkbox to save a separate captions file to your computer when you transcode a job that has captions. See Export captions in Compressor.
Download this guide: PDF