Motion User Guide
- Welcome
-
- Intro to basic compositing
-
- Intro to transforming layers
-
- Intro to transforming layers in the canvas
- Transform layer properties in the canvas
- Transform tools
- Change layer position, scale, or rotation
- Move a layer’s anchor point
- Add a drop shadow to a layer
- Distort or shear a layer
- Crop a layer
- Modify shape or mask points
- Transform text glyphs and other object attributes
- Align layers in the canvas
- Transform layers in the HUD
- Transform 2D layers in 3D space
-
- Intro to behaviors
- Behaviors versus keyframes
-
- Intro to behavior types
-
- Intro to Parameter behaviors
- Audio behavior
- Average behavior
- Clamp behavior
- Custom behavior
- Add a Custom behavior
- Exponential behavior
- Link behavior
- Logarithmic behavior
- MIDI behavior
- Add a MIDI behavior
- Negate behavior
- Oscillate behavior
- Create a decaying oscillation
- Overshoot behavior
- Quantize behavior
- Ramp behavior
- Randomize behavior
- Rate behavior
- Reverse behavior
- Stop behavior
- Track behavior
- Wriggle behavior
-
- Intro to Simulation behaviors
- Align to Motion behavior
- Attracted To behavior
- Attractor behavior
- Drag behavior
- Drift Attracted To behavior
- Drift Attractor behavior
- Edge Collision behavior
- Gravity behavior
- Orbit Around behavior
- Random Motion behavior
- Repel behavior
- Repel From behavior
- Rotational Drag behavior
- Spring behavior
- Vortex behavior
- Wind behavior
- Additional behaviors
-
- Intro to using generators
- Add a generator
-
- Intro to image generators
- Caustics generator
- Cellular generator
- Checkerboard generator
- Clouds generator
- Color Solid generator
- Concentric Polka Dots generator
- Concentric Shapes generator
- Gradient generator
- Grid generator
- Japanese Pattern generator
- Lens Flare generator
- Manga Lines generator
- Membrane generator
- Noise generator
- One Color Ray generator
- Op Art 1 generator
- Op Art 2 generator
- Op Art 3 generator
- Overlapping Circles generator
- Radial Bars generator
- Soft Gradient generator
- Spirals generator
- Spiral Drawing generator
- Use Spiral Drawing onscreen controls
- Star generator
- Stripes generator
- Sunburst generator
- Truchet Tiles generator
- Two Color Ray generator
- Save a modified generator
-
- Intro to filters
- Browse and preview filters
- Apply or remove filters
-
- Intro to filter types
-
- Intro to Color filters
- Brightness filter
- Channel Mixer filter
- Color Balance filter
- Example: Color-balance two layers
- Color Curves filter
- Use the Color Curves filter
- Color Reduce filter
- Color Wheels filter
- Use the Color Wheels filter
- Colorize filter
- Contrast filter
- Custom LUT filter
- Use the Custom LUT filter
- Gamma filter
- Gradient Colorize filter
- HDR Tools filter
- Hue/Saturation filter
- Hue/Saturation Curves filter
- Use the Hue/Saturation Curves filter
- Levels filter
- Negative filter
- OpenEXR Tone Map filter
- Sepia filter
- Threshold filter
- Tint filter
-
- Intro to Distortion filters
- Black Hole filter
- Bulge filter
- Bump Map filter
- Disc Warp filter
- Droplet filter
- Earthquake filter
- Fisheye filter
- Flop filter
- Fun House filter
- Glass Block filter
- Glass Distortion
- Insect Eye filter
- Mirror filter
- Page Curl filter
- Poke filter
- Polar filter
- Refraction filter
- Ring Lens filter
- Ripple filter
- Scrape filter
- Sliced Scale filter
- Use the Sliced Scale filter
- Sphere filter
- Starburst filter
- Stripes filter
- Target filter
- Tiny Planet filter
- Twirl filter
- Underwater filter
- Wave filter
-
- Intro to Stylize filters
- Add Noise filter
- Bad Film filter
- Bad TV filter
- Circle Screen filter
- Circles filter
- Color Emboss filter
- Comic filter
- Crystallize filter
- Edges filter
- Extrude filter
- Fill filter
- Halftone filter
- Hatched Screen filter
- Highpass filter
- Indent filter
- Line Art filter
- Line Screen filter
- MinMax filter
- Noise Dissolve filter
- Pixellate filter
- Posterize filter
- Relief filter
- Slit Scan filter
- Slit Tunnel filter
- Texture Screen filter
- Vignette filter
- Wavy Screen filter
- Publish filter parameters to Final Cut Pro
- Using filters on alpha channels
- Filter performance
- Save custom filters
-
- Intro to 3D objects
- Add a 3D object
- Move and rotate a 3D object
- Reposition a 3D object’s anchor point
- Exchange a 3D object file
- 3D object intersection and layer order
- Using cameras and lights with 3D objects
- Save custom 3D objects
- Guidelines for working with 3D objects
- Working with imported 3D objects
-
- Intro to 360-degree video
- 360-degree projects
- Create 360-degree projects
- Add 360-degree video to a project
- Create a tiny planet effect
- Reorient 360-degree media
- Creating 360-degree templates for Final Cut Pro
- 360-degree-aware filters and generators
- Export and share 360-degree projects
- Guidelines for better 360-degree projects
-
-
- Intro to preferences and shortcuts
-
- Intro to Keyboard shortcuts
- Use function keys
- General keyboard shortcuts
- Audio list keyboard shortcuts
-
- Tools keyboard shortcuts
- Transform tool keyboard shortcuts
- Select/Transform tool keyboard shortcuts
- Crop tool keyboard shortcuts
- Edit Points tool keyboard shortcuts
- Edit shape tools keyboard shortcuts
- Pan and Zoom tools keyboard shortcuts
- Shape tools keyboard shortcuts
- Bezier tool keyboard shortcuts
- B-Spline tool keyboard shortcuts
- Paint Stroke tool keyboard shortcuts
- Text tool keyboard shortcuts
- Shape mask tools keyboard shortcuts
- Bezier Mask tool keyboard shortcuts
- B-Spline Mask tool keyboard shortcuts
- Transport control keyboard shortcuts
- View option keyboard shortcuts
- HUD keyboard shortcuts
- Inspector keyboard shortcuts
- Keyframe Editor keyboard shortcuts
- Layers keyboard shortcuts
- Library keyboard shortcuts
- Media list keyboard shortcuts
- Timeline keyboard shortcuts
- Keyframing keyboard shortcuts
- Shape and Mask keyboard shortcuts
- 3D keyboard shortcuts
- Miscellaneous keyboard shortcuts
- Touch Bar shortcuts
- Move assets to another computer
- Work with GPUs
- Glossary
- Copyright

Adjust HDR media in Motion
You can adjust HDR media in Motion in two ways:
Use the HDR Tools filter to convert wide-gamut HDR media from one color space to another or to limit the brightness of a video to a specific level.
Use the Media Inspector to assign or correct a media file’s color profile.
Adjust the color space of wide-gamut HDR media using the HDR Tools filter
In the Layers list in Motion, select the wide-gamut HDR media.
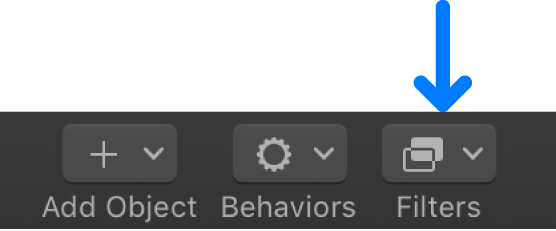
In the toolbar, click Filters, then choose Color > HDR Tools from the pop-up menu.

In the Filters Inspector, click the Mode pop-up menu, then choose one of the following adjustments:
HDR to Rec. 709 SDR: Choose this option to convert high-dynamic-range (HDR) media (such as PQ, HLG, or log media that has been color-corrected in HDR) to Rec. 709 standard-dynamic-range (SDR) luminance levels. Further adjustments to the image may be necessary to fine-tune the look.
PQ Output Tone Map: Choose this option to reduce the brightness of PQ media down to the level you set in the Peak Brightness slider, and to apply a soft rolloff to the highlights so that they don’t clip abruptly. Use this setting in PQ projects only, and apply it as the last effect.
HLG to PQ (Rec. 2100): Apply this setting to HLG clips in PQ projects to maintain the brightness at a level you set in the Peak Brightness slider (in accordance with Rec. ITU-R BT.2100-1).
PQ to HLG (Rec. 2100): Apply this setting to PQ clips in HLG projects to maintain the brightness at a level you set in the Peak Brightness slider (in accordance with Rec. ITU-R BT.2100-1).
Depending on the Mode parameter setting, the Peak Brightness parameter sets a clip’s maximum luminance on a display to a specific level or sets the nominal peak luminance of a display:
When Mode is set to PQ Output Tone Map, Peak Brightness specifies the number of nits to which the output of the filter is limited. For example, if you want to limit your clip to 1,000 nits peak, set Peak Brightness to 1000.
When Mode is set to HLG to PQ (Rec. 2100) or PQ to HLG (Rec. 2100), Peak Brightness specifies the nominal peak luminance of the (HLG) display on which the HLG content is displayed. For example, if you want to convert an HLG clip to PQ and want the resulting PQ clip to look identical to an HLG clip on a 1000-nit display, set the Peak Brightness parameter to 1000.
For the most accurate results when using the HDR Tools filter, keep the Mix setting at 100%.
You might use the HDR Tools filter on any of the following kinds of wide-gamut HDR images:
MOV or MXF files that were encoded directly using the HLG (Hybrid Log-Gamma) or PQ (Perceptual Quantizer) standard. This could be media originating from a camera or media exported from Motion, Final Cut Pro, Compressor, or another app.
A source file that is not HLG or PQ (it could be RAW, for example) to which a LUT filter has been applied (before application of the HDR Tools filter) to output HLG or PQ video.
A video clip that has been set to either PQ or HLG. For example, you might modify a PQ project (a project configured for Rec. 2020 PQ), and then export the project as a movie and place it in an HLG project. For information about wide-gamut HDR project settings, see Use wide-gamut HDR color processing in Motion.
Override a file’s color profile in the Media pane
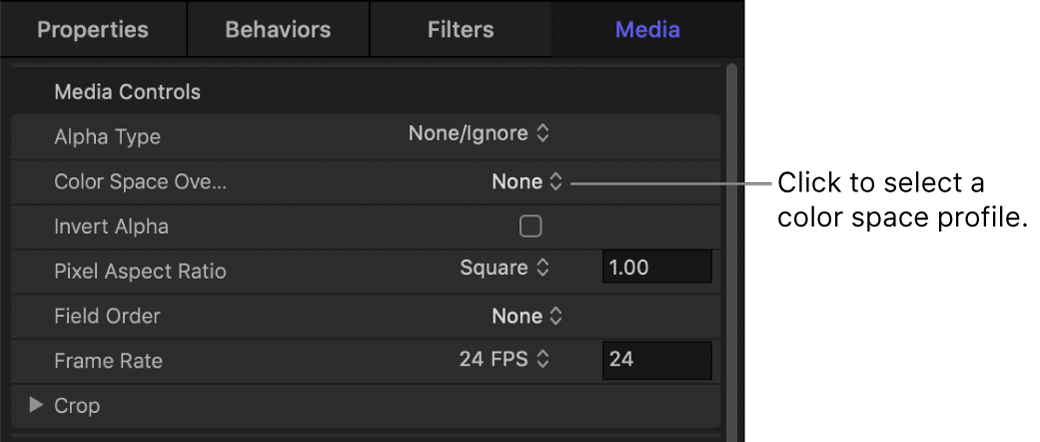
If a media file is not tagged or is tagged incorrectly prior to importing into Motion, you can manually set its color profile in the Media pane of the Inspector.
In Motion, open the Media pane, then select the image or clip.
In the Media Inspector, click the Color Space Override pop-up menu, then choose an option.

The options vary depending on the selected file. Rec. 601, Rec. 709, and Rec. 2020, Rec. 2020 HLG, and Rec. 2020 PQ are available for most files.
For more information about controls in the Media Inspector, see Source media controls in Motion.
Download this guide: Apple Books | PDF