Motion User Guide
- Welcome
-
- Intro to basic compositing
-
- Intro to transforming layers
-
- Intro to transforming layers in the canvas
- Transform layer properties in the canvas
- Transform tools
- Change layer position, scale, or rotation
- Move a layer’s anchor point
- Add a drop shadow to a layer
- Distort or shear a layer
- Crop a layer
- Modify shape or mask points
- Transform text glyphs and other object attributes
- Align layers in the canvas
- Transform layers in the HUD
- Transform 2D layers in 3D space
-
- Intro to behaviors
- Behaviors versus keyframes
-
- Intro to behavior types
-
- Intro to Parameter behaviors
- Audio behavior
- Average behavior
- Clamp behavior
- Custom behavior
- Add a Custom behavior
- Exponential behavior
- Link behavior
- Logarithmic behavior
- MIDI behavior
- Add a MIDI behavior
- Negate behavior
- Oscillate behavior
- Create a decaying oscillation
- Overshoot behavior
- Quantize behavior
- Ramp behavior
- Randomize behavior
- Rate behavior
- Reverse behavior
- Stop behavior
- Track behavior
- Wriggle behavior
-
- Intro to Simulation behaviors
- Align to Motion behavior
- Attracted To behavior
- Attractor behavior
- Drag behavior
- Drift Attracted To behavior
- Drift Attractor behavior
- Edge Collision behavior
- Gravity behavior
- Orbit Around behavior
- Random Motion behavior
- Repel behavior
- Repel From behavior
- Rotational Drag behavior
- Spring behavior
- Vortex behavior
- Wind behavior
- Additional behaviors
-
- Intro to using generators
- Add a generator
-
- Intro to image generators
- Caustics generator
- Cellular generator
- Checkerboard generator
- Clouds generator
- Color Solid generator
- Concentric Polka Dots generator
- Concentric Shapes generator
- Gradient generator
- Grid generator
- Japanese Pattern generator
- Lens Flare generator
- Manga Lines generator
- Membrane generator
- Noise generator
- One Color Ray generator
- Op Art 1 generator
- Op Art 2 generator
- Op Art 3 generator
- Overlapping Circles generator
- Radial Bars generator
- Soft Gradient generator
- Spirals generator
- Spiral Drawing generator
- Use Spiral Drawing onscreen controls
- Star generator
- Stripes generator
- Sunburst generator
- Truchet Tiles generator
- Two Color Ray generator
- Save a modified generator
-
- Intro to filters
- Browse and preview filters
- Apply or remove filters
-
- Intro to filter types
-
- Intro to Color filters
- Brightness filter
- Channel Mixer filter
- Color Balance filter
- Example: Color-balance two layers
- Color Curves filter
- Use the Color Curves filter
- Color Reduce filter
- Color Wheels filter
- Use the Color Wheels filter
- Colorize filter
- Contrast filter
- Custom LUT filter
- Use the Custom LUT filter
- Gamma filter
- Gradient Colorize filter
- HDR Tools filter
- Hue/Saturation filter
- Hue/Saturation Curves filter
- Use the Hue/Saturation Curves filter
- Levels filter
- Negative filter
- OpenEXR Tone Map filter
- Sepia filter
- Threshold filter
- Tint filter
-
- Intro to Distortion filters
- Black Hole filter
- Bulge filter
- Bump Map filter
- Disc Warp filter
- Droplet filter
- Earthquake filter
- Fisheye filter
- Flop filter
- Fun House filter
- Glass Block filter
- Glass Distortion
- Insect Eye filter
- Mirror filter
- Page Curl filter
- Poke filter
- Polar filter
- Refraction filter
- Ring Lens filter
- Ripple filter
- Scrape filter
- Sphere filter
- Starburst filter
- Stripes filter
- Target filter
- Tiny Planet filter
- Twirl filter
- Underwater filter
- Wave filter
-
- Intro to Stylize filters
- Add Noise filter
- Bad Film filter
- Bad TV filter
- Circle Screen filter
- Circles filter
- Color Emboss filter
- Comic filter
- Crystallize filter
- Edges filter
- Extrude filter
- Fill filter
- Halftone filter
- Hatched Screen filter
- Highpass filter
- Indent filter
- Line Art filter
- Line Screen filter
- MinMax filter
- Noise Dissolve filter
- Pixellate filter
- Posterize filter
- Relief filter
- Slit Scan filter
- Slit Tunnel filter
- Texture Screen filter
- Vignette filter
- Wavy Screen filter
- Publish filter parameters to Final Cut Pro
- Using filters on alpha channels
- Filter performance
- Save custom filters
-
- Intro to 3D objects
- Add a 3D object
- Move and rotate a 3D object
- Reposition a 3D object’s anchor point
- Exchange a 3D object file
- 3D object intersection and layer order
- Using cameras and lights with 3D objects
- Save custom 3D objects
- Guidelines for working with 3D objects
- Working with imported 3D objects
-
- Intro to 360-degree video
- 360-degree projects
- Create 360-degree projects
- Add 360-degree video to a project
- Create a tiny planet effect
- Reorient 360-degree media
- Creating 360-degree templates for Final Cut Pro
- 360-degree-aware filters and generators
- Export and share 360-degree projects
- Guidelines for better 360-degree projects
-
- Intro to tracking
- How does motion tracking work?
- Motion tracking behavior types
- Analyze motion in a clip
- Stabilize a shaky clip
- Unstabilize a clip
- Use a range of frames for analysis
- Load existing tracking data
- Track shapes, masks, and paint strokes
- Track a filter’s position parameter
- Adjust onscreen trackers
- Save tracks to the Library
-
- Intro to preferences and shortcuts
-
- Intro to Keyboard shortcuts
- Use function keys
- General keyboard shortcuts
- Audio list keyboard shortcuts
-
- Tools keyboard shortcuts
- Transform tool keyboard shortcuts
- Select/Transform tool keyboard shortcuts
- Crop tool keyboard shortcuts
- Edit Points tool keyboard shortcuts
- Edit shape tools keyboard shortcuts
- Pan and Zoom tools keyboard shortcuts
- Shape tools keyboard shortcuts
- Bezier tool keyboard shortcuts
- B-Spline tool keyboard shortcuts
- Paint Stroke tool keyboard shortcuts
- Text tool keyboard shortcuts
- Shape mask tools keyboard shortcuts
- Bezier Mask tool keyboard shortcuts
- B-Spline Mask tool keyboard shortcuts
- Transport control keyboard shortcuts
- View option keyboard shortcuts
- HUD keyboard shortcuts
- Inspector keyboard shortcuts
- Keyframe Editor keyboard shortcuts
- Layers keyboard shortcuts
- Library keyboard shortcuts
- Media list keyboard shortcuts
- Timeline keyboard shortcuts
- Keyframing keyboard shortcuts
- Shape and Mask keyboard shortcuts
- 3D keyboard shortcuts
- Miscellaneous keyboard shortcuts
- Touch Bar shortcuts
- Move assets to another computer
- Work with GPUs
- Glossary
- Copyright

Color Balance filter in Motion
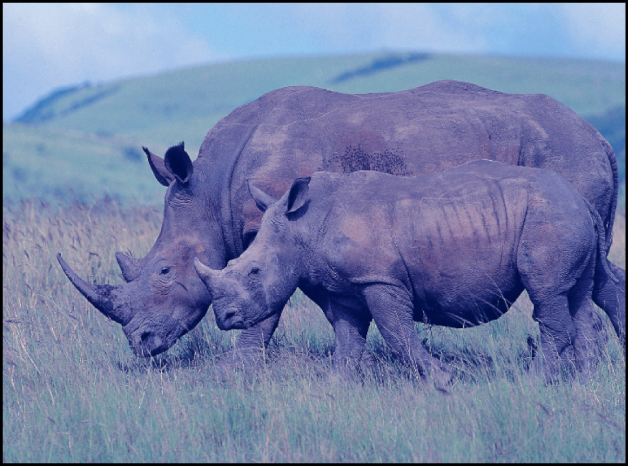
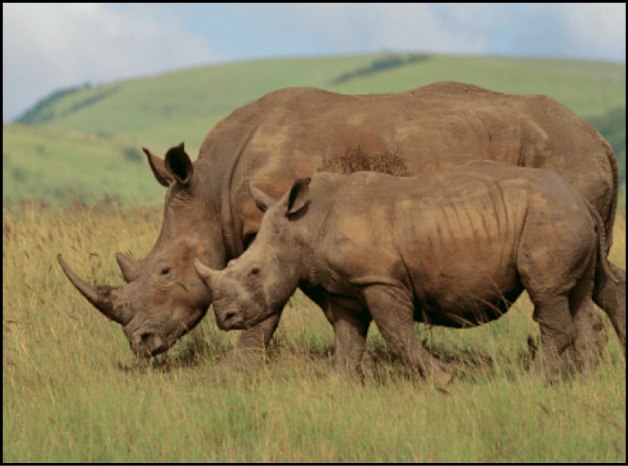
Color balance refers to the relative strength of the red, green, and blue channels that constitute an image. For example, a blue-tinted image has a strong blue channel and weaker green and red channels.
For an example of using the Color Balance filter to match two composited layers, see Example: Color-balance two layers in Motion.

The Color Balance filter lets you adjust the relative balance of all three color channels of an image at once—for example, lowering the blue channel and raising the red and green channels to reduce blue tinting and yield an image that appears more orange and warm.

Color balance also relates to color temperature, which describes the quality of light in an image. For example, sunlight is generally more bluish than tungsten light, which is more orange. In professional film and video productions, white-balancing the camera before shooting usually ensures that whites in an image are neutral (with all three color channels balanced evenly). However, film stocks, optical filters, and digital white-balance settings can modify the tint of an image.
Note: The imbalanced color channels caused by a dominant color temperature in the lighting of an image is often referred to as a color cast.
You can use the Color Balance filter to adjust the three color channels of an image to eliminate a color cast or introduce one. Here are some uses for the Color Balance filter:
Correct problems in lighting: For example, you can rebalance an image that’s too orange to appear more neutral.
Match two images to one another: For example, you can match the quality of light on an actor in a foreground green screen clip to the lighting in a background image.
Stylize the color of an image used in a creative composition: For example, you can create a high-contrast, blue-tinted silhouette from the image of two actors dancing for a title sequence.
The Color Balance filter doesn’t just let you rebalance the overall strength of an image’s three color channels, it also lets you rebalance color specifically in three tonal zones of an image: shadows, midtones, and highlights. Three correspondingly named color controls let you make color balance adjustments in each zone of image tonality.

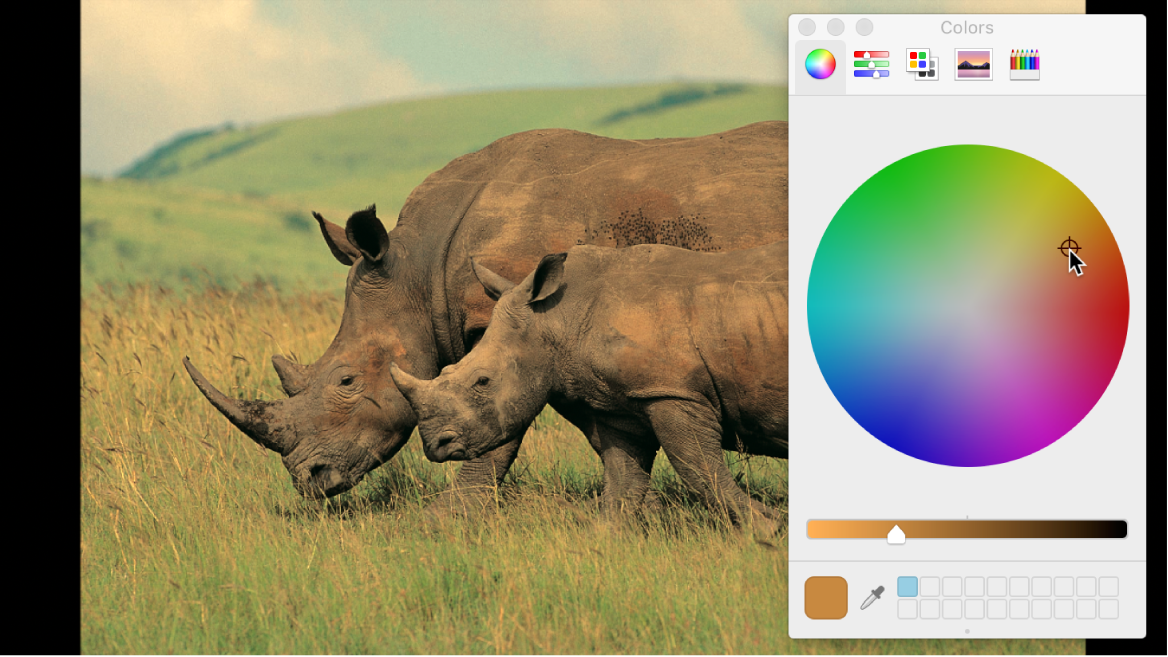
To make an adjustment to a zone, click the corresponding color well to open the macOS Colors window, then drag in the color wheel. As you drag, the image updates. Dragging in a specific hue’s direction rebalances the image, tinting it with that hue. The farther toward the edge of the color wheel you drag, the more intensely you tint the image.

Tip: You can use any controls in the macOS Colors window to make color adjustments, including sliders, web-safe colors, and the magnifying glass picker. Further, you can save frequently used tints by dragging a color from the color bar at the top to an empty white swatch below. Clicking a filled swatch selects that color.
The adjustments to shadows, midtones, and highlights of an image overlap widely. For example, adjustments to shadows affect the darkest parts of the image the most, but the effect also influences midtones and lower highlights. This overlap ensures that adjustments you make blend seamlessly with the original colors of the image.
Note: Although you can make small contrast adjustments using the vertical lightness slider in the color wheel pane of the Colors window, it’s better to use a Contrast filter or a Levels filter to adjust the overall lightness and darkness of an image.
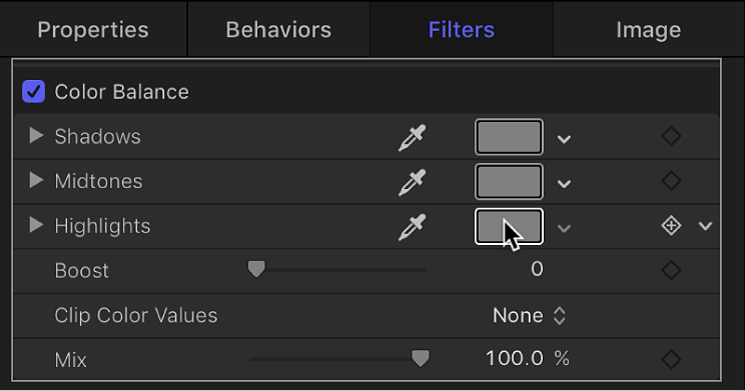
Adjust this filter using the parameter controls in the Filters Inspector:
Shadows: Adjusts color channels in the darkest regions of the image. Click the color well to open the Colors window, then adjust the color balance of the darkest portion of the image. An eyedropper lets you sample any color in the canvas for use in balancing the image. You can also click the disclosure triangle to reveal individual red, green, and blue channel sliders, with a numeric range from 0 (no color) to 0.5 (unaltered color) to 1.0 (maximum color).
Midtones: Adjusts color channels in midtone regions of the image. Click the color well to open the Colors window, then adjust the color balance of the range of color falling between shadows and highlights. An eyedropper lets you sample any color in the canvas for use in balancing the image. You can also click the disclosure triangle to reveal red, green, and blue channel sliders with a numeric range from 0 (no color) to 0.5 (unaltered color) to 1.0 (maximum color).
Highlights: Adjusts color channels in the lightest regions of the image. Click the color well to open the Colors window, then adjust the color balance of the brightest portion of the image. An eyedropper lets you sample any color in the canvas for use in balancing the image. You can also click the disclosure triangle to reveal red, green, and blue channel slider with a numeric range from 0 (no color) to 0.5 (unaltered color) to 1.0 (maximum color).
Boost: Multiplies the values set in the Shadows, Midtones, and Highlights parameters. This is useful when using Color Balance for exposure balancing, allowing you to “blow out” an image. A boost applied to strong colors may yield unexpected results.
Clip Color Values: Turns clipping on and off. Clipping prevents color adjustments from forcing color values out of the allowable range. Clipping can prevent illegal signal levels in clips that are output to video. There are four menu options:
None: No clipping occurs.
At White: Any color channel exceeding the maximum value of 1 is clipped to 1.
At Black: Any color channel falling below the minimum value of 0 is clipped to 0.
At Black and White: All color channels are clipped to a minimum of 0 and a maximum of 1.
Mix: Sets the percentage of the original image that’s blended with the color-corrected image.