Use color wheels in Final Cut Pro
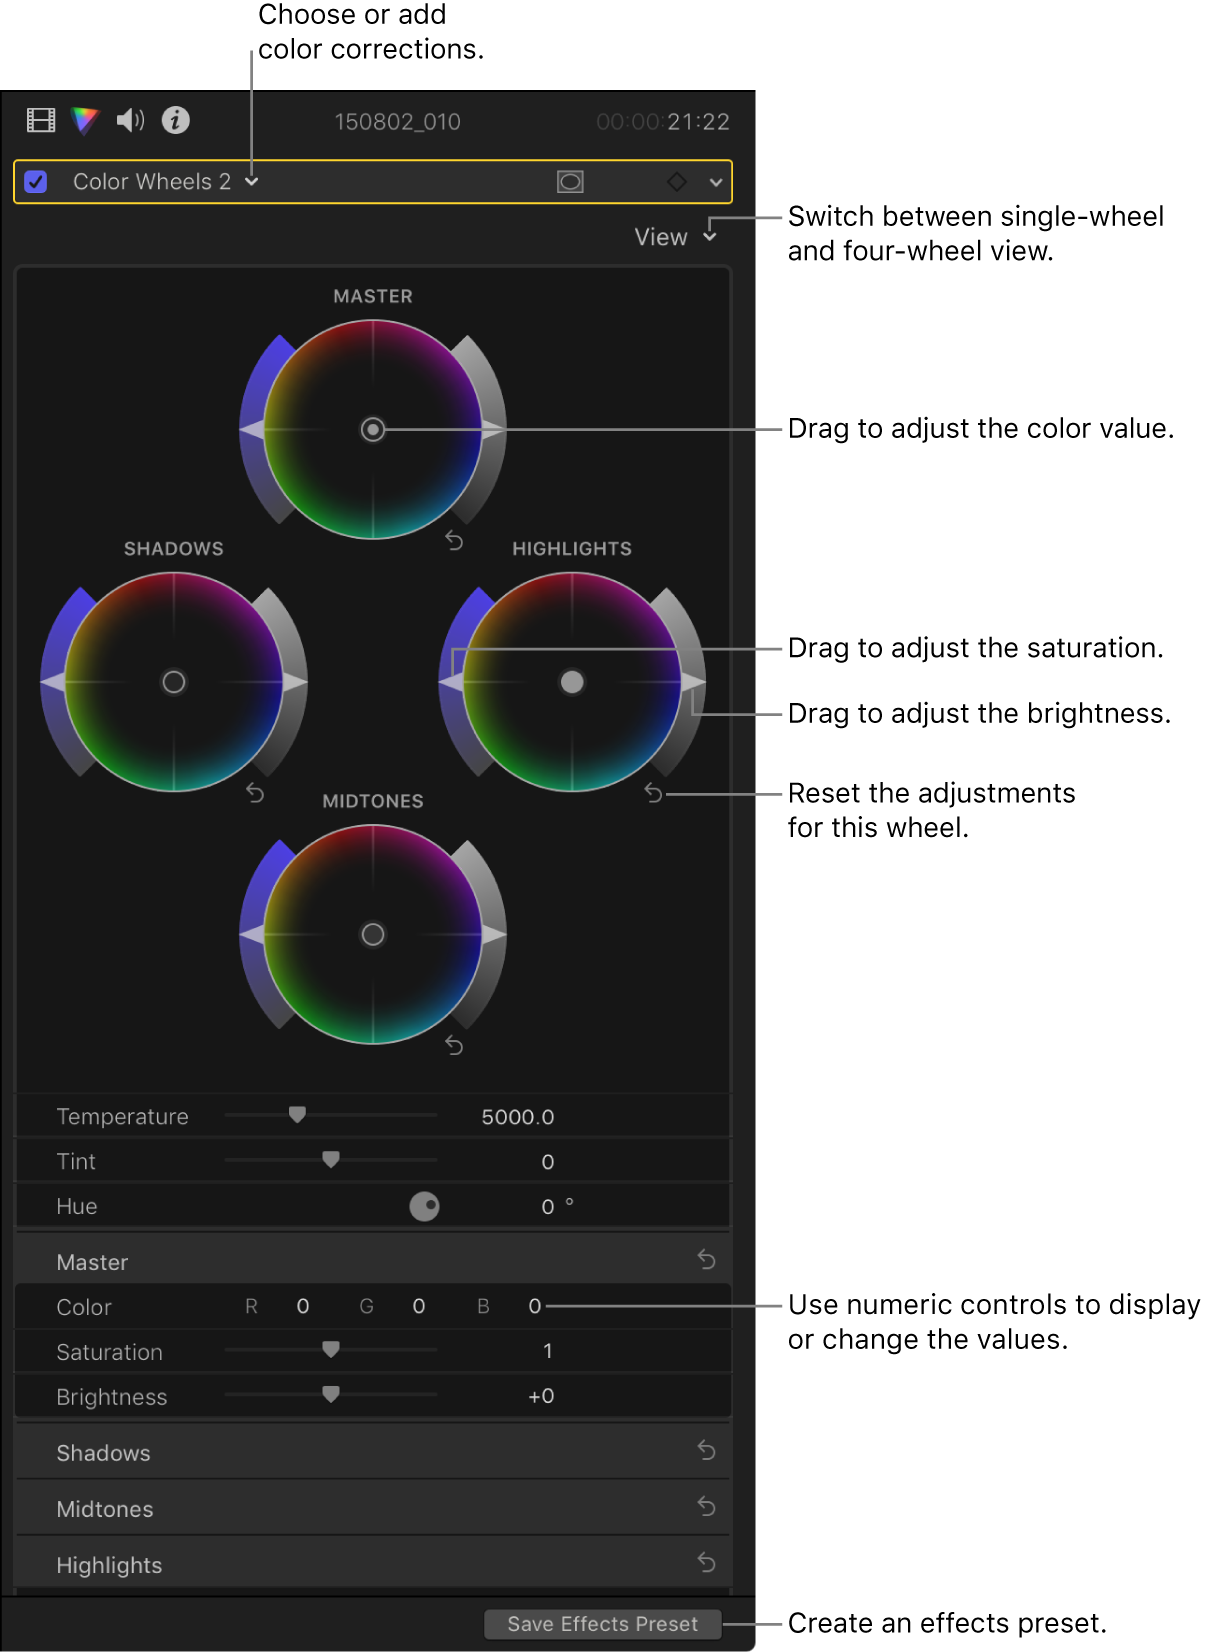
You can use four color wheels (Master, Shadows, Midtones, and Highlights) to adjust color in your video clips. You can also adjust a clip’s brightness and saturation levels using sliders on the sides of the color wheels. First you add the Color Wheels color correction effect to the clip, and then you adjust its settings in the Color inspector.

To provide objective, precise information as you color correct a clip, use the video scopes and other video measurement tools (see Intro to measuring video in Final Cut Pro). The vectorscope shows the distribution of color in your image on a circular scale and is particularly useful for working with color wheels. The angle of distribution of red, green, and blue in the color wheels corresponds to the angles of those colors in the vectorscope. When you move the color control in the center of a color wheel, the mix of colors in the vectorscope moves the same direction.
You can create a custom workspace layout for color correction or switch to the predefined Color & Effects layout (see Change the workspace layout in Final Cut Pro).
Note: Because you can apply multiple color correction effects to a clip, you’re not required to follow all of the steps below, nor the order of those steps. For example, you might adjust the overall contrast with the Color Curves effect and adjust a color tint with the Color Wheels effect. Or you could achieve the same results with multiple instances of the same effect. For a summary of the color correction effects, see Intro to color correction effects in Final Cut Pro.
In the Final Cut Pro timeline, select the clip you want to correct, then position the playhead in the clip so that the clip appears in the viewer.
Open the Color inspector.
Tip: If you frequently add a particular color correction effect, you can speed up your workflow by setting it as the default color correction. Then just select a timeline clip and press Command-6 to start adjusting the effect in the Color inspector.
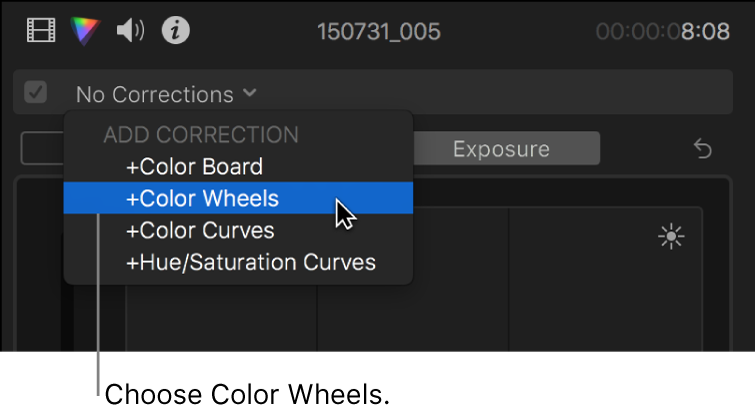
Click the pop-up menu at the top of the Color inspector, then do one of the following:
Add a new instance of the Color Wheels effect: Choose Color Wheels from the Add Correction section at the bottom of the menu.

For more details and methods, see Add color corrections in Final Cut Pro.
Correct a Color Wheels effect already applied to the clip: Choose the Color Wheels effect you want to correct from the Corrections section at the top of the menu.
Color Wheels controls appear in the Color inspector. The effect also appears in the Effects section of the Video inspector.

Tip: To switch the inspector between full-height view and half-height view, double-click the top bar of the inspector.
Click the View pop-up menu at the top of the Color inspector and choose a display option:
All Wheels: Displays all four color wheels at once.
The Master color wheel adjusts the whole clip image; the other color wheels adjust only the shadows, midtones, or highlights.
Single Wheels: Displays one large color wheel at a time. Click a button at the top of the Color inspector to select the wheel to display.
To change a clip’s brightness, color, or saturation, adjust the controls for a color wheel, or enter values in the value sliders below.
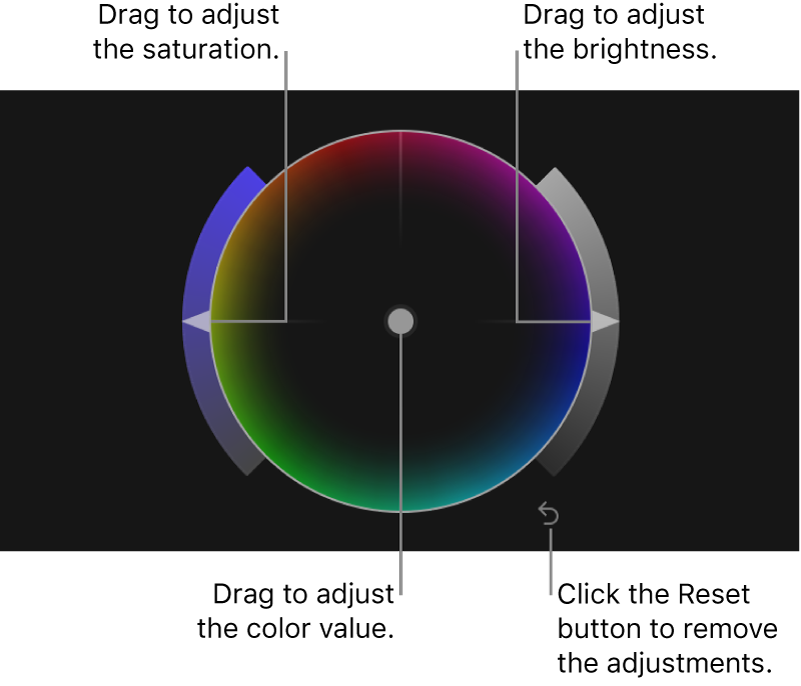
Adjust the brightness: Drag the Brightness slider on the right side of a wheel.
Adjust the color value: Drag the color control in the center of a wheel.
You can also move the color control up, down, left, or right by pressing the Up Arrow, Down Arrow, Left Arrow, or Right Arrow key.
Adjust the saturation: Drag the Saturation slider on the left side of a wheel.
To make fine adjustments, hold down the Option key as you drag a control.

Use the controls at the bottom of the Color inspector to adjust any of the following:
Temperature: Adjust the color temperature, in degrees kelvin, so that the image looks as natural as possible. Color temperature describes the color value of light when the image was shot (not the light’s heat value). Drag the slider to the left to increase blue tones, or to the right to increase yellow-red tones. For example, if the image was shot under tungsten conditions, set the value between 2500 and 2900 degrees kelvin to white-balance it.
Tint: Fine-tune the white-balance adjustment by neutralizing a remaining green or magenta tint. Drag the Tint slider to the left to add a green tint to the image, or to the right to add a magenta tint.
Hue: Use the Hue control or value slider to set a value from 0° to 360°, effectively rotating all hues in the image around the perimeter of the color wheel. A value of 0° represents the original image.
Mix: Set the amount of the original image to be blended with the color-corrected image.
To reset the values for a color wheel or a value slider, click its Reset button
 .
.
Tip: If you want to color correct the next or previous clip in the timeline, press Command-Right Arrow or Command-Left Arrow to move the playhead to the next or previous clip and select it. These shortcuts select clips in the same role only, so you can quickly move between video clips and skip over clips not suited for color correction (such as music or titles).
After you apply a color correction, you can copy it to another clip or group of clips. See Copy effects between clips in Final Cut Pro.