Final Cut Pro User Guide
- Welcome
-
- What’s new in Final Cut Pro 10.6
- What’s new in Final Cut Pro 10.5.3
- What’s new in Final Cut Pro 10.5
- What’s new in Final Cut Pro 10.4.9
- What’s new in Final Cut Pro 10.4.7
- What’s new in Final Cut Pro 10.4.6
- What’s new in Final Cut Pro 10.4.4
- What’s new in Final Cut Pro 10.4.1
- What’s new in Final Cut Pro 10.4
- What’s new in Final Cut Pro 10.3
- What’s new in Final Cut Pro 10.2
- What’s new in Final Cut Pro 10.1.2
- What’s new in Final Cut Pro 10.1
- What’s new in Final Cut Pro 10.0.6
- What’s new in Final Cut Pro 10.0.3
- What’s new in Final Cut Pro 10.0.1
-
- Intro to effects
-
- Intro to transitions
- How transitions are created
- Add transitions
- Set the default transition
- Delete transitions
- Adjust transitions in the timeline
- Adjust transitions in the inspector and viewer
- Merge jump cuts with the Flow transition
- Adjust transitions with multiple images
- Modify transitions in Motion
-
- Add storylines
- Use the precision editor
- Conform frame sizes and rates
- Use XML to transfer projects
-
- Glossary
- Copyright

Adjust audio effects in Final Cut Pro
You can adjust an effect’s parameters using controls in the Audio inspector or the effect’s window.
If you’re using Audio Units effects or Logic Effects, you can show an expanded interface by opening the effect’s window.
For more information about using the Logic Effects that are included with Final Cut Pro, see Final Cut Pro Logic Effects.
Adjust an audio effect
In the Final Cut Pro timeline, select the clip with the effect you want to adjust.
Locate the effect in the Effects section of the Audio inspector.
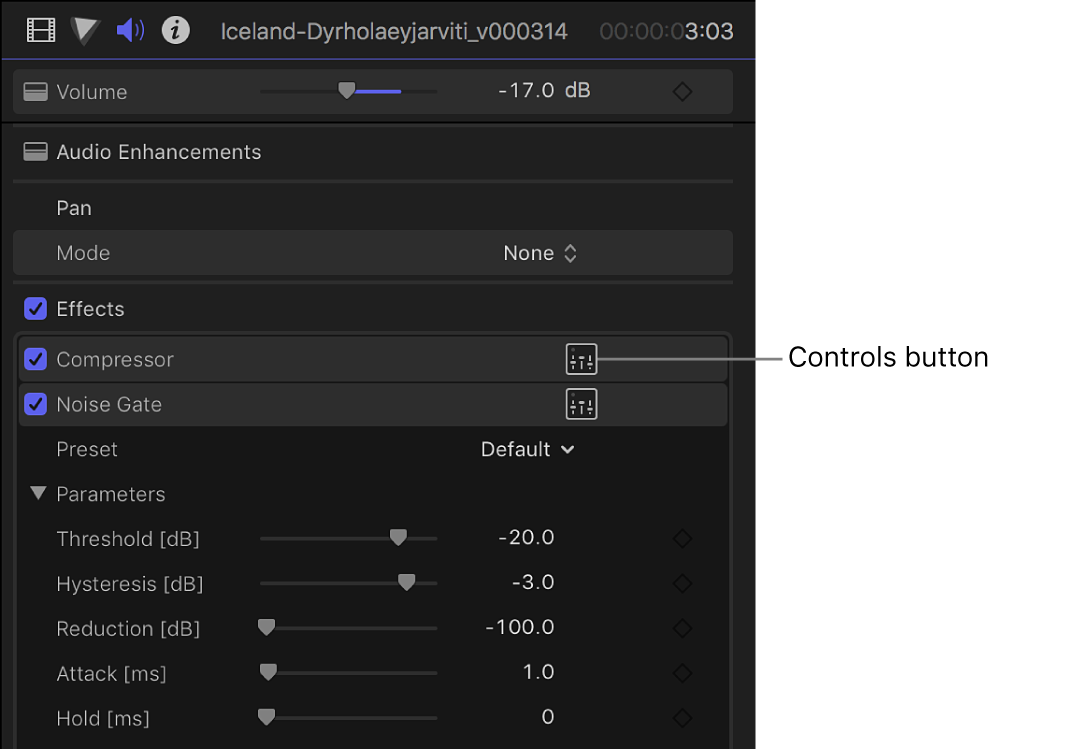
To see an effect’s parameters, do one of the following:
Click the Controls button (to the right of the effect’s name) to show a larger window with advanced controls.
Move the pointer over the effect in the inspector and click the Show button at the right end of the effect bar.
Tip: You can adjust effects over time using keyframes in the Audio inspector or the Audio Animation editor.
Select effect parameters and adjust their settings as needed.
You can preview your adjustments by using the skimmer or playing the clip in the timeline.
To return the effect’s values to their default settings, click the effect’s Reset button
 .
.
Use Audio Units and Logic effects presets
Many Audio Units and Logic effects include built-in presets that are tailored for specific settings or environments, such as reverb presets that simulate the acoustics of a small room or a large cathedral. Presets make it easy to preview and apply effects quickly.
In Final Cut Pro, locate the effect in the Effects section of the Audio inspector.
Click the Preset pop-up menu and choose a preset.
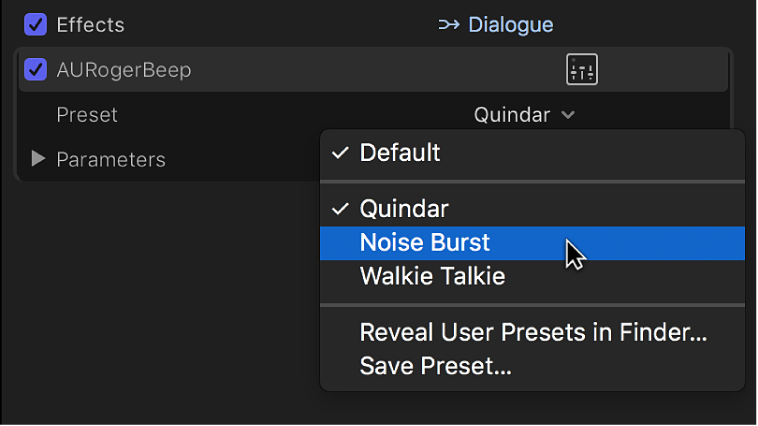
You can preview your presets by using the skimmer or playing the clip in the timeline.
To return the effect to its default settings, click the Preset pop-up menu and choose Default.
Edit and save custom Audio Units and Logic effects presets
You can edit preset parameters by adjusting the effect’s controls. If you want to keep your changes, you can save them as as a custom preset.
In Final Cut Pro, locate the effect in the Effects section of the Audio inspector.
Click the Preset pop-up menu and choose a preset.

To see an effect’s parameters, do one of the following:
Click the Controls button (to the right of the effect’s name) to show a larger window with advanced controls.
Click the Parameters disclosure triangle to show controls in the Audio inspector.
Select effect parameters and adjust their settings as needed.
You can preview your adjustments by using the skimmer or playing the clip in the timeline.
When you adjust a preset’s parameters, the Preset pop-up menu indicates that the preset has been edited.

To save an edited preset, click the Preset pop-up menu and choose Save Preset, then type a name for the new preset.
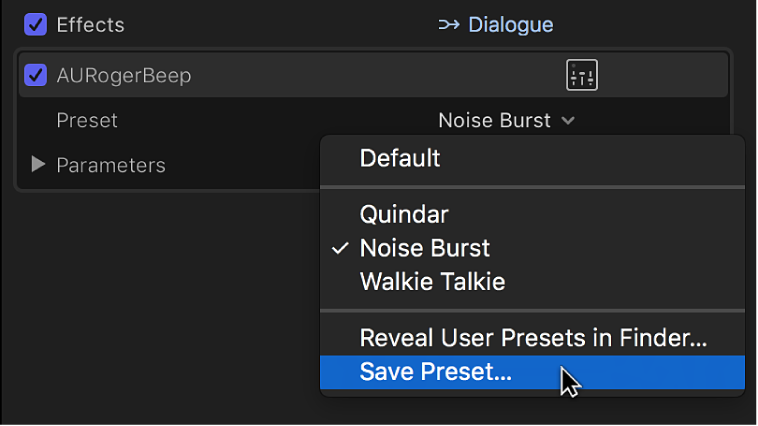
Saved presets appear in the Preset pop-up menu.
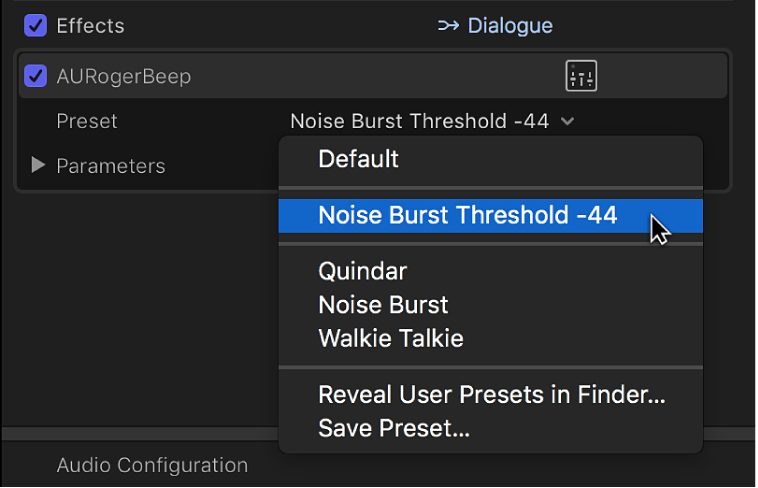
To return the effect to its default settings, click the Preset pop-up menu and choose Default.
Delete custom presets
In Final Cut Pro, locate the effect in the Effects section of the Audio inspector.
Click the Preset pop-up menu and choose Reveal User Presets in Finder.
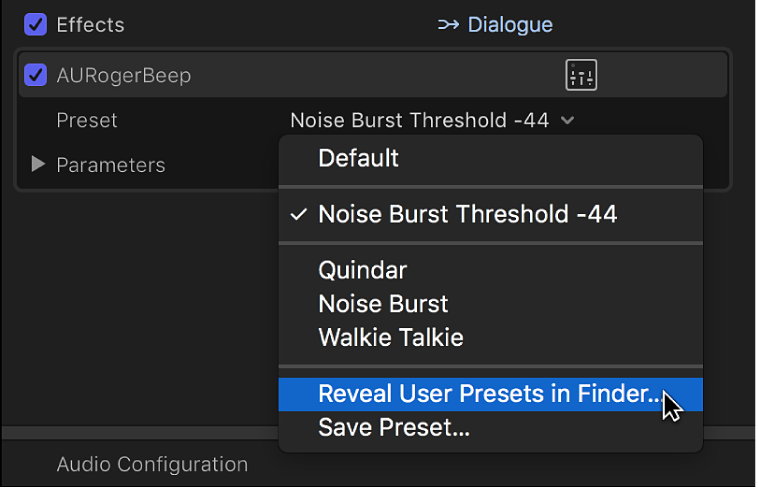
In the Finder window, select the preset or presets you want to delete, then drag them to the Trash.
After a custom preset has been deleted, it no longer appears in the Preset pop-up menu.
Download this guide: Apple Books | PDF