Final Cut Pro User Guide
- Welcome
-
- What’s new in Final Cut Pro 10.5
- What’s new in Final Cut Pro 10.4.9
- What’s new in Final Cut Pro 10.4.7
- What’s new in Final Cut Pro 10.4.6
- What’s new in Final Cut Pro 10.4.4
- What’s new in Final Cut Pro 10.4.1
- What’s new in Final Cut Pro 10.4
- What’s new in Final Cut Pro 10.3
- What’s new in Final Cut Pro 10.2
- What’s new in Final Cut Pro 10.1.2
- What’s new in Final Cut Pro 10.1
- What’s new in Final Cut Pro 10.0.6
- What’s new in Final Cut Pro 10.0.3
- What’s new in Final Cut Pro 10.0.1
-
- Intro to effects
-
- Intro to transitions
- How transitions are created
- Add transitions
- Set the default transition
- Delete transitions
- Adjust transitions in the timeline
- Adjust transitions in the inspector and viewer
- Merge jump cuts with the Flow transition
- Adjust transitions with multiple images
- Modify transitions in Motion
-
- Add storylines
- Use the precision editor
- Conform frame sizes and rates
- Use XML to transfer projects
-
- Glossary
- Copyright

Intro to color correction in Final Cut Pro
In any post-production workflow, color correction is generally one of the last steps in finishing an edited program. There are a number of reasons to color correct your footage:
Balance all the shots in a scene to match.
Correct errors in color balance, exposure, and white-balance.
Make sure that key elements in your program, such as skin tones, look the way they should.
Achieve a look, such as making the scenes warmer or cooler.
Create contrast or special effects by manipulating the colors and exposure.
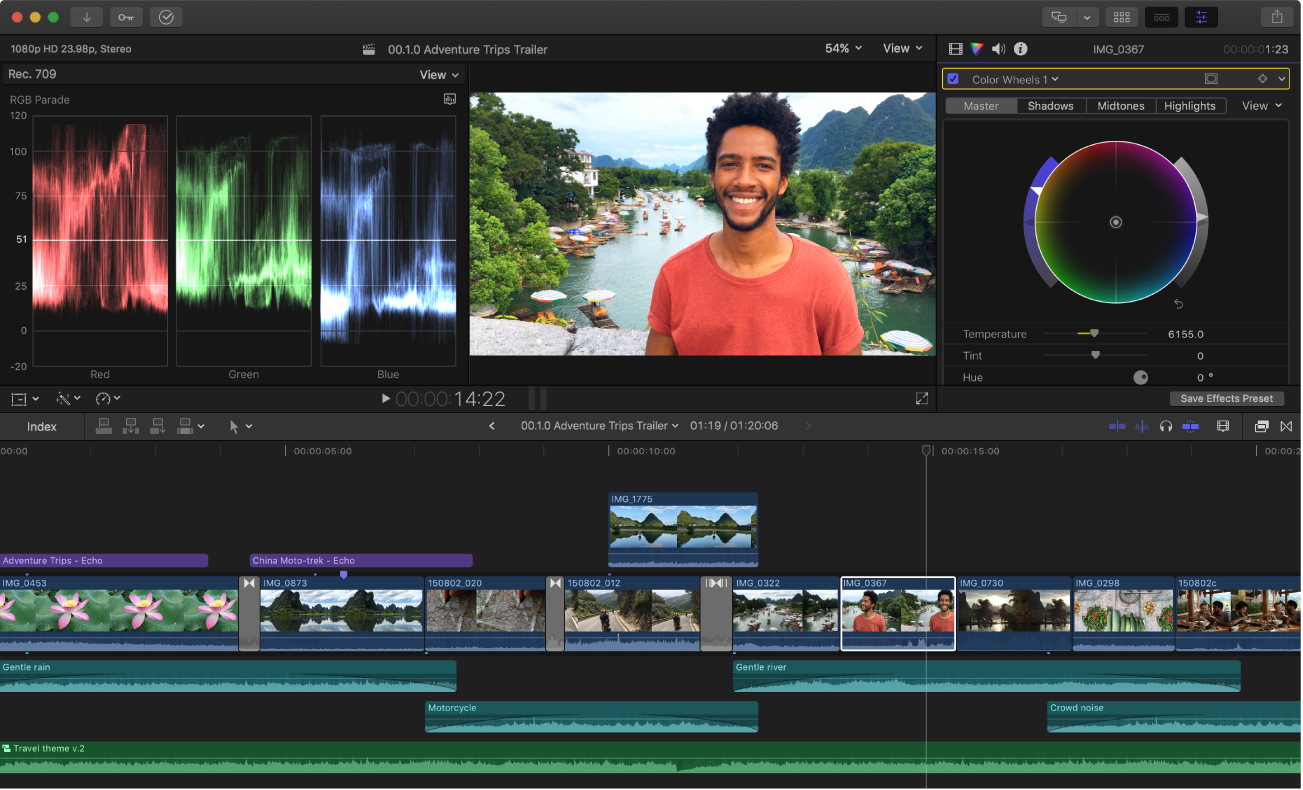
Final Cut Pro color correction tools give you precise control over the look of every clip in your project, including still images, by letting you adjust each clip’s color balance, shadow levels, midtone levels, highlight levels, and more.

In Final Cut Pro, you can:
Automatically balance colors: With one click, neutralize any color casts and maximize image contrast. See Intro to balancing color in Final Cut Pro.
Automatically match a clip’s color and look: With two clicks, make one or more clips match the color look of any clip that you choose. See Match color between clips in Final Cut Pro.
Automatically white-balance a clip: Use an eyedropper to define a white or neutral gray highlight in a clip and instantly remove an unwanted color cast. See Manually white-balance clips in Final Cut Pro.
Manually adjust color, saturation, and exposure: Manually correct a clip’s overall color. You can even add multiple manual color corrections to one clip. See Intro to color correction effects in Final Cut Pro.
Target specific colors or areas: Use color or shape masks to limit a correction to a particular color range or area in the image. See Add a color mask in Final Cut Pro and Add a shape mask in Final Cut Pro.
Save color correction settings and apply them to other clips: Save a clip’s color correction settings and apply them to other clips in the project or in other projects. See Save color correction presets in Final Cut Pro.
Although these methods are independent of one another—you can turn any of the corrections off and on to see their effect—the order in which you use them matters. In general, you should use these tools in the order of Balance Color (including white-balance corrections), Match Color, and (if necessary) manual color correction.
Final Cut Pro also includes several video scopes you can use when manually color correcting your video. The scopes make it possible to precisely monitor the luma and chroma levels of your video clips.