
Apply LUTs in Final Cut Pro for Mac
A lookup table (LUT) is a set of data that enables a numeric transformation of pixel values to change the way an image looks.
A common use of LUTs in video post-production is log conversion. Many modern cameras have a log or wide-dynamic-range recording option that provides more f-stops of exposure latitude in the image. Video footage recorded with this option looks “flat” and gray, but you can apply LUTs to change the appearance of log footage to a standard broadcast specification, such as Rec. 709.
Another common use of LUTs is to stylize video clips with a particular “look.” Beyond just matching some objective model of exposure, you can subtly mix color to enhance the story you’re telling with your project. Color adjustments can alter the audience’s perception of the scene being played, changing a program’s mood.
What are camera LUTs and custom LUT effects?
Final Cut Pro supports two categories of LUTs:
Camera LUTs (also known as camera log conversion LUTs) provide log processing for media from video cameras that have a log recording option. When you import log media, Final Cut Pro detects metadata in the media identifying the log format and automatically applies the appropriate built-in camera LUT, converting the media to the working space of the current library. If the library is set to Wide Gamut HDR, camera LUTs preserve the full dynamic range of the log media. Depending on the source camera, these built-in camera LUTs also take into account metadata such as camera exposure index, ISO setting, and white balance.
Camera LUTs are applied at the media level (across the library) and are applied before any clip effects. In contrast, custom LUT effects (described below) are clip effects that can be applied at any position in the effect order.
You can also import additional camera LUTs (known as custom camera LUTs). Custom camera LUTs can be provided by camera manufacturers or created by your director of photography, digital imaging technician (DIT), or colorist using a third-party color-grading app. You can use custom camera LUTs to correct color in your program or to apply stylized looks. See Example: Use custom camera LUTs in your workflow, below.
Custom LUT effects allow you to easily create, import, or share custom looks for video clips and projects according to your creative needs. Custom LUT effects are clip effects that you apply to timeline clips from the Effects browser. You can also use custom LUT effects to apply tone mapping, allowing for a custom conversion to the project’s output color space.
Manually apply, change, or remove a camera LUT
In some cases, media files may not contain metadata that allows Final Cut Pro to apply the appropriate camera LUT automatically. For example, some cameras don’t embed this metadata, or the metadata may simply be lost if the material is transcoded. You can apply a camera LUT to one or more video clips, or switch to a different camera LUT, using the Info inspector.
Note: Final Cut Pro preserves the full dynamic range of the log media as long as color processing for the library is set to Wide Gamut HDR. If the library is set to either Standard or Wide Gamut (Deprecated) when you apply a camera LUT, the media is tone mapped (downgraded) to the narrower standard dynamic range (SDR). See Intro to wide color gamut and HDR in Final Cut Pro for Mac.
In Final Cut Pro, select one or more video clips recorded with the log option.
If the inspector isn’t already shown, do one of the following:
Choose Window > Show in Workspace > Inspector (or press Command-4).
Click the Inspector button on the right side of the toolbar.

Click the Info button at the top of the inspector.
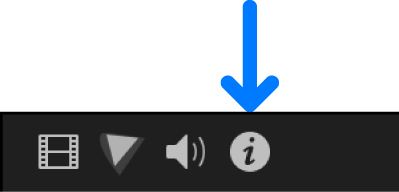
Click the Metadata View pop-up menu in the bottom-left corner of the Info inspector and choose General, Extended, or Settings.

Click the Camera LUT pop-up menu and choose an option for converting the appearance of your footage:
None: Turns off log processing.
Apple Log: Uses Apple’s 3D LUT to convert Apple Log to Rec. 709.
ARRI Log C: Applies ARRI Log C linearization with a default tone mapping.
ARRI Log C (3D LUT): Uses the 3D LUTs embedded in the media to apply a custom look.
ARRI LogC4: Uses ARRI’s ALEXA 35 LogC4 3D LUTs to convert LogC4 to Rec. 709/Rec. 2020.
Blackmagic Design Film: Applies the appropriate linearization and a tone mapping for the Blackmagic Cinema Camera and the Blackmagic Pocket Cinema Camera.
Blackmagic Design Film 4K: Applies the appropriate linearization and a tone mapping for the Blackmagic Production Camera 4K.
Canon Log: Applies the appropriate linearization and Canon’s (1D) viewing LUT for conversion to Rec. 709.
Canon Log 2/Cinema Gamut: Uses Canon’s EOS C300 Mark II 3D LUTs to convert Canon Log 2 with Cinema Gamut to Wide DR gamma.
Canon Log 3/Cinema Gamut: Uses Canon’s EOS C300 Mark II 3D LUTs to convert Canon Log 3 with Cinema Gamut to Wide DR gamma.
DJI D-Log: Uses DJI’s Mavic 3 3D LUT to convert D-Log to Rec. 709.
Fujifilm F-Log: Uses Fujifilm’s X-H2S 3D LUT to convert F-Log to WDR Rec. 709.
Fujifilm F-Log2: Uses Fujifilm’s X-H2S 3D LUT to convert F-Log2 to WDR Rec. 709.
Nikon N-Log: Uses Nikon’s Z 6 3D LUT to convert N-Log to Rec. 709.
Panasonic V-Log: Uses Panasonic’s Varicam 35 3D LUTs to convert V-Log to V-709/V-2020.
Sony S-Log2/S-Gamut: Applies the appropriate linearization and 709(800%) MLUT tone mapping for footage shot with the S-Log2/S-Gamut setting on Sony cameras such as the F5 and F55.
Sony S-Log3/S-Gamut3: Applies the appropriate linearization and 709(800%) MLUT tone mapping for footage shot with the S-Log3/S-Gamut3 setting on Sony cameras such as the F5 and F55.
Sony S-Log3/S-Gamut3.Cine: Applies the appropriate linearization and 709(800%) MLUT tone mapping for footage shot with the S-Log3/S-Gamut3.Cine setting on Sony cameras such as the F5 and F55.
If you’ve imported custom camera LUTs, you can choose one from the Custom Camera section of the pop-up menu.
Final Cut Pro applies the camera LUT you chose, and alters the look of the video clip accordingly. (The camera LUT descriptions above cover conversion to SDR. For conversion to HDR, the camera LUTs apply the appropriate linearization only.) The change is applied to all instances of the clip, in all projects and events in the current library.
Note: Final Cut Pro properly displays Apple ProRes media captured with the ARRI ALEXA camera Log C recording option and imported with Final Cut Pro 10.0.8 or later. If Log C media was imported into an earlier version of Final Cut Pro, Log C processing is disabled by default for that media.
Import a custom camera LUT
Select a video clip in the Final Cut Pro browser or timeline.
In the Info inspector, click the Metadata View pop-up menu in the bottom-left corner and choose General, Extended, or Settings.

Click the Camera LUT pop-up menu and choose Add Custom Camera LUT.
In the window that appears, navigate to the LUT file you want to import, and select it.
You can import 3D LUT files with the filename extensions .cube and .mga. You can select single files, multiple files, or a folder of files.
Click the Output Color Space pop-up menu and choose the target color space that the custom camera LUT converts to.
The target color space is usually indicated in the custom camera LUT name.
Click Open.
The custom camera LUT you imported appears in the Custom Camera section of the Camera LUT pop-up menu. If you imported a folder of LUT files, it appears as a submenu in that section of the pop-up menu.
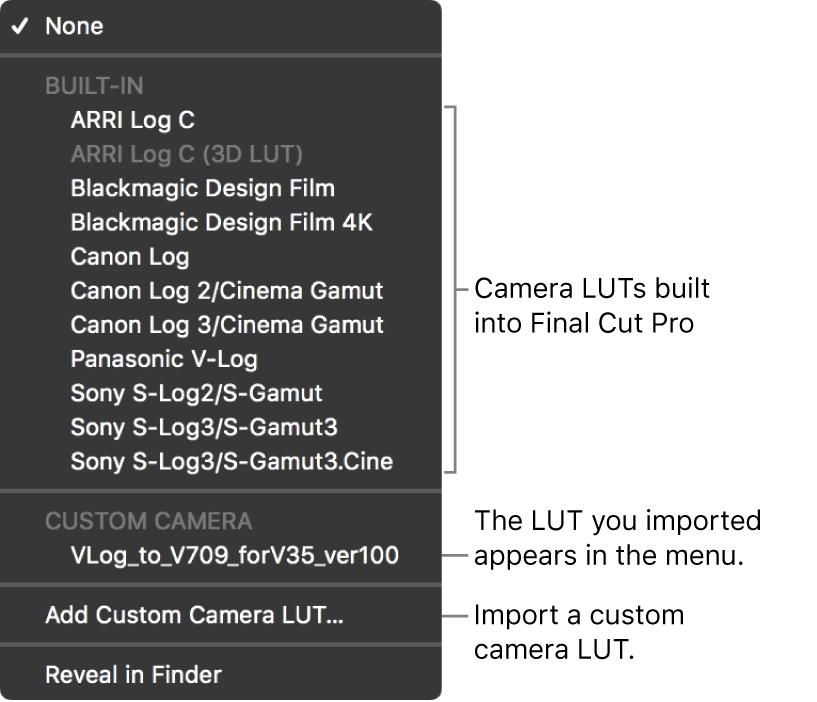
To remove imported custom camera LUTs from the Camera LUT pop-up menu, choose Reveal in Finder to open the Camera LUTs folder, drag the LUT files to the Trash, and reopen Final Cut Pro.
Note: If you imported a custom camera LUT and applied it to a clip, but the LUT file is missing from the Camera LUTs folder, a yellow warning button appears next to the Camera LUT pop-up menu. Click the warning button to reimport the custom camera LUT or to replace it with a different one.
Share a custom camera LUT
You can easily copy imported custom camera LUTs to another computer or share them with others.
Select a video clip in the Final Cut Pro browser or timeline.
In the Info inspector, click the Metadata View pop-up menu in the bottom-left corner and choose General, Extended, or Settings.

To open the Camera LUTs folder in the Finder, click the Camera LUT pop-up menu and choose Reveal in Finder.
The Camera LUTs folder is in the following location:
/Users/username/Library/Application Support/ProApps/Camera LUTs/
In the Finder, select the LUT files you want to share, then choose File > Compress.
Compressing the files prevents any change to custom layouts during transit.
Transfer the resulting ZIP file (with the filename extension .zip) using email or another convenient method.
On the receiving Mac, double-click the ZIP file to decompress it.
To import the LUT file, see Import a custom camera LUT, above.
Note: If you copy a library that uses an imported custom camera LUT, you must copy the custom camera LUT as a separate file. If the LUT file is missing from the Camera LUTs folder, a yellow warning button appears next to the Camera LUT pop-up menu. Click the warning button to reimport the custom camera LUT.
Example: Use custom camera LUTs in your workflow
If implemented correctly, custom camera LUTs offer multiple benefits to productions shooting log footage.
In Final Cut Pro, you can:
Access the full dynamic range of log media.
Stylize footage with custom looks to suit your filmmaking needs.
Play back without rendering. This is essential for directors and DPs to review takes immediately, on the set.
Apply custom camera LUTs directly in the browser. This makes viewing dailies quick and easy. (In contrast, custom LUT effects must be applied to clips in the timeline.)
Below is an outline of how you might use LUTs in your production and post-production workflows.
Before shooting begins, the director of photography (DP) creates a custom camera LUT on the set of a production that is using cameras with a log recording option.
The digital imaging technician (DIT) imports the DP’s custom camera LUT.
As the footage is downloaded from the camera, the DIT selects the relevant shots in the browser and applies the DP’s custom camera LUT.
The director and DP conduct the on-set review with the custom camera LUT applied. Clips are played back directly from the browser.
The organizational capabilities of Final Cut Pro (such as Keyword Collections) make it easy to quickly find the best parts of each “circle take” (a take the director considers noteworthy).
Because camera LUTs are applied nondestructively, the DP can replace the custom camera LUT with an updated one at any time.
The DIT sends out dailies (generating them directly from the browser) with the custom camera LUT applied. See Batch sharing in Final Cut Pro for Mac.
During the editing and finishing phases, editors and colorists may replace the DP’s custom camera LUT—for example, they might augment the LUT by adding one or more color correction effects. See Intro to color correction effects in Final Cut Pro for Mac and Manual color correction workflow in Final Cut Pro for Mac.
If a more stylized look is required (such as Summer, Old Timey, Sci-Fi, and so on), editors or colorists can add custom LUT effects to the same footage. See Import and apply a custom LUT effect, below.
Stylized custom LUT effects are available from a variety of third-party sources.
Import and apply a custom LUT effect
In contrast to camera LUTs, custom LUT effects are applied by adding a clip effect to timeline clips.
Select a clip in the Final Cut Pro timeline.
Open the Effects browser, select the Color category on the left, then double-click Custom LUT to apply the effect to the selected clip.
If the Video inspector isn’t already shown, do one of the following:
Choose Window > Show in Workspace > Inspector (or press Command-4).
Click the Inspector button on the right side of the toolbar.

Click the Video button at the top of the inspector.
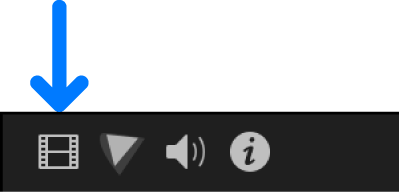
In the Custom LUT section of the Video inspector, click the LUT pop-up menu and choose “Choose Custom LUT.”
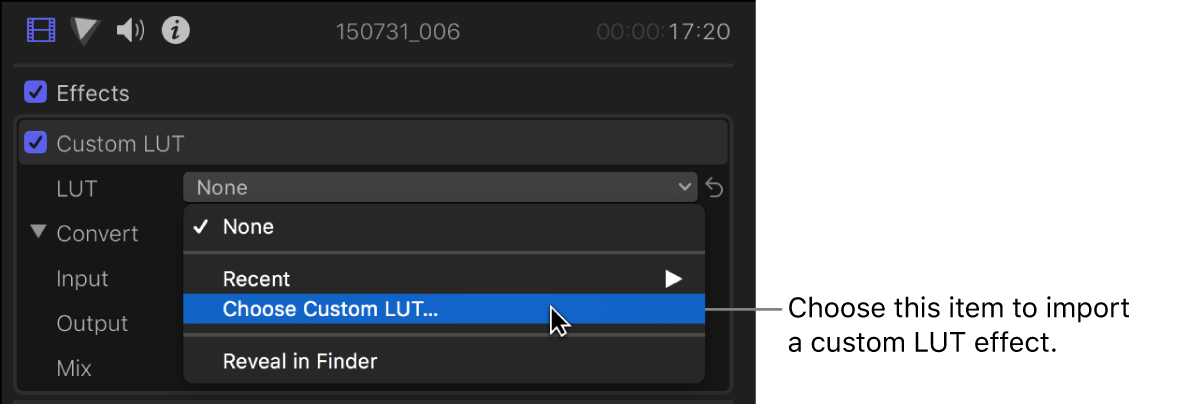
Note: If you previously imported a custom LUT, you can choose Recent and then choose from a list of recently used custom LUT effects.
In the window that appears, navigate to the LUT file you want to import, and select it.
You can import 3D LUT files with the filename extensions .cube and .mga. You can select single files, multiple files, or a folder of files.
Click Open.
The LUT you imported appears as the selected LUT at the top of the Custom LUT section.
If you imported a folder of LUT files, it appears as a submenu in the LUT pop-up menu. (In this case, choose a LUT from the submenu so that it appears as the selected LUT at the top of the Custom LUT section.)
Click the Input pop-up menu and choose the color space the LUT converts from.
This color space was determined when the custom LUT was created.
Note: Camera LUTs and custom LUTs typically include the names of the input (source) color space and intended output (target) color space in the LUT filename. If you’re not sure which color space to choose, see the LUT creator for more information.
Click the Output pop-up menu and choose the color space the LUT converts to.
This color space was determined when the custom LUT was created.
To optionally set the amount of the original image to be blended with the adjusted image, drag the Mix slider.
Final Cut Pro applies the custom LUT and the settings you chose, and alters the look of the video clip accordingly.
Share a custom LUT effect
You can share custom LUTs by copying the LUT files to another Mac.
In the Final Cut Pro timeline, select a clip that has the custom LUT effect applied.
To apply the custom LUT effect, see Import and apply a custom LUT effect, above.
If the Video inspector isn’t already shown, do one of the following:
Choose Window > Show in Workspace > Inspector (or press Command-4).
Click the Inspector button on the right side of the toolbar.

Click the Video button at the top of the inspector.

To open the Custom LUTs folder in the Finder, click the LUT pop-up menu in the Custom LUT section of the inspector and choose Reveal in Finder.
The Custom LUTs folder is in the following location:
/Users/username/Library/Application Support/ProApps/Custom LUTs/
In the Finder, select the LUT files you want to share, then choose File > Compress.
Compressing the files prevents any change to custom layouts during transit.
Transfer the resulting ZIP file (with the filename extension .zip) using email or another convenient method.
On the receiving Mac, double-click the ZIP file to decompress it.
To import the custom LUT effect, see Import and apply a custom LUT effect, above.
To remove imported custom LUTs from the LUT pop-up menu, follow the steps above to open the Custom LUTs folder, drag the LUT files to the Trash, then reopen Final Cut Pro.
Note: If you copy a library that uses a custom LUT effect, you must copy the LUT as a separate file. If the LUT file is missing from the Custom LUTs folder, a yellow warning button appears next to the LUT pop-up menu. Click the warning button to reimport the LUT or replace it with a different LUT.
Download this guide: PDF