Adjust titles in Final Cut Pro for Mac
You can edit title text and change a title’s style, color, and opacity.
You can edit text in the viewer or in the Text inspector, and you can adjust a title’s appearance using the Title and Video inspectors.
Edit title text
In Final Cut Pro, do one of the following:
Select a title clip in the timeline, then move the playhead over the selected title clip.
Double-click a title clip in the timeline.
The title appears in the viewer, and the text in the first text object in the title clip is selected. The playhead moves to the point in the timeline where the first text object is fully visible in the viewer. (For example, to make the animated text you’re editing visible in the viewer, you may need to move the playhead to a different point in the animation.)
Do one of the following:
Double-click a text object in the viewer.
Select the text in the Text inspector.
Edit the text.
To exit text editing, press Command-Return.
Change a title’s color
Double-click a title clip in the Final Cut Pro timeline.
The title appears in the viewer, and the text in the first text object in the title clip is selected.
Note: To modify a different text object in the same title, select it in the viewer.
If the inspector isn’t already shown, do one of the following:
Choose Window > Show in Workspace > Inspector (or press Command-4).
Click the Inspector button on the right side of the toolbar.

Click the Text button at the top of the inspector.

Tip: Double-click the top bar of the inspector to switch between half-height view and full-height view.
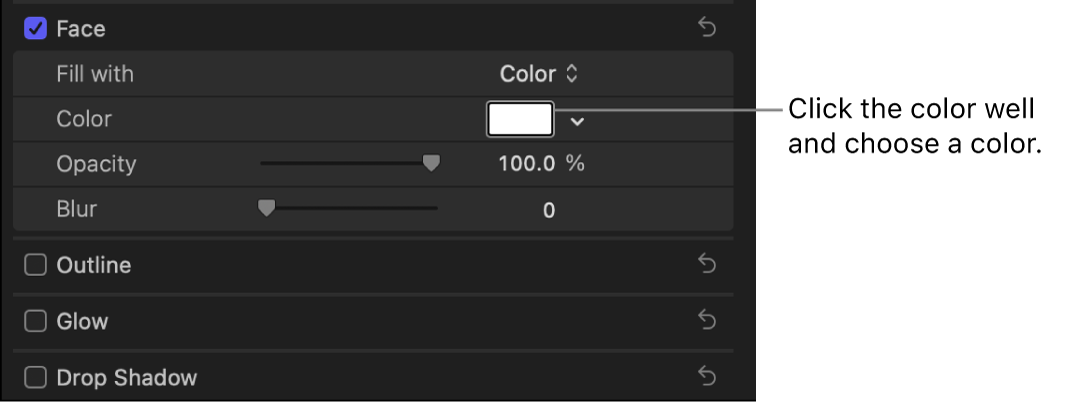
Click the color well in the Face section of the inspector and choose a color.

Note: To add a background color to your title, see Add backgrounds.
Change a title’s text style
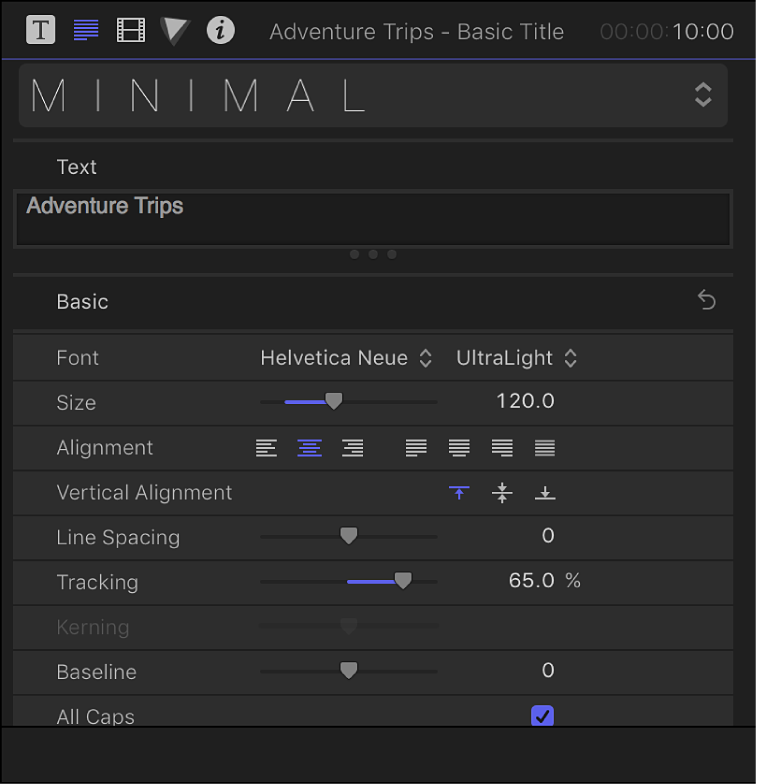
You can change a title’s text style—for example, the text’s font, color, size, and alignment.
Double-click a title clip in the Final Cut Pro timeline.
The title appears in the viewer, and the text in the first text object in the title clip is selected.
Note: To modify a different text object in the same title, select it in the viewer.
If the inspector isn’t already shown, do one of the following:
Choose Window > Show in Workspace > Inspector (or press Command-4).
Click the Inspector button on the right side of the toolbar.

Click the Text button at the top of the inspector.

Tip: Double-click the top bar of the inspector to switch between half-height view and full-height view.
Adjust the available settings as needed.

Note: To reveal the controls in each of the sections, you may need to scroll down in the Text inspector and double-click each section name. For a complete list of available controls, see Text inspector controls.
Basic: Sets the basic text settings such as font, size, alignment, tracking, and line spacing.
3D Text: Sets the depth, depth direction, weight, front edge type, front edge size, back edge type, and inside corner type for 3D text objects. See Intro to 3D titles.
Face: Sets the type of color fill, the fill color, opacity, and blur.
Outline: Sets the type of color fill, the fill color, opacity, blur, and width.
Glow: Sets the type of color fill, the fill color, opacity, blur, and radius.
Drop Shadow: Sets the type of color fill, the fill color, opacity, distance, and angle.
To exit text editing, press Command-Return.
Tip: You can quickly add preset text styles to titles and save text appearance settings for future use. See Apply preset text styles.
Change the custom title settings
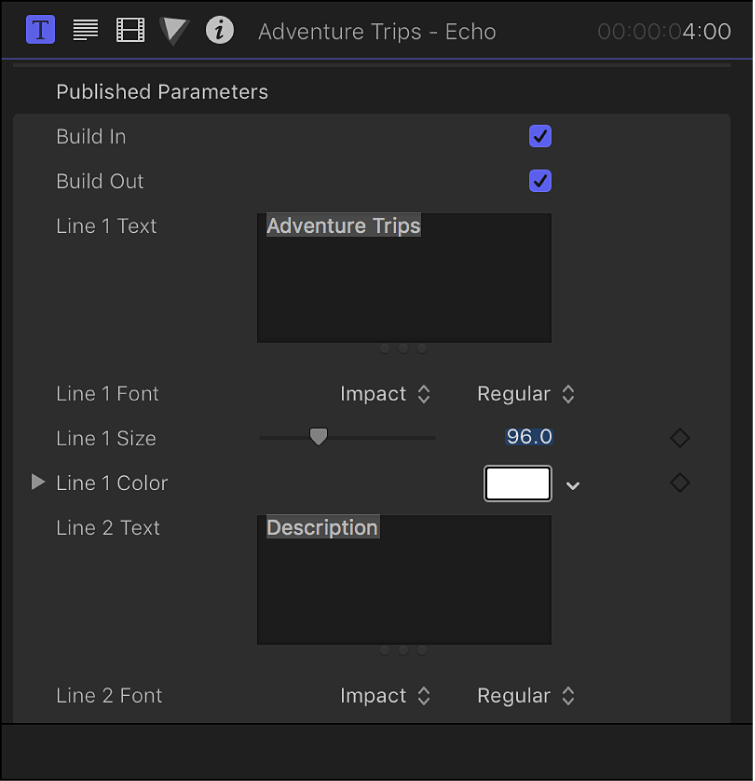
You can modify the title controls and parameters that are unique to a specific title.
Depending on the title, you may be able customize certain features or parameters such as the title’s scale, position, color, or animation timing.
Select a title clip in the Final Cut Pro timeline.
If the inspector isn’t already shown, do one of the following:
Choose Window > Show in Workspace > Inspector (or press Command-4).
Click the Inspector button on the right side of the toolbar.

Click the Title button at the top of the inspector.

Tip: Double-click the top bar of the inspector to switch between half-height view and full-height view.
Adjust the available settings as needed.

You can design, build, and modify titles in Motion for use in Final Cut Pro. When you save a title template in Motion, you can choose which parameters to publish in the Title inspector in Final Cut Pro. See more information about Final Cut Pro templates in the Motion User Guide.
Note: You can also animate some titles by keyframing settings in the Title inspector. For more information about animating effects using keyframes, see Add video effect keyframes.
Change multiple text objects in a title at once
You can adjust the settings (such as the color, font, or size) of more than one text object at once.
Select a title clip in the Final Cut Pro timeline.
Move the playhead over the selected title clip.
In the viewer, do one of the following:
Holding down the Command key, select the text objects you want to modify.
Drag to select the text objects you want to modify.
If the inspector isn’t already shown, do one of the following:
Choose Window > Show in Workspace > Inspector (or press Command-4).
Click the Inspector button on the right side of the toolbar.

In the Text inspector, adjust the available settings as needed.
Change a title’s opacity, blend mode, or HDR brightness
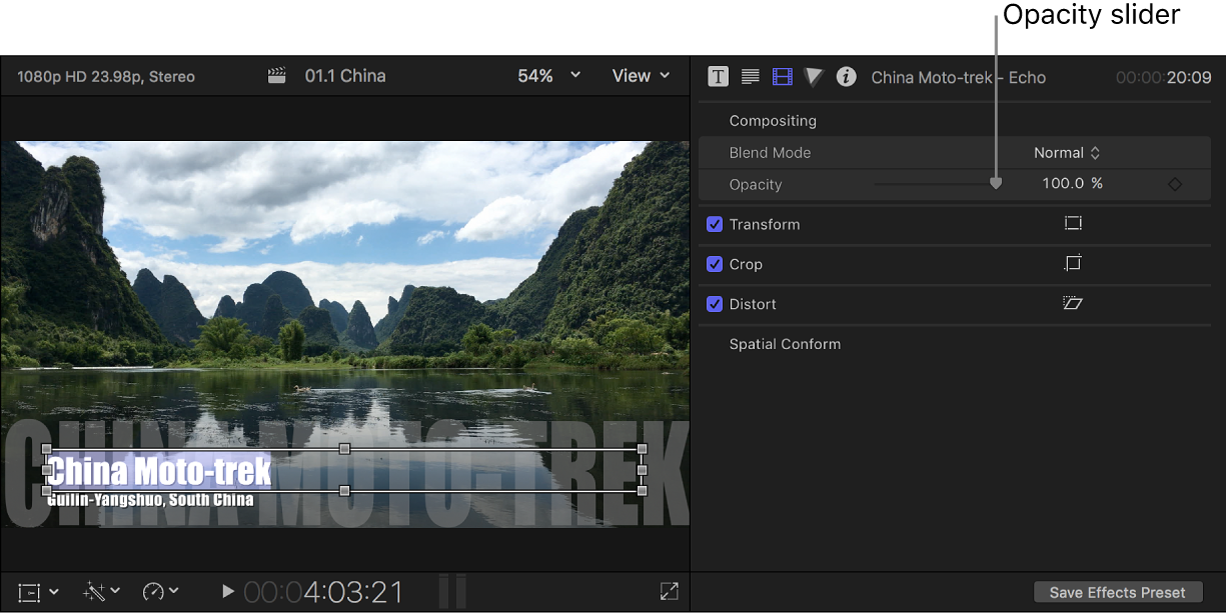
You can change a title’s opacity (to make the title more transparent) or how it blends with the clip beneath it in the timeline.
When you connect a title clip to an HDR video clip in the timeline, the superimposed text (and other title elements) in the viewer may seem dimmer than the video (because they were created in an SDR color space). You can increase the color intensity of title elements to HDR levels by adjusting the Graphics HDR Level slider.
Double-click a title clip in the Final Cut Pro timeline.
If the inspector isn’t already shown, do one of the following:
Choose Window > Show in Workspace > Inspector (or press Command-4).
Click the Inspector button on the right side of the toolbar.

Click the Video button at the top of the inspector.

Tip: Double-click the top bar of the inspector to switch between half-height view and full-height view.
To exit text editing, press Command-Return.
In the Compositing section, do any of the following:
Change the title’s opacity: Drag the Opacity slider or use the value slider.
Note: Some titles allow you to adjust the text opacity separately from the opacity of the rest of the title graphics. See Change a title’s text style.

Note: You can also keyframe a title’s opacity setting.
Change how the title blends with colors in the clip beneath it in the timeline: Click the Blend Mode pop-up menu, then choose an option (Darken or Multiply, for example).
Note: The blend modes in Final Cut Pro for Mac are identical to those in Motion and in Final Cut Pro for iPad. For detailed information about blend modes, see the Motion User Guide.
If the title is in an HDR project, optionally change the title’s HDR intensity by clicking the Title button at the top of the inspector, then dragging the Graphics HDR Level slider.
Download this guide: PDF