Final Cut Pro User Guide
- Welcome
- What’s new
-
- Intro to effects
-
- Intro to transitions
- How transitions are created
- Add transitions and fades
- Quickly add a transition with a keyboard shortcut
- Set the default duration for transitions
- Delete transitions
- Adjust transitions in the timeline
- Adjust transitions in the inspector and viewer
- Merge jump cuts with the Flow transition
- Adjust transitions with multiple images
- Modify transitions in Motion
-
- Add storylines
- Use the precision editor
- Conform frame sizes and rates
- Use XML to transfer projects
- Glossary
- Copyright

Edit multicam clips in Final Cut Pro for Mac
You can switch multicam clip angles directly in the timeline or the Info inspector, without having to open the angle viewer.
Multicam clips generally function just like standard clips in the timeline. You can add video and audio effects, transitions, and markers; attach connected clips; and apply retiming effects. You can apply split edits to multicam clips and edit them in the precision editor. You can nest multicam clips in compound clips and storylines.
However, multicam clips do have some unique characteristics in the Final Cut Pro timeline:
You can display the names of the active video angle and the active audio angle in the multicam clip.
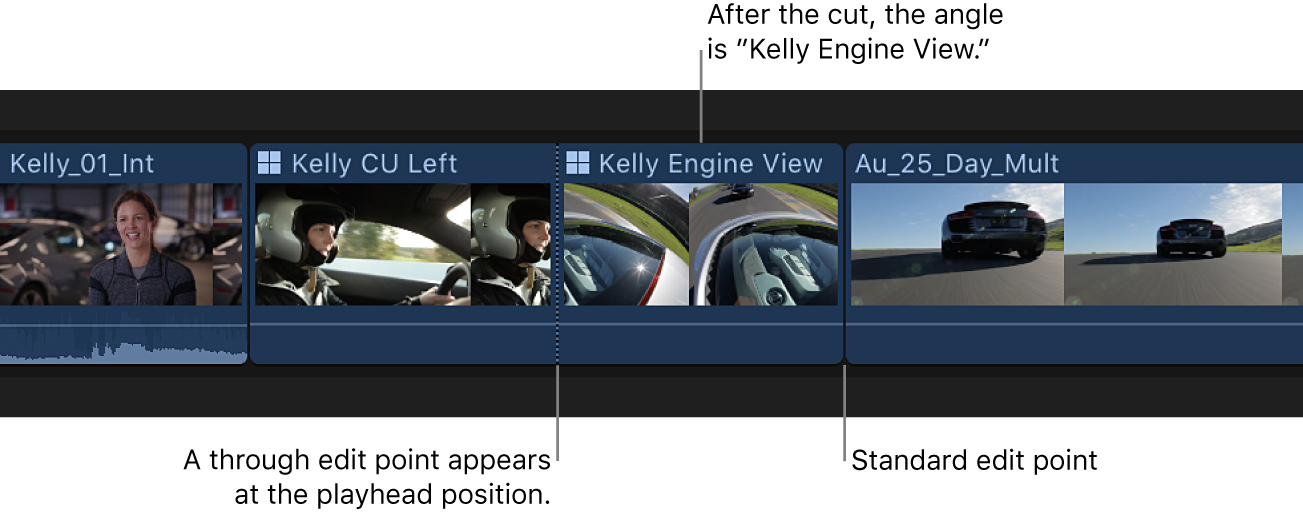
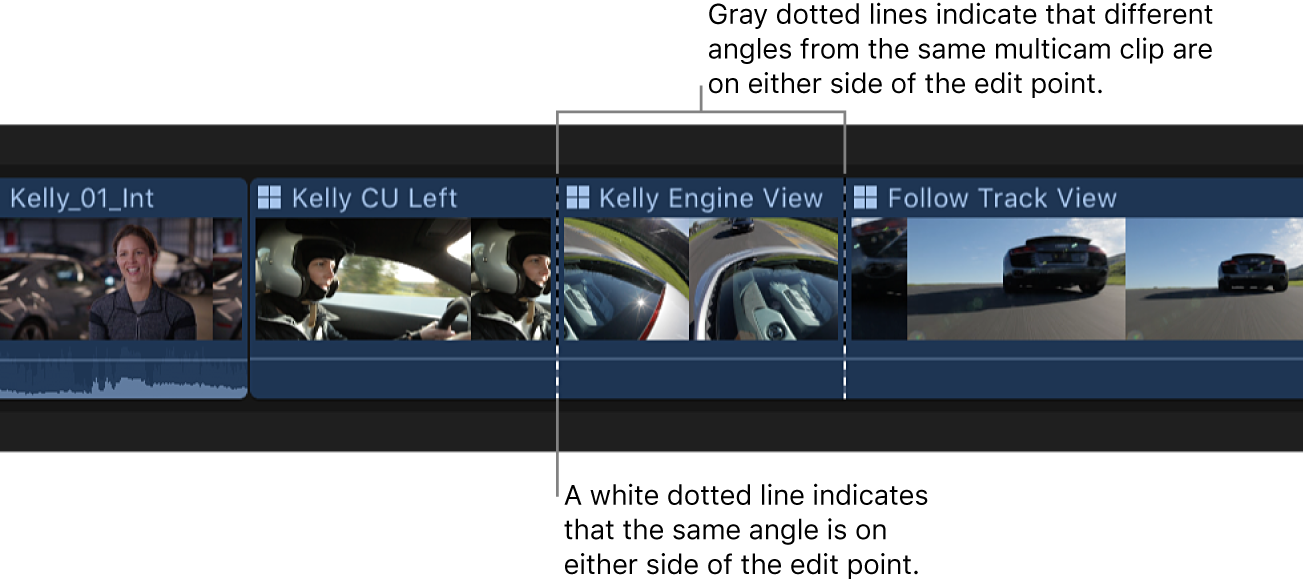
Cut and switch edit points appear as dotted lines. These are through edits (in which the video or audio content on either side of the edit point is continuous). In the case of multicam editing, through edits indicate that the content on either side of the edit point comes from the same multicam clip. A gray dotted line indicates that different angles from the same multicam clip are on either side of the edit point. A white dotted line indicates that the same angle is on either side of the edit point.


In the case of video-only or audio-only cuts and switches, the edit point can be mixed (with both gray and white dotted lines). For example, when you cut and switch video only, you see a gray dotted line for the video and a white dotted line for the audio.

When you move the pointer over a multicam through edit, the pointer changes to the Trim tool, indicating that the edit will be a roll edit (because any other type of edit breaks the relationship between the clips on either side of the cut and switch edit point in the timeline).
Many edits (such as split edits, markers, connected clips, and retiming effects) remain in place on a multicam clip in the timeline even after you switch the angle. However, the following editing operations are associated directly with the specific angle and are not retained when you switch angles:
Video and audio effects
Keyframing (including audio volume and panning)
Role assignments
Switch angles in the timeline
In the Final Cut Pro timeline, Control-click the multicam clip you want to switch.
Do one of the following:
Switch the video angle: Choose Active Video Angle, then choose the angle you want to switch to.

Switch the audio angle: Choose Active Audio Angle, then choose the angle you want to switch to.
The clip switches to the video or audio angle you chose.
Switch angles in the inspector
Switching angles in the inspector allows you to switch angles for multiple selected multicam clips at once.
In Final Cut Pro, select one or more multicam clips that you want to switch.
Open the Info inspector.
In the Info inspector, do one of the following:
Switch the video angle: Click the Active Video Angle pop-up menu, then choose the angle you want to switch to.
Switch the audio angle: Click the Active Audio Angle pop-up menu, then choose the angle you want to switch to.
Display the names of active angles in the timeline
You can display the names of the active video angle and the active audio angle in a multicam clip in the timeline, in the following format: V: video angle name | A: audio angle name.

In Final Cut Pro, click the Clip Appearance button in the top-right corner of the timeline.

Select the Angles checkbox.
Remove multicam through edit points
In Final Cut Pro, do any of the following:
Remove an individual multicam through edit: Select it and press Delete.
Remove multiple through edits at once: Select the edit points (or select the clips on both sides of the through edits), then choose Trim > Join Clips.
Download this guide: Apple Books | PDF