Final Cut Pro User Guide
- Welcome
-
- What’s new in Final Cut Pro 10.5
- What’s new in Final Cut Pro 10.4.9
- What’s new in Final Cut Pro 10.4.7
- What’s new in Final Cut Pro 10.4.6
- What’s new in Final Cut Pro 10.4.4
- What’s new in Final Cut Pro 10.4.1
- What’s new in Final Cut Pro 10.4
- What’s new in Final Cut Pro 10.3
- What’s new in Final Cut Pro 10.2
- What’s new in Final Cut Pro 10.1.2
- What’s new in Final Cut Pro 10.1
- What’s new in Final Cut Pro 10.0.6
- What’s new in Final Cut Pro 10.0.3
- What’s new in Final Cut Pro 10.0.1
-
- Intro to effects
-
- Intro to transitions
- How transitions are created
- Add transitions
- Set the default transition
- Delete transitions
- Adjust transitions in the timeline
- Adjust transitions in the inspector and viewer
- Merge jump cuts with the Flow transition
- Adjust transitions with multiple images
- Modify transitions in Motion
-
- Add storylines
- Use the precision editor
- Conform frame sizes and rates
- Use XML to transfer projects
-
- Glossary
- Copyright

Adjust effect curves in Final Cut Pro
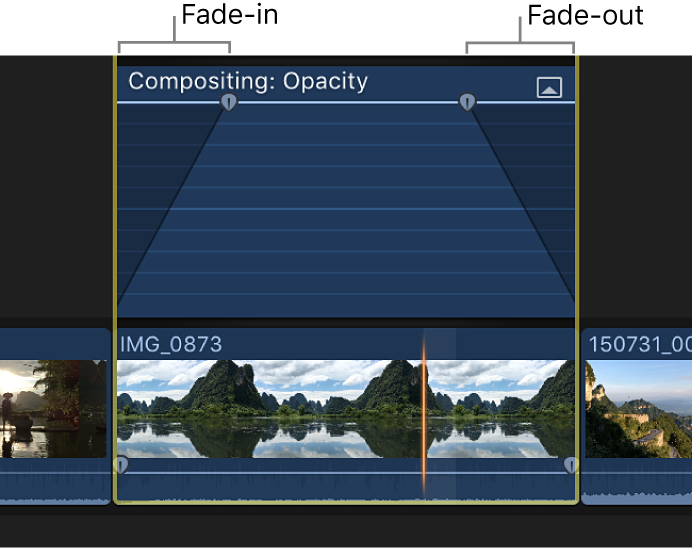
Some effects in the Video Animation editor include fade handles, which allow you to adjust how long it takes for an effect to fade in or out. For example, you can use fade handles to adjust how long it takes for an opacity effect to fade in, how long it takes to fade up from black, or how long it takes to fade to black.
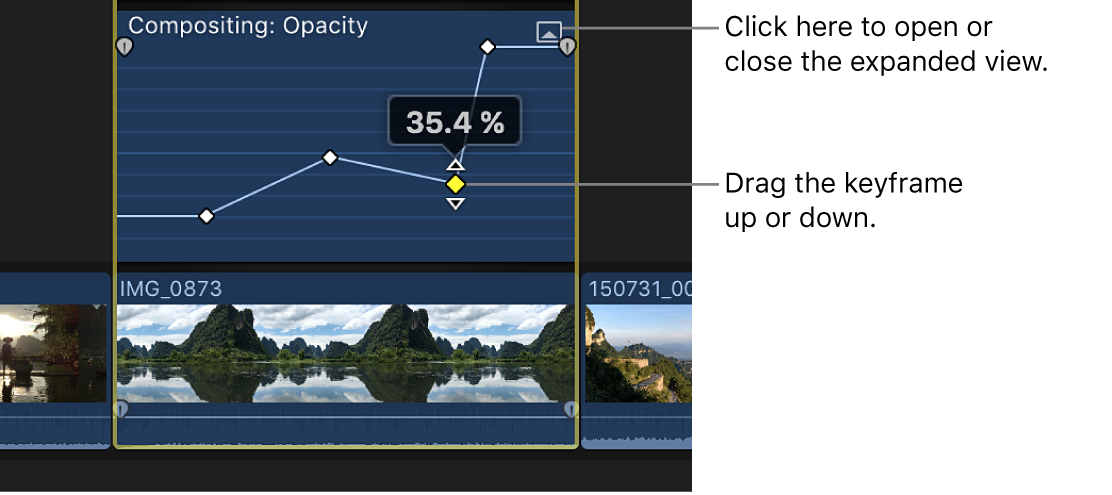
You can also move keyframes up or down to create a curve for the effect parameter and change the curve shape (interpolation) between keyframes.
Creating a fade or an effect curve smooths the transition so that the effect changes appear more natural when the clip plays.
Change an effect using fade handles
In the Final Cut Pro Video Animation editor, click the disclosure button for an effect to expand it.

Note: If an effect doesn’t have a disclosure button, it doesn’t have fade handles.
Drag the fade handle to the point in the clip where you want the fade to begin or end.
Fade handles from the beginning of a clip create a fade-in, and fade handles at the end of a clip create a fade-out.

Change an effect using keyframes
In the Final Cut Pro Video Animation editor, click the disclosure button for an effect to expand it.

Note: If an effect doesn’t have a disclosure button, you can’t move keyframes up or down.
Do any of the following:
Add a keyframe: Option-click (or press Option-K) at a point on the effect control where you want to add the keyframe.
Tip: To add a keyframe and change the effect’s parameter value at the same time, Option-click while dragging the effect control up or down.
Change the effect’s parameter value at a particular keyframe: Select a keyframe and drag it up or down.
Tip: To adjust values with greater precision, hold down the Command key while dragging the keyframe up or down.

Change the curve shape (interpolation) between keyframes
In the Final Cut Pro Video Animation editor, click the disclosure button for an effect to expand it.
Note: If an effect doesn’t have a disclosure button, you can’t move keyframes up or down.
Command-drag the line horizontally between the keyframes to create a curve.
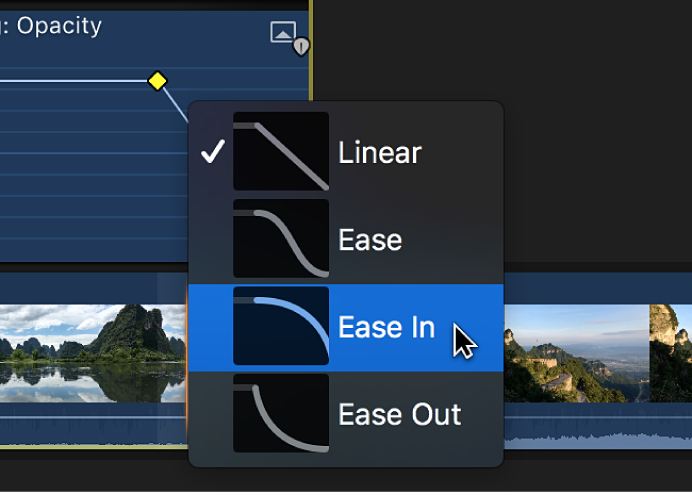
Control-click the line between keyframes and choose a curve option.

Linear: Maintains a constant rate of change over the duration of the fade.
Ease: Eases in and out of the fade with the midpoint set between the beginning and end values.
Ease In: Starts quickly from the beginning value and then moves slowly toward the end value.
Ease Out: Starts slowly from the beginning value and then moves quickly toward the end value.
Note: You can change the curve shape between keyframes for video effects only. For audio volume only, you can change the curve shape for fades created using fade handles, but not keyframes. See Fade audio in and out in Final Cut Pro.