Format columns of text in Pages for iCloud
You can format a document into two or more columns so that text and graphics flow automatically from one column to the next, or you can force text to break to the top of the next column. You can also change the number of columns for only a few paragraphs of your document, for a whole section, or for text in a text box or shape.
Note: If you don’t want the content in columns to flow from one column to the next, add a table to your document with the number of columns you want instead. That way, you can enter text across the page in individual table cells.
Format columns of text
Go to Pages for iCloud
 , then sign in to your Apple Account (if necessary).
In your document, do one of the following:
To format the whole document: Click in any text in the document.
If the document has multiple sections, any changes only apply to the section you click in.
To format specific paragraphs: Select the paragraphs you want to change.
To format text in a text box or shape: Double-click to place the insertion point inside the text box or shape (or select the text box or shape).
In the Format
 sidebar on the right, click the Layout button near the top.
If you select a text box or shape, you first need to click the Text tab at the top of the sidebar before you can click the Layout button.
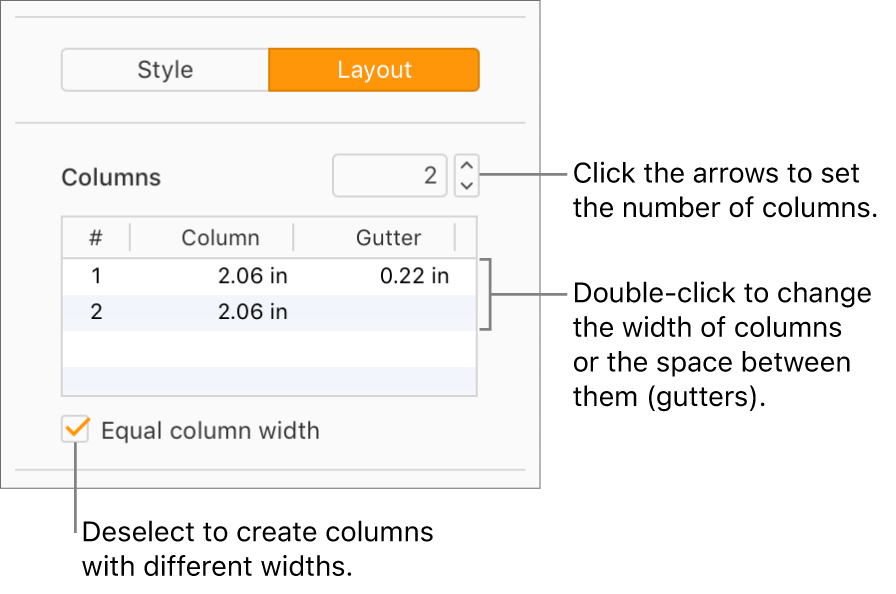
To set the number of columns and their spacings, use the controls in the Columns section:
Set the number of columns: Click the arrows next to the Columns value field.
Set column spacing: Double-click the values in the Column and Gutter columns, then type the width for the column.
Set different column widths: Deselect the checkbox next to “Equal column width.”

If the text is in a text box or shape and you want to change the amount of white space between the text and the edge of the text box or shape, click the arrows next to Text Inset.
To change the indentation of the first line or the left or right margin, click the First, Left, or Right arrow below Indents.
Force text to the top of the next column
Go to Pages for iCloud
 , then sign in to your Apple Account (if necessary).
In any multicolumn text field in your document, click where you want the previous column to end.
Click
 in the toolbar, then choose Column Break.