
Record voiceovers in Final Cut Pro
You can record voiceover narration or other live audio directly in Final Cut Pro from input sources such as built-in and external microphones.
By default, Final Cut Pro includes an automatic countdown when you record, and also automatically groups multiple takes into auditions so that you can quickly preview recordings and choose the best one. The recorded audio files appear both in the browser and as connected clips in the timeline.
Record live audio
In Final Cut Pro, position the playhead where you want to start recording in the timeline.
Choose Window > Record Voiceover.
Tip: To start recording immediately without adjusting settings, press Option-Shift-A and go to step 7.
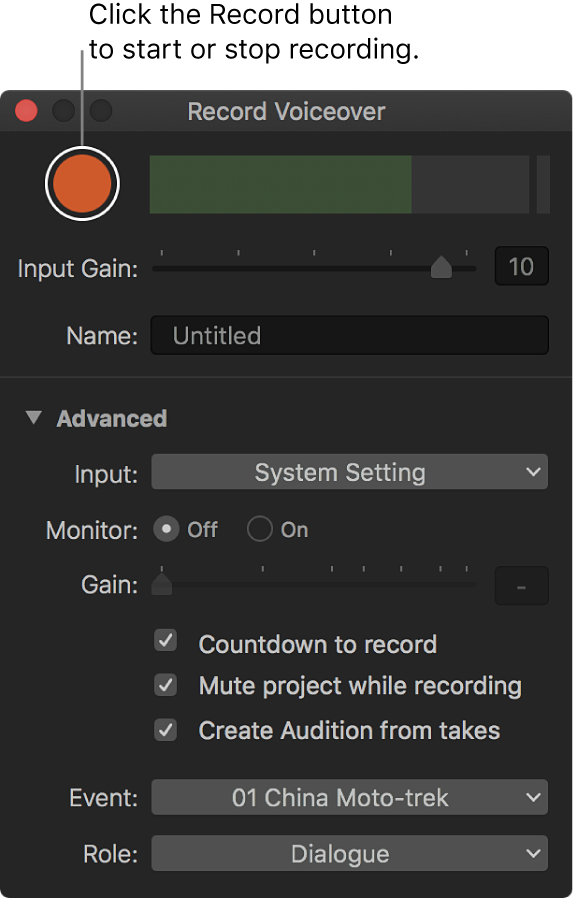
To adjust the input level of the microphone, do one of the following:
Drag the Input Gain slider right to increase the input level, or left to decrease it.
Type a dB value in the Input Gain field.
Use the audio meters to make sure the volume doesn’t exceed peak levels (shown in red), which may result in audible distortion.
Note: If the Input Gain slider is dimmed for a selected input device, try adjusting the gain on the device itself or its software utility (if available).
To name your voiceover clip, click the Name field and type a name.
To specify other voiceover settings, click the Advanced disclosure triangle and do any of the following:
Change the input device or the number of input channels (mono or stereo): Click the Input pop-up menu and choose an option. The default choice of System Setting uses the first channel of the input device currently selected in the Sound pane of System Preferences.
Tip: If you always want to record with a particular device or a particular channel on a multichannel audio device, choose that device/channel pair from the Input pop-up menu instead of System Setting. The setting is retained, and the Input pop-up menu indicates whether the device is available.
Listen to your microphone input as you record: Set Monitor to On. The microphone audio plays from the output device currently selected in the Sound pane of System Preferences. There’s no input signal when monitoring is off.
Tip: To listen to a live mix of both microphone and project audio, set Monitor to On and deselect the “Mute project while recording” checkbox below.
Adjust the monitoring level: Drag the Gain slider right to increase the monitoring level, or left to decrease it (or type a dB value in the Gain field).
Note: If the built-in microphone is selected, the Gain slider automatically resets to zero to prevent feedback from the built-in speakers when monitoring is turned on. To avoid feedback, use headphones or external speakers placed away from the microphone.
Turn off the automatic countdown before recording: Deselect the “Countdown to record” checkbox.
Unmute project audio while recording: Deselect the “Mute project while recording” checkbox.
Turn off automatic grouping of multiple voiceover takes into auditions: Deselect the “Create Audition from takes” checkbox.
Change where the recording is saved: Click the Event pop-up menu and choose an event in the current library.
Assign a role to the recording: Click the Role pop-up menu and choose a role. To create a new role, choose Edit Roles. See Intro to roles in Final Cut Pro.
To start recording, click the Record button (or press Option-Shift-A).
To stop recording, click the Record button (or press the Space bar or Option-Shift-A).
When you stop recording, the playhead returns to the start point you set in step 1, ready for you to record additional takes. If you record additional takes with the “Create Audition from takes” checkbox selected, Final Cut Pro creates an audition. See Combine audio from multiple takes and Create auditions in Final Cut Pro.
Your audio recordings are attached to the primary storyline at the playhead position.
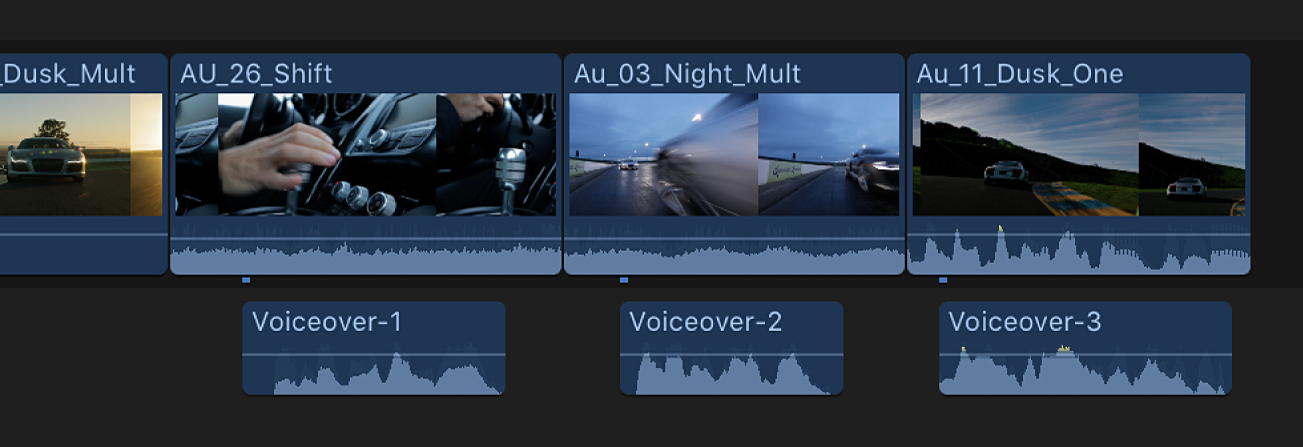
Record multiple voiceover takes
You can record multiple versions, or “takes,” of voiceover recordings for the same section of your project. By default, Final Cut Pro creates an audition from all the takes you record. After you’ve finished recording, you can review the different takes in the audition and choose the one you want to use.
To record your first voiceover take in Final Cut Pro, follow the instructions in Record live audio, above.
Without moving the playhead, click the Record button (or press Option-Shift-A) to record another take for the same section of your project.
To stop recording, click the Record button again (or press the Space bar or Option-Shift-A).
By default, Final Cut Pro creates an audition containing both recordings.
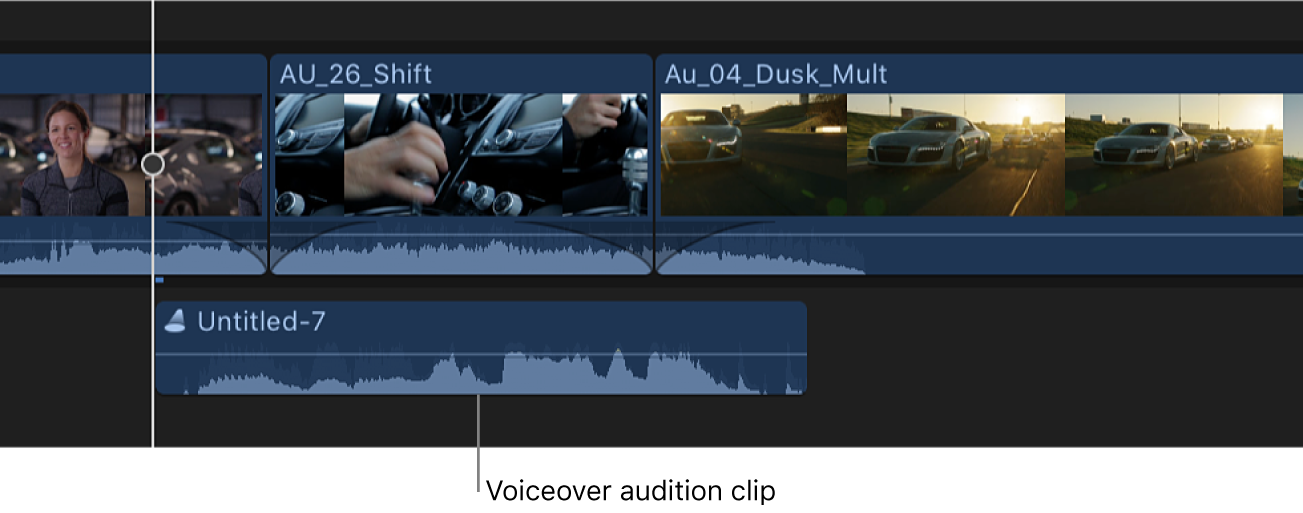
To add another take to the audition, repeat steps 2 and 3. Each new take you record is added to the audition.
To learn more about auditions, see Add clips to auditions in Final Cut Pro.
Preview and select a voiceover take
In the Final Cut Pro timeline, select the audition containing the voiceover takes you want to review, then open it by choosing Clip > Audition > Open (or pressing Y).
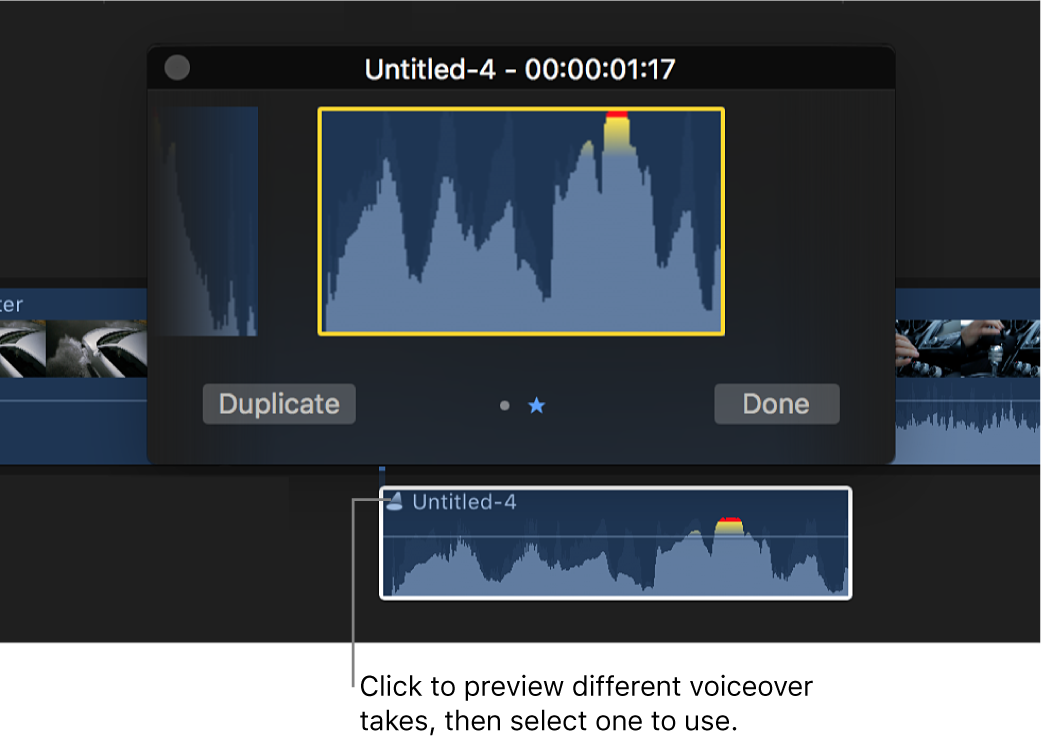
In the audition window, select the take and press the Space bar (or press Control-Command-Y) to play it.
When you decide on the take you want to use, make sure it’s selected, then click Done.
If you’re sure of your decision and want to finalize the audition, choose Clip > Audition > Finalize Audition (or press Option-Shift-Y).
The audition is dissolved, leaving the voiceover clip in the timeline.
To learn more about previewing auditions, see Review clips in auditions in Final Cut Pro.
Combine audio from multiple takes
By default, an audition lets you choose only one voiceover take to use in your project. If you want to combine portions of two separate takes into one “comp” take, you can break the audition into separate audio clips, which you can then edit and combine as needed.
In Final Cut Pro, select an audition in the timeline, then choose Clip > Break Apart Clip Items (or press Shift-Command-G).
Final Cut Pro replaces the audition selected in the timeline with the individual recordings that made up the audition.
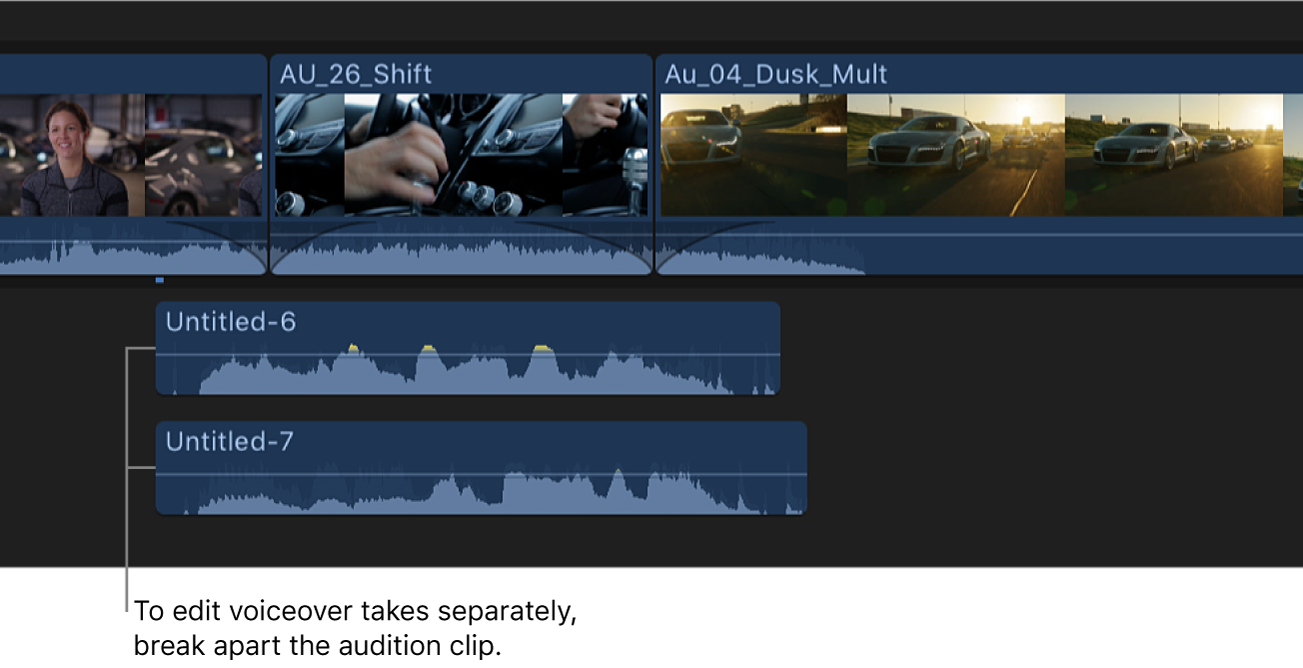
Edit the clips as needed.
Tip: You can silence unwanted sections rather than edit them out. See Adjust volume automatically across a selected area.