Final Cut Pro Logic Effects
- Welcome
-
- Intro to echo effects
-
- Intro to Delay Designer
- Delay Designer interface
- Main display controls
- View buttons
- Navigate the Tap display
- Create taps
- Select taps
- Move and delete taps
- Use the tap toggle buttons
- Edit taps in the Tap display
- Align tap values
- Edit filter cutoff
- Edit pan
- Tap parameter bar
- Tap shortcut menu
- Reset tap values
- Master section controls
- Use Delay Designer in surround
- Modulation Delay
- Stereo Delay
- Tape Delay
- Copyright
Chorus controls in Final Cut Pro for Mac
The Chorus effect delays the original signal, and the delay time is modulated with a low-frequency oscillator (LFO). The delayed, modulated signal is then mixed with the original, dry signal.
You can use the Chorus effect to enrich the incoming signal and create the impression that multiple instruments or voices are being played in unison. The slight delay time variations generated by the LFO simulate the subtle pitch and timing differences heard when several musicians or vocalists perform together. Using Chorus also adds fullness or richness to the signal, and it can add movement to low or sustained sounds.
To add the Chorus effect to a clip and show the effect’s controls, see Add Logic effects to clips in Final Cut Pro for Mac.

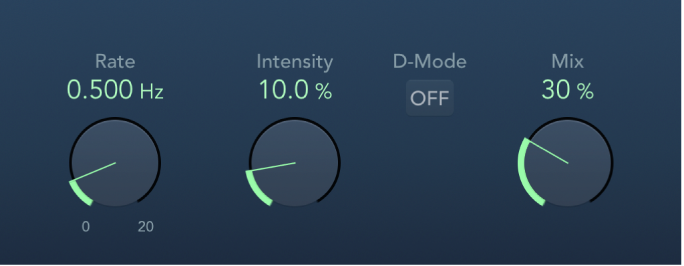
Rate knob and field: Set the frequency, or speed, of the LFO.
Intensity knob and field: Set the modulation amount.
D-Mode button: Turn on to introduce a spatial filtering effect that resembles a well-known vintage processor.
Mix knob and field: Determine the balance between dry and wet signals.
Download this guide: PDF