Final Cut Pro User Guide for Mac
- Welcome
- What’s new
-
- Intro to effects
-
- Intro to transitions
- How transitions are created
- Add transitions and fades
- Quickly add a transition with a keyboard shortcut
- Set the default duration for transitions
- Delete transitions
- Adjust transitions in the timeline
- Adjust transitions in the inspector and viewer
- Merge jump cuts with the Flow transition
- Adjust transitions with multiple images
- Modify transitions in Motion
-
- Add storylines
- Use the precision editor
- Conform frame sizes and rates
- Use XML to transfer projects
- Glossary
- Copyright

Save modified 3D text materials in Final Cut Pro for Mac
After you create your own materials, you can save those textures as custom presets. Saving a modified material as a custom preset includes all material layers shown in the Text inspector at the time of saving (including disabled material layers).
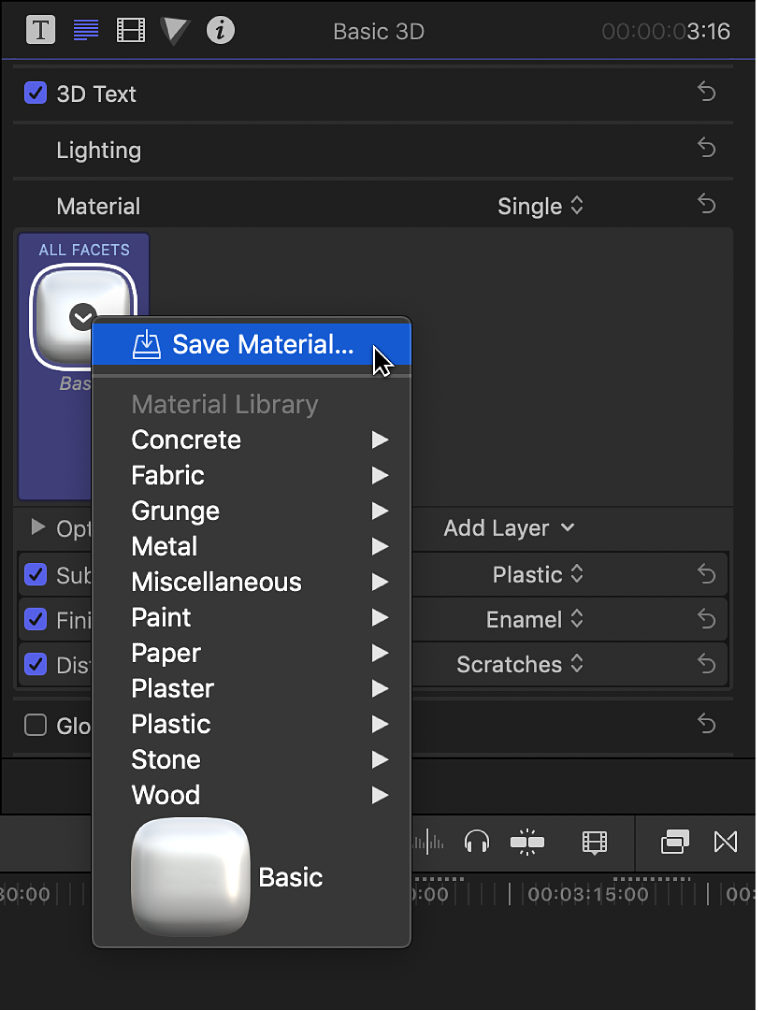
In the Material section of the 3D Text section of the Final Cut Pro Text inspector, click the preview thumbnail and choose Save Material from the pop-up menu.

In the Save Preset window, type a descriptive name for the preset, then click Save.
The currently selected material is saved as a preset. Saved preset materials appear in alphabetical order at the bottom of the material presets pop-up menu. You can apply the preset as you would any other material preset.
Note: You can organize saved custom preset materials using Motion, an Apple app designed to work with Final Cut Pro. See the information about organizing saved custom preset materials in the Motion User Guide.
Download this guide: PDF