Final Cut Pro User Guide for Mac
- Welcome
- What’s new
-
- Intro to effects
-
- Intro to transitions
- How transitions are created
- Add transitions and fades
- Quickly add a transition with a keyboard shortcut
- Set the default duration for transitions
- Delete transitions
- Adjust transitions in the timeline
- Adjust transitions in the inspector and viewer
- Merge jump cuts with the Flow transition
- Adjust transitions with multiple images
- Modify transitions in Motion
-
- Add storylines
- Use the precision editor
- Conform frame sizes and rates
- Use XML to transfer projects
- Glossary
- Copyright

Color correct ProRes RAW video directly without LUTs in Final Cut Pro for Mac
You can color correct ProRes RAW video as HDR video, regardless of the library color-processing setting. To do this, you turn off the RAW-to-log conversion and camera LUT settings automatically applied by Final Cut Pro. (For more information about these settings, see Use built-in camera LUTs to color correct ProRes RAW video in Final Cut Pro for Mac.)
In Final Cut Pro, select one or more video clips recorded with ProRes RAW.
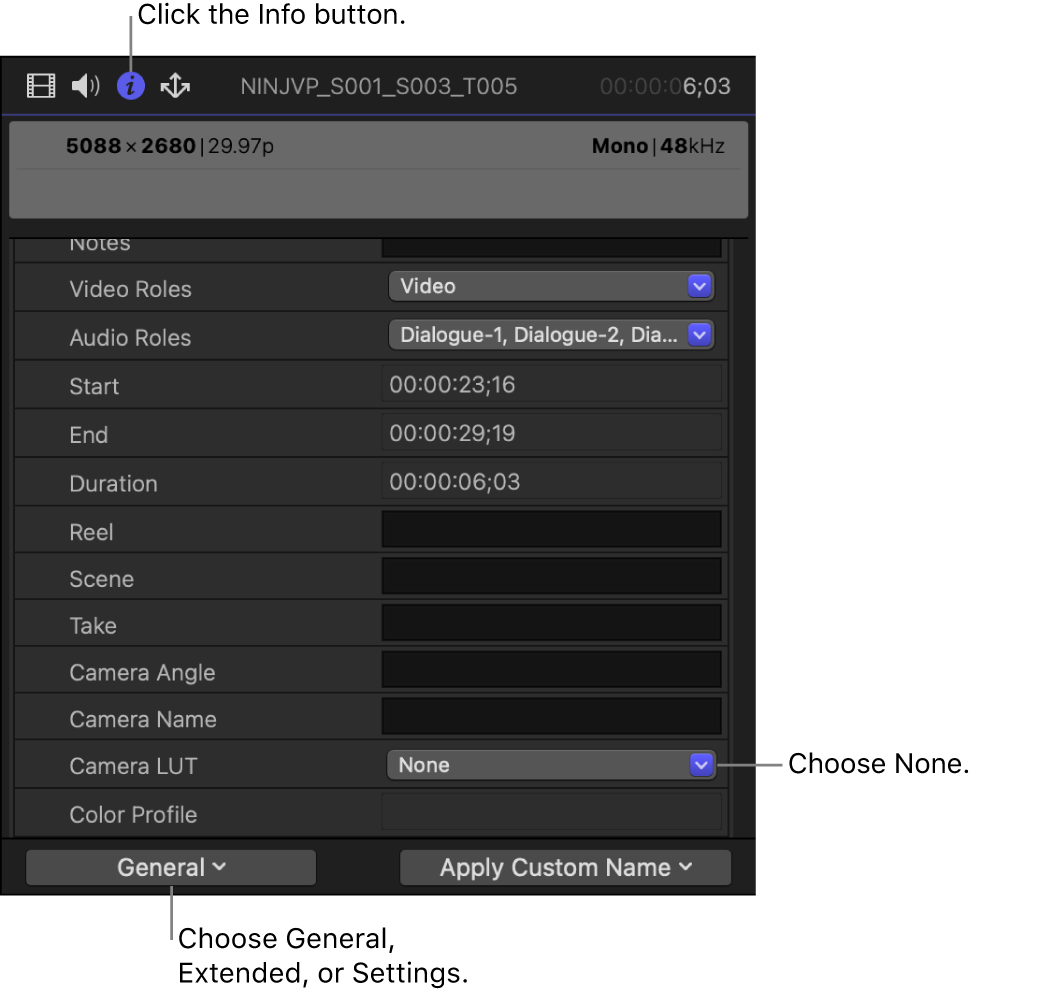
If the Info inspector isn’t already shown, choose Window > Show in Workspace > Inspector, then click the Info button at the top.

Click the Metadata View pop-up menu in the bottom-left corner, then choose either General, Extended, or Settings.
Click the Camera LUT pop-up menu and choose None.
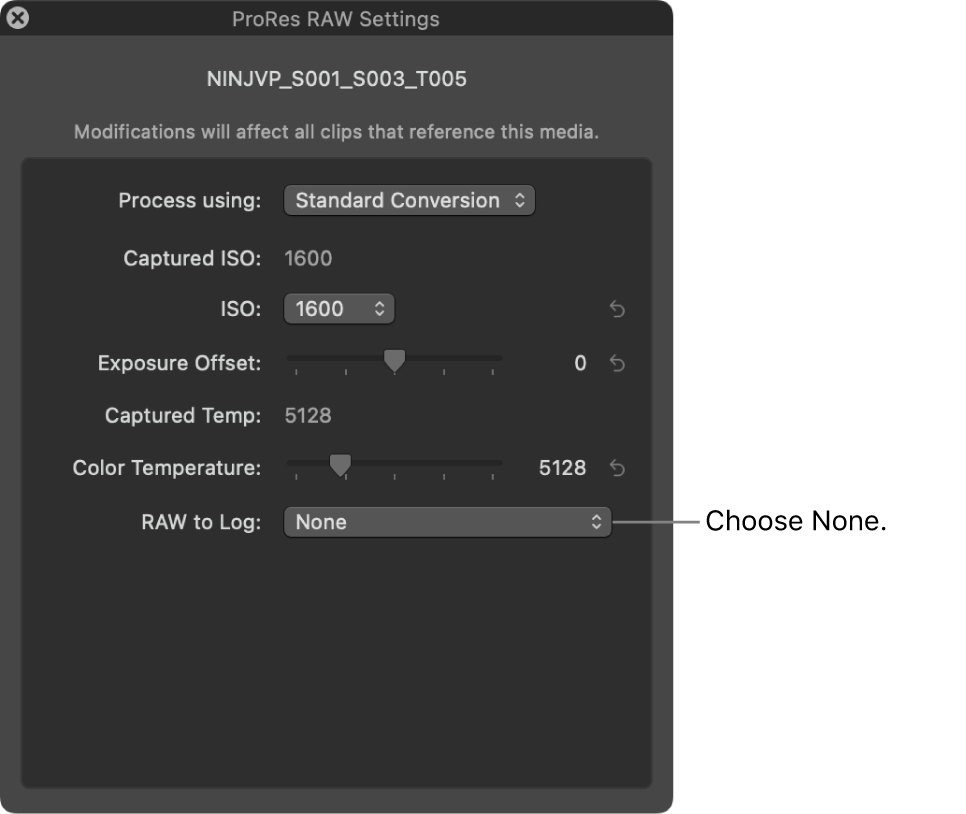
At the bottom of the inspector, click Modify ProRes RAW Settings.
In the ProRes RAW Settings window, click the RAW to Log pop-up menu and choose None.

For more information, see Adjust ProRes RAW camera settings in Final Cut Pro for Mac.
No tone mapping is applied to the source, and the full dynamic range is available in the working space, even in libraries set to Standard color processing. Although highlights may initially appear blown out, you can correct this using color correction tools, such as Color Wheels, Color Curves, and Color Adjustments.
Download this guide: PDF